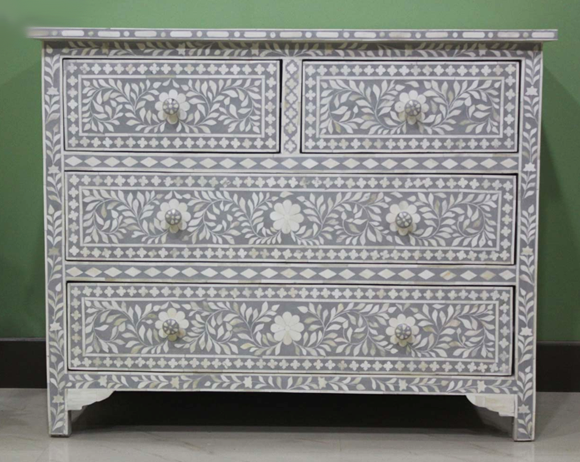
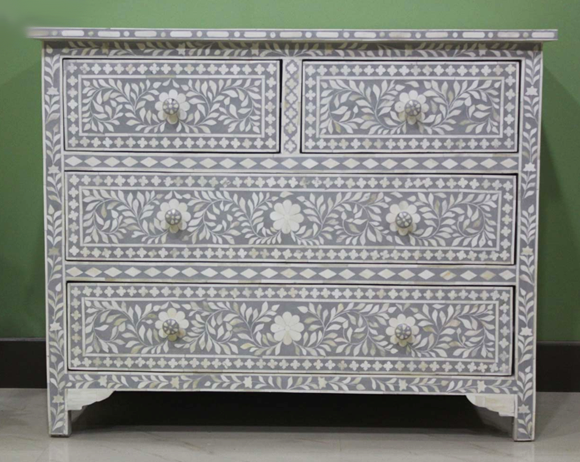
I love mother of pearl inlay furniture. The layer of texture it gives to a room is so COOL, but is it really worth the price tag? Larger pieces are several thousand dollars (sometimes more than $10,000 for repros!)
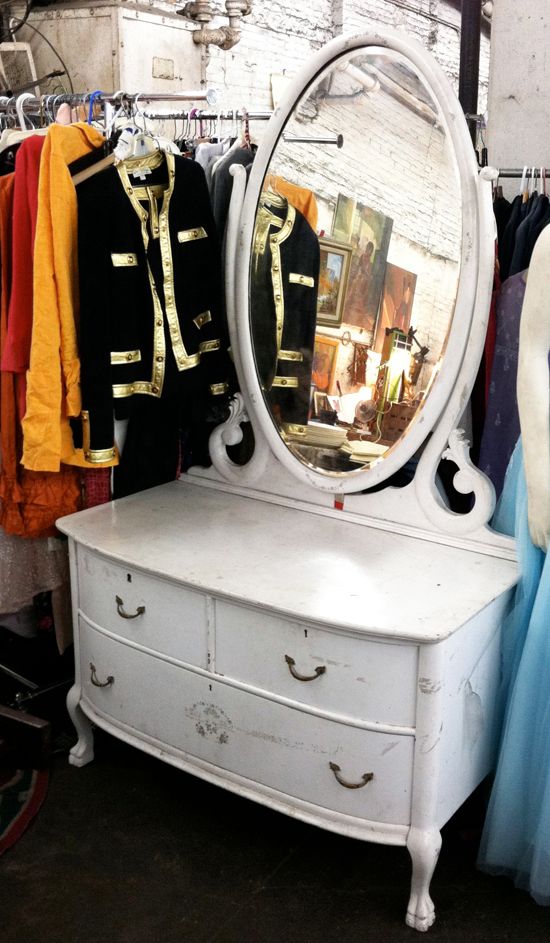
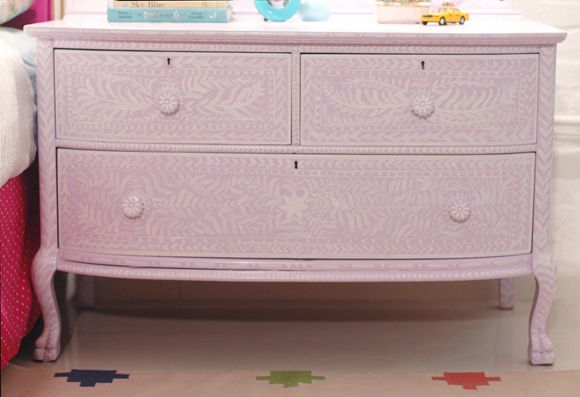
I bought this dresser at the flea market last fall for my girls bedroom. It fit perfectly between their twin beds and made a great joint nightstand. I thought the size and shape made this piece a great candidate for an inlay DIY. I was super excited when Sherwin-Williams invited me to join a group of talented bloggers to spread the word about National Painting Week. Each of us was assigned a color and I was thrilled to get purple.
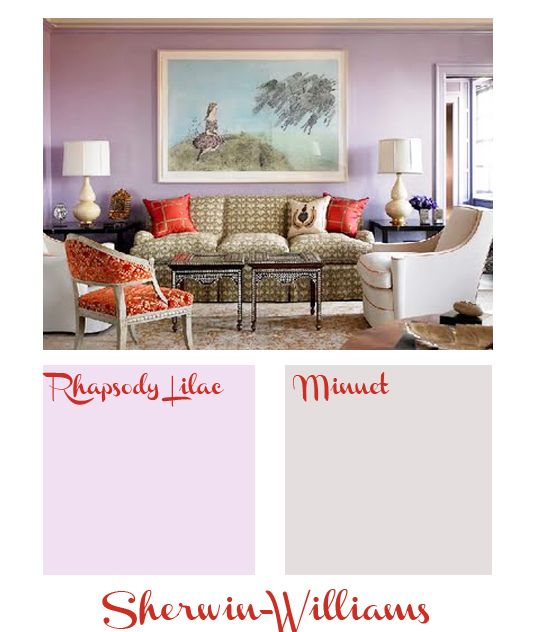
Inspired by the lilac wall color in this amazing Katie Ridder room, I chose Rhapsody Lilac for the main color of the dresser and Minuet for the highlights/faux inlay.
I used Sherwin-Williams waterborne interior alkyd enamel in both shades. It wears as well as full on oil-based paint, but cleans up like latex paint. It’s low VOC and there is hardly any smell, (though you’ll still want to keep your windows open or do the painting outside). It really is a great paint. It’s made for trim and doors, but the hard-wearing formula is awesome for furniture as well.
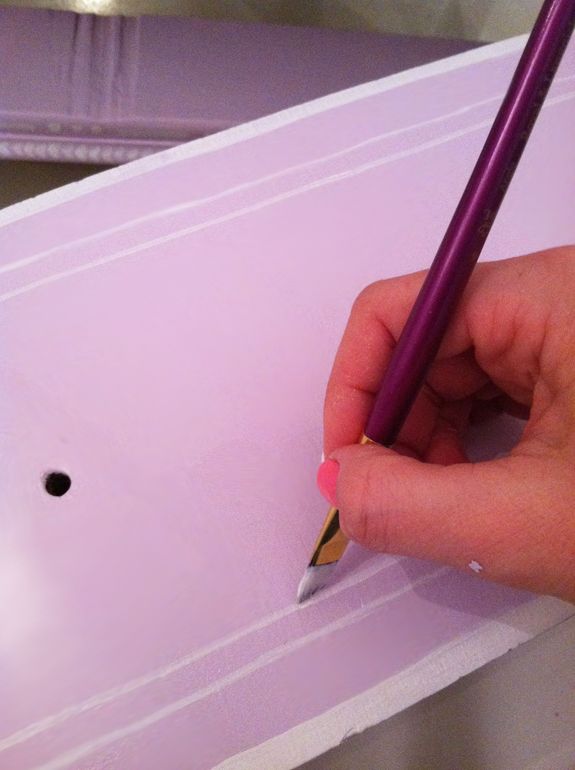
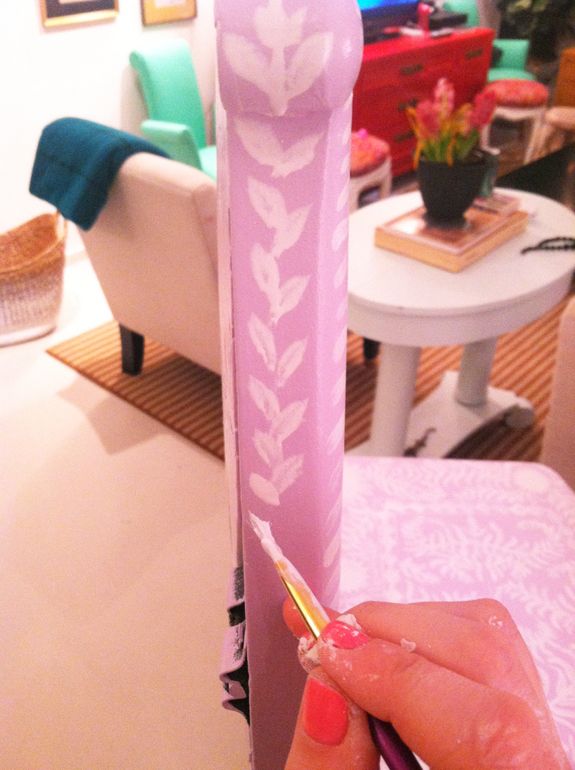
I lightly sanded the dresser and gave it two coats of Rhapsody Lilac in semi-gloss with a foam mini-roller. Once the base coats were fully dried, I took a glance at some inspiration inlay pieces online and just started doodling with an artists brush. I tried a couple different brushes and quickly discovered you only need one for this project – a 1/4″ wide angled artist’s brush.
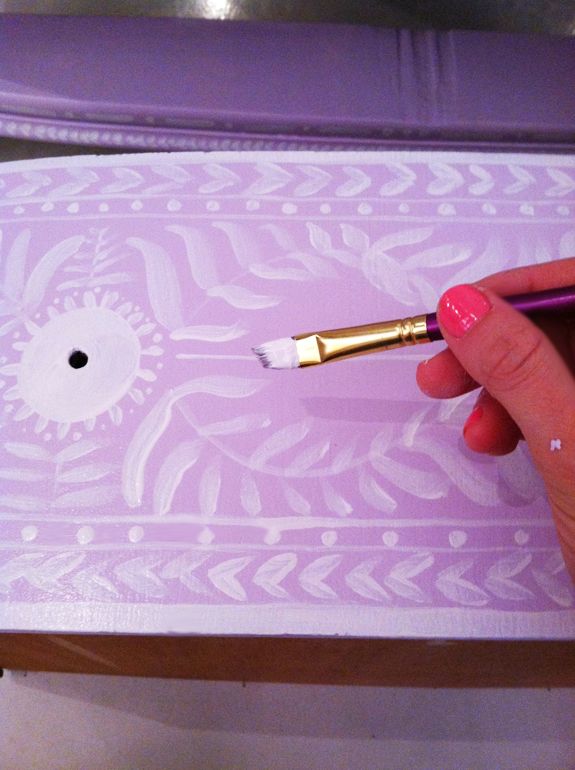
You can see on most of the real inlay pieces that the patterns are simple – a couple of circular stylized flowers with vines and simple leaves, all inside a border.
It feels like an intimidating project, but I found that the more relaxed you are, the better and more authentic the result is. I was over-thinking the design on the top of the dresser and that’s my least favorite section now. Also, don’t go over the leaves twice. The real bone or mother of pearl inlay pieces have a lot of color variation, so you don’t want solid white design here either. The real inlay patterns are often not exact and are even a little crooked. Don’t worry about perfection here. No painters tape needed!
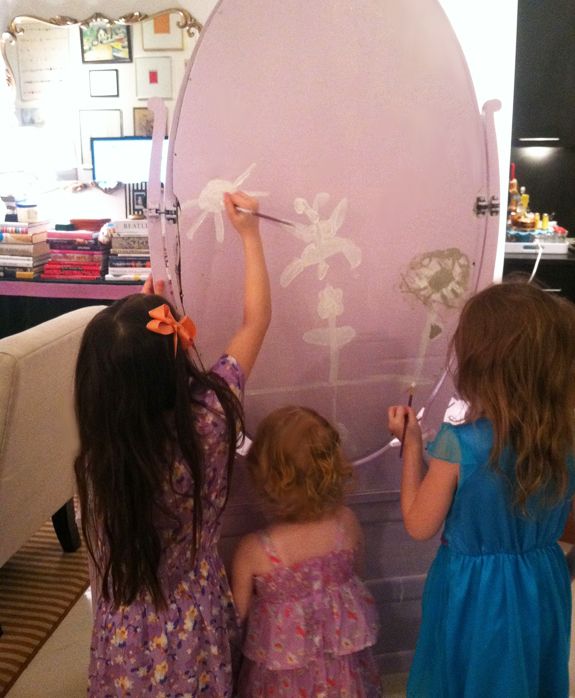
Here’s a little 10 second video to give you the sense of the speed of the project. It takes a couple hours probably to cover every surface with the doodling, but it feels like quick, light work.
Can you hear my kids chattering in the background? This was happening on the other side of dresser :)
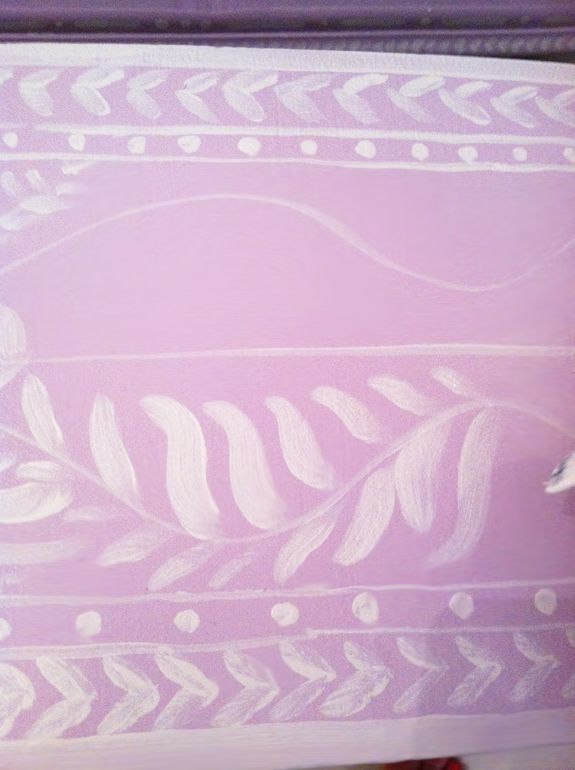
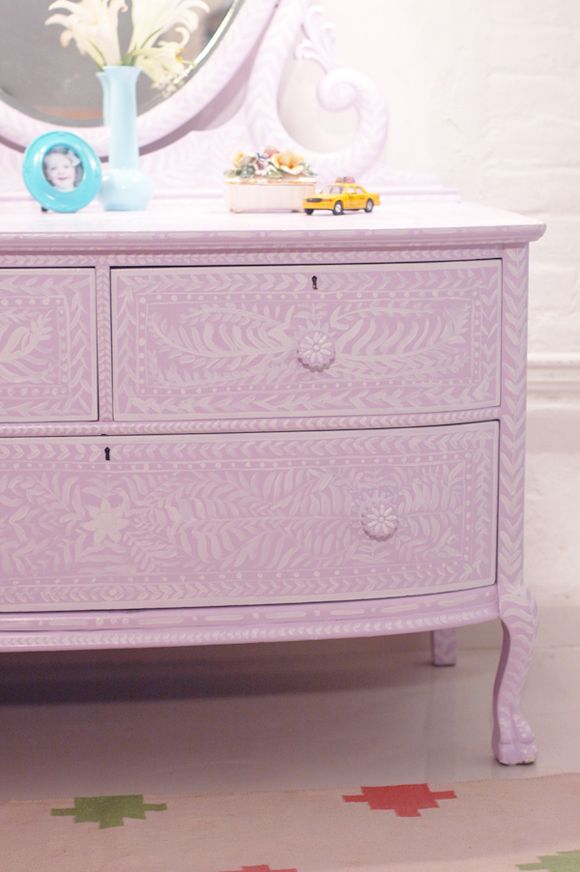
Once all the big surface designs were done, I went back and added small leaf patterns to all the edges and sides. This was the fun part for me and the look really started coming together with the addition of the smaller patterns.

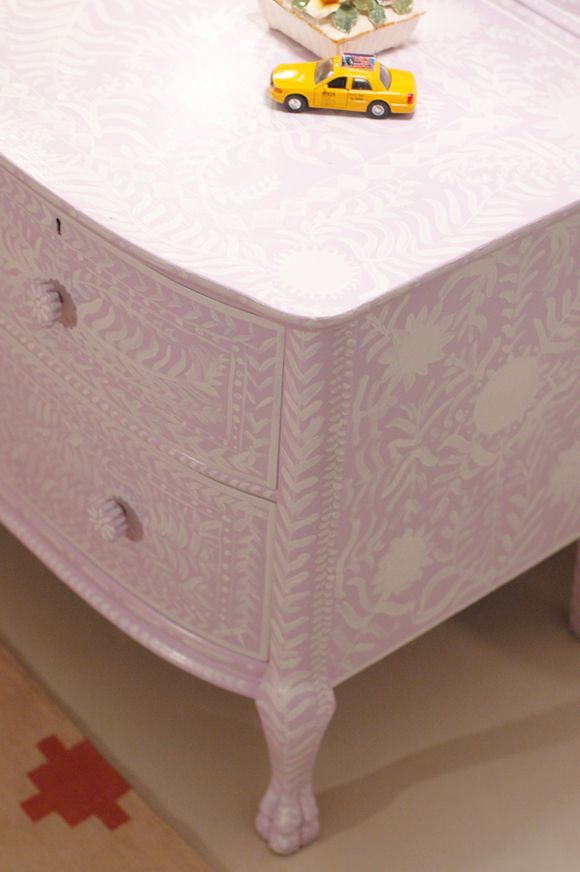
It doesn’t really matter what design you paint or where or how, the idea is just lots of movement and pattern, in varying shades of white. The result is folksy and pretty charming. Perfect for a child’s room!
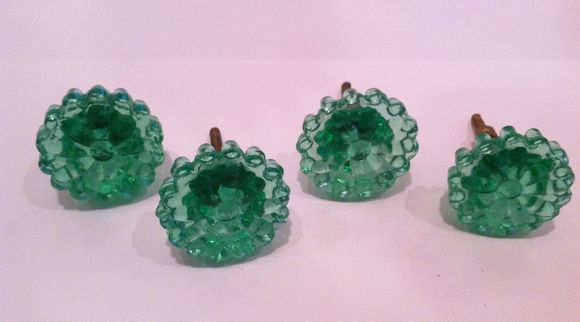
Oh – and a quick note about the knobs. After I started the project I realized I would need new knobs to replace the super traditional brass pulls. I was planning to just pick up some of those round unfinished wood knobs, but then I remembered I had a bunch of these green glass knobs from the clearance section at TJ Maxx. They already had a flower design on the fronts, so I just painted those white.
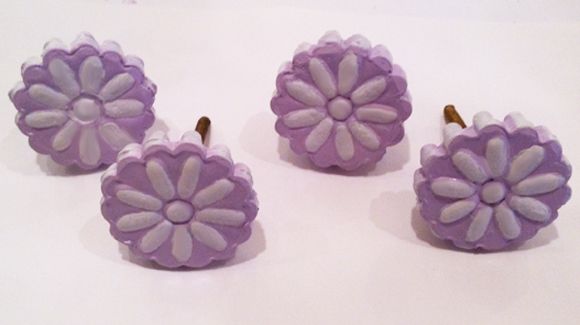
I love the dimension the knobs give!
One of my girlfriends stopped by our place last week, coincidentally after some shopping at ABC where she saw lots of inlay furniture in pastel shades. She noticed the dresser as she walked past the girls room, gasped, said “Oh no you didn’t” as she ran up to get a closer look at the inlay. Trickery = Success! Insert evil laugh and tapping together of finger tips!
Later my friend confessed she was pretty confused at the thought of me spending five grand at ABC. She said that’s not really my style, which I *think* I’ll take as a compliment. :) I’m happy with the dresser, even though it’s clearly not perfect, and super glad I didn’t have to spend thousands to get the inlay look. Especially for something in my kids’ room!

Have you checked out the other National Painting Week participant projects? Tomorrow is Aicia and Bruno from Curbly, so be sure to pop over there in the morning.
Also, I just wanted to thank you guys for all the sweet comments and emails about our super sick Gracie girl. I’m happy to report she is on the upswing today. Thanks for the suggestions and for giving me a little time off to take care of her. Have a GREAT weekend! xoxo


WOW, oh, WOW!!! That is so impressive. I just love that.
Your dresser is amazing. It's just perfect for a girl's room. I saw you featured over at Isabella and Max's Room.
WOW!!! This is just amazing! You are seriously one talented lady!
Amazing job! That is really beautiful! Love your kids got involved!
Jenny, you have made this piece into a truly beautifully whimsical piece! I am sure that when your daughters are grown it will be a treasured one they will long remember.
Are you going to do anything to the inside of the drawers?
Wow! You did an amazing job! Did you have something to look at or did you just wing it? If so, you have an incredible eye!
Jenny, I've said it before but I'll say it again – you are a genius! That looks fantastic, what lucky little ladies.
Absolutely amazing!! Looks stunning, and your color combo just adds to the effect!
Just found you via Janelle at Isabella and Max and I am hooked — your dresser is awesome and the idea is going into my mental file for a future project for sure – Thanks for sharing!!!
Love this.
You are a DIY-machine! Someone needs to figure out how to 'bottle' that kind of flair.
absolutely gorgeous!!
How do you go from the 2 screw drawer pulls down to the 1 screw knobs? This is beautiful and looks fun!
Ok I LOVE THIS! i want to do something like this but i have a little man and this feels really feminine for a boys room… would you have any ideas on how to do this but in a more masculine pattern?
wow, you are my hero!! I was just googling to see if anyone had tried this DIY, and there you were. I LOVE it! beautiful work! and now I am inspired to do it for my own dresser. Mostly likely green or blue as a base. :)
Just gorgeous Jenny – you've done an amazing job! I've got this linked to my dressers post as well today, for inspiration!
Gorgeous job on the dresser!!!! Makes me want to paint my antique dresser the same way!!!
beautiful! ive been taking old finds and revamping them for years- i have a smaller 4 drawer im working on now and was wondering what difficulties one commentor had with using paint/primer combo. since im also repainting my house i have tons of this sort of paint. ill be doing distressing work to the dresser but hadnt attempted using p/p mix before.
great work! just saw a dresser yesterday that was a definite diy at a high-end gift shop marked down to $798.00. i was shocked and proud im a self made diy'er. tutorials like yours can really help many save money.
spread the knowledge/keep calm & paint on!
HOLY COW – I just saw this dresser in today's post where you did the red lamp for girls room. I thought it was gorgeous there and so I started searching your site on it. I can't believe you did this!!!! It is beautiful and I love it so much. Seriously, my house is going to turn into a wannabe-Jenny-of-LGN!!!!
Wow!! great Post.
Thanks for providing this amazing information. I think we can expect better success with these tips.
Mother of Pearl Inlay
Keep Posting:)