I’m always looking for inexpensive alternatives to custom framing. I’d rather spend the money elsewhere in a room. I’ve mentioned before that I like to pick up cheap art in good frames from thrift stores and flea markets, and later I switch out the art.

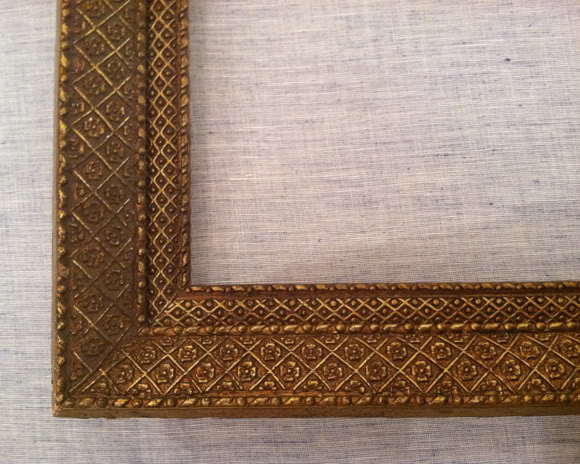
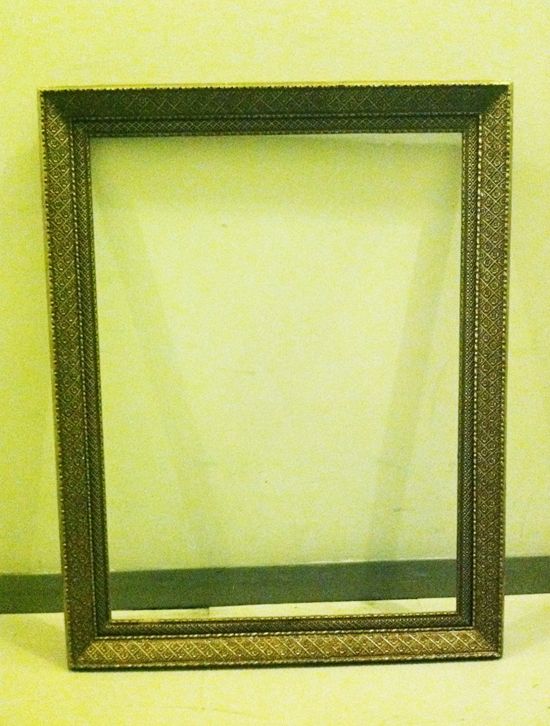
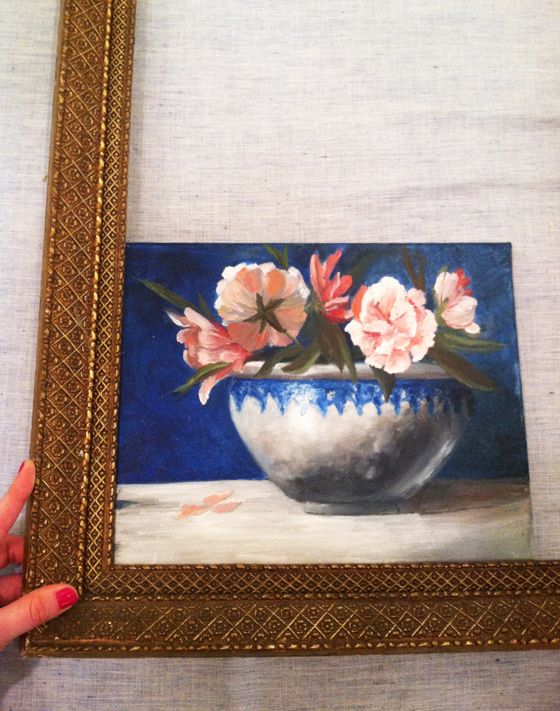
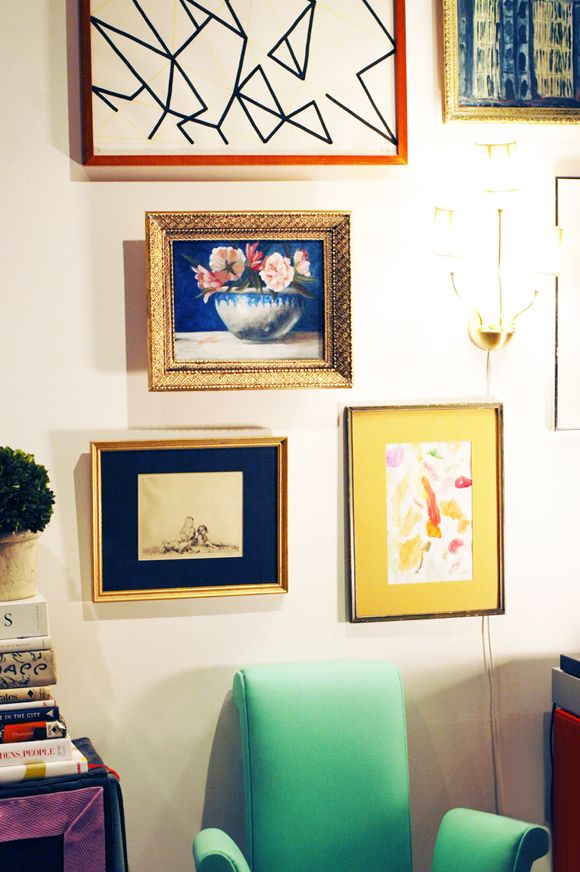
When I finished the chinese wallpaper panels a couple weeks back I moved over the gallery wall to the tv area in our living room. I wanted to included this peony painting because I like the dark shot of blue color. I’ve been meaning to frame it for a while now but it was painted on a European canvas which won’t fit in standard US frames. It’s not easy to make a frame from stock moulding you buy at the lumber yard, so I had an idea to repurpose one of the old frames from my collection.
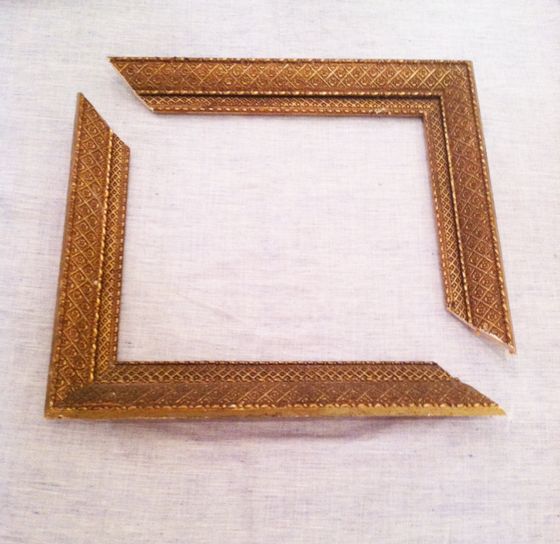
I tucked the painting into the corner of the old frame and marked the edges on the frame. I did this twice – using the two best corners with the least amount of damage to the plasterwork.
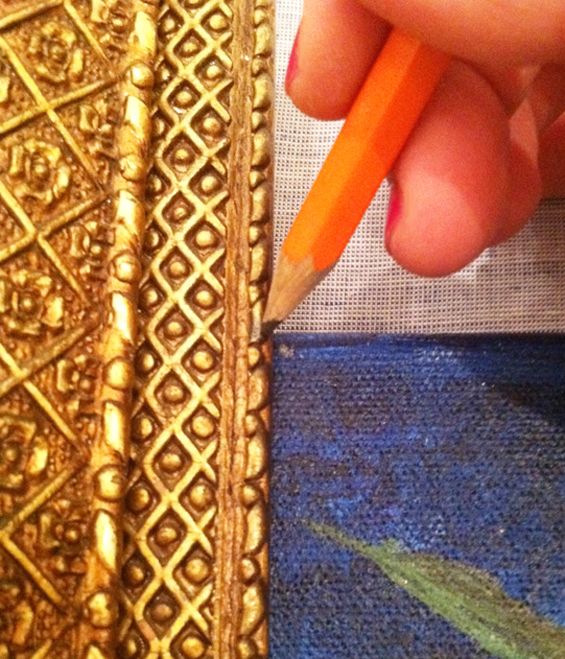
Then I used a miter box and a hand saw to make four 45-degree cuts. If you have a miter saw, this step would be super fast, but even cutting the angles by hand wasn’t bad. The trick to fast, straight cuts is keeping the frame moulding flush with the miter box edge. It’s helpful to have a second set of hands here.

Four simple cuts later and we have the beginnings of a new frame!
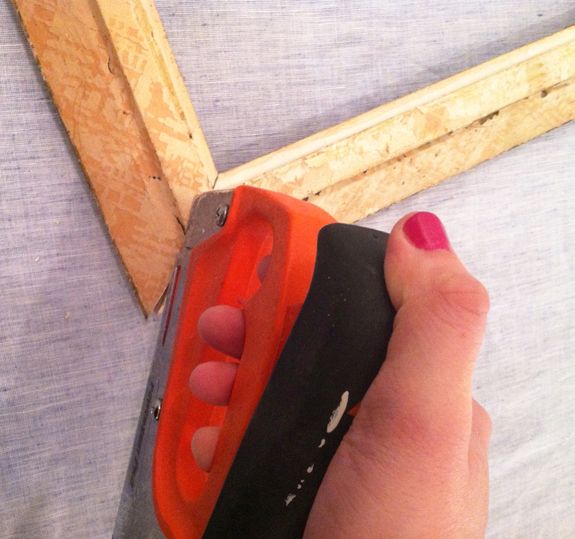
I smoothed the cut edges with a sanding block until the two cut edges fit perfectly together.

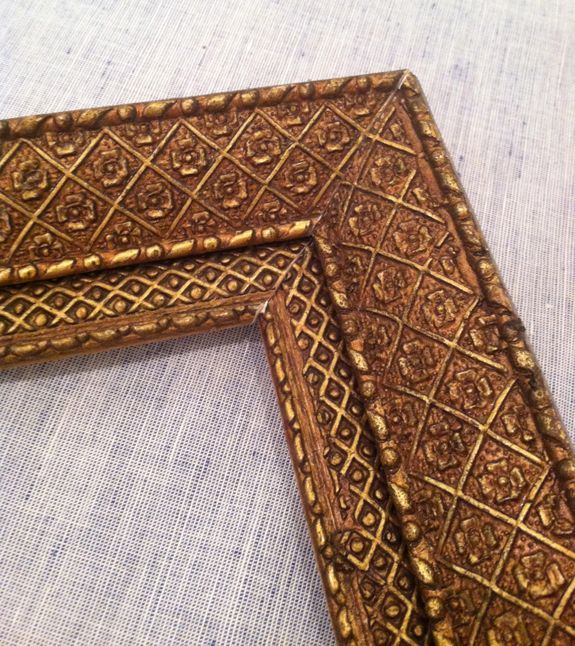
Then I ran a bead of wood glue along the edges and stapled the two pieces together, right down the corner line four or five times.
Not bad, right? Pretty seamless.
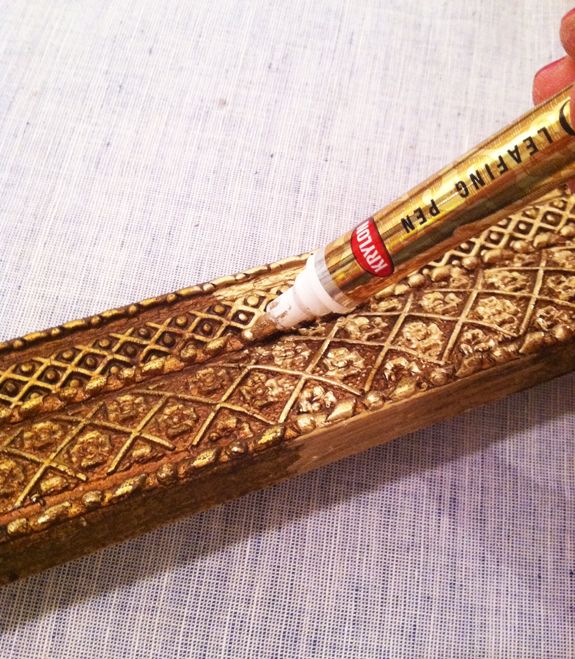
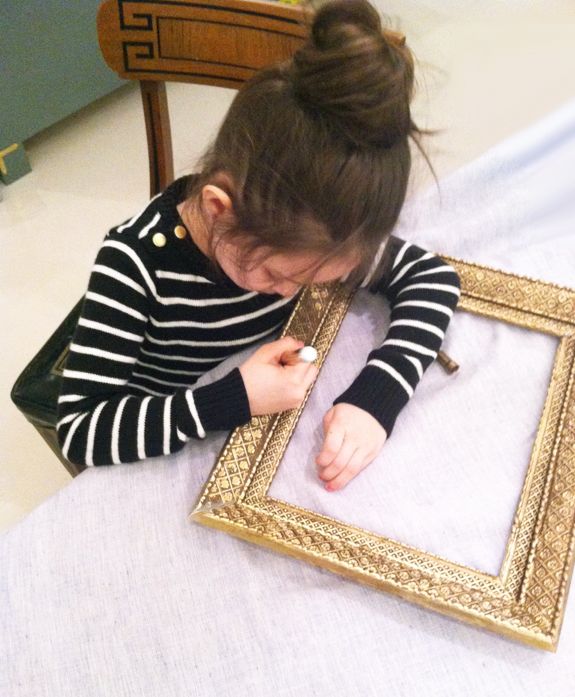
While the glue was drying, I touched up the highlights on the frame with my trusty gold leaf pen so that the gilding would be a brighter yellow.
Gracie got in on the action too. She’s my little budding artist.
I forgot to take a photo, but I simply stapled a few times on the back around the perimeter of the painting at an angle to keep the canvas secured in place. Then it was done and ready to hang.
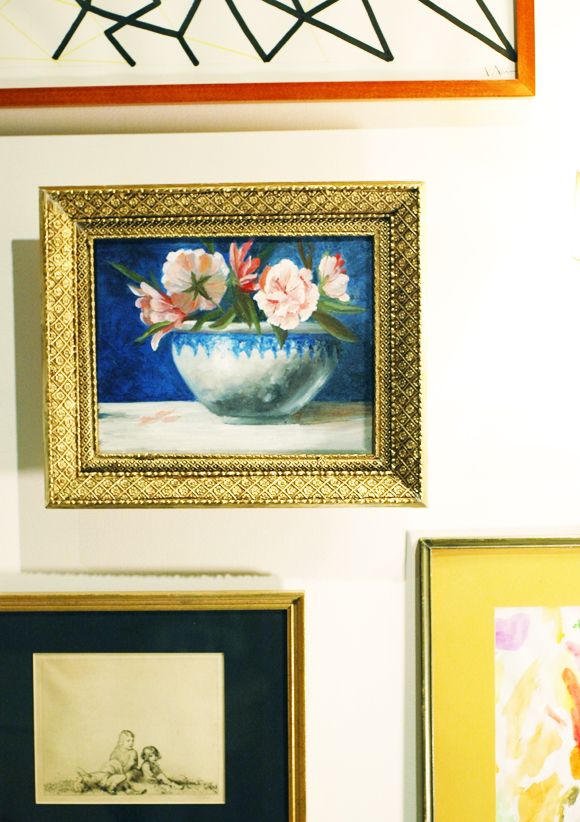
I’m so thrilled with the results here. Even if I had dropped $300 on custom framing, it wouldn’t have the age or patina this old frame has. I’m dying to cut down more unwanted frames for the other canvases I have in storage!


That is impressive! I'm going to be on the lookout for frames!
Don't know if I missed but I love the way those Italian chairs turned out! I've neem hunting for the perfect shade of mint green for my own armchairs and you b eat me to it!
Excuse the typos, writing comments on an iPad is not the easiest!
Anna (My Design Ethos)
Well clever is as clever does! You make it all look so easy peasy puddin' and pie!
It came out beautifully! The frame makes the painting for sure! That gallery wall seems amazing.
What a great idea. I love how you make projects like this look easy. Makes me want to give it a shot.
GREAT idea!
The best ideas are the most simple! That looks great!
Great DIY! Love the frame.
I just love how this turned out! That frame looks beautiful and expensive. Also loving the transformation of your Goodwill chairs! That color is perfect.
Looks great! My flea market frames are my favorite but I never thought to cut one down to size before! Thanks for sharing!
Nicely done! And to let your young lady help makes all the difference!
Our daughter changed her room on a budget all by herself! Come and have a look if you have a moment! You as a DIY bee must know the exhilarating feeling once done!
xoxo Victoria
Really good! You've found many uses for that little saw! Love the peek of the chair in the photo, too!
I will never have to spend an exorbitant amount of money on framing again!! Ingenious!!
So cute! Love that you had a 'helper' too :) Happy Monday
Bethany
http://www.PowellBrowerHome.com
Looks awesome! Great idea!
So clever!
I agree, I will try anything to avoid custom framing-it's so expensive. Thanks for showing this idea!
What a smart, economical solution, Jenny! Love your ecletic collection of artwork–what is the black and white graphic piece about your peony painting?
amazing!
WOW! I would have never thought of that! so clever and great for all those collected thrift stores frames-you can make your own size.
Great idea!! I've been thinking about trying to make my own frames using trim from the lumber yard but this looks easier!! :) Thanks for the great re-use idea!
You can do it all lady! And that's why I love ya ;) Looks great!
Such a great idea Jenny! Thanks for sharing.
Live Inspired,
Heidi
athousandlaughingstarfish.blogspot.com
Wow, this is amazing! My problem is usually getting my brain wrapped around which angle is the correct one to cut. I"ve wasted lots of crown molding on this mistake and still haven't learned:)
I love it, I love it, I love it! You are nearly my only decorating blog because you do so much DIY, but it still looks high end and designer – not crafty crazy. I HAVE to do this idea.
another brilliant art diy! i am so going to try this.
What a great idea!! I always find frames I like that are either too big or too small.
http://egadsevents.blogspot.com/
Wow that turned out so great! I'll definitely have to try this in the near future!
http://lindseyyoung.net
genius!!! I never would have thought to do that but it is such a smart idea! now I'm off to the basement to see what old frames I have stashed away down there…..
It looks gorgeous! I buy frames at thrift shops too, but since I am an artist, I just make my own art to fit the frames I get. I also hang empty frames on my walls and sometimes I get mirrors cut to fit the frames.
wow–great idea. i like the look.
i love that painting in the gold frame! such a great idea.
I just read your post on cutting down old frames – wonderful! I am always looking at old frames and have several sitting in my closet waiting for me to work on. Thanks for the inspiration!
Great Idea!
P.S. I spy one of your "mint green chairs" can't wait for that post.
This is genius. I refuse to pay for custom framing so I'm always on the lookout for old frames. This was actually on my list of things to try, now I have your diy. Thanks!
I spy a new upholstered chair!! love that green!!
GREAT little mitre box! Brand please?
You are fantastic, I love checking out your blog for great DIY projects and the end result always looks so chic!
Thanks… you gives great inspiration…
wow! work of art.
very impressive work. thanks for sharing this one.
you have steady hand that paint great art..
this kids can do the job well.. congrats for the great art.
fun and amazing frame you did. I'm happy you share it on your blog..
your helper is so cute.. great job guys..
the picture paint great amazing fun.. You did really enjoy doing that art.
very impressive for a kid to do that.. so glad to find your blog on google.
I will show this to my kids and follow the steps you made.. thanks.
nice you really have fun with that frame..