Update: Welcome, D*S readers! If this is your first time visiting my site, you can read a little bit about me here. I hope you look around and decide to stay a while! By way of a quick introduction, here are a few of my recent projects:
– DIY Sputnik chandelier
– Antique dresser as a kitchen island
– Heirloom Button Art
——————————————–
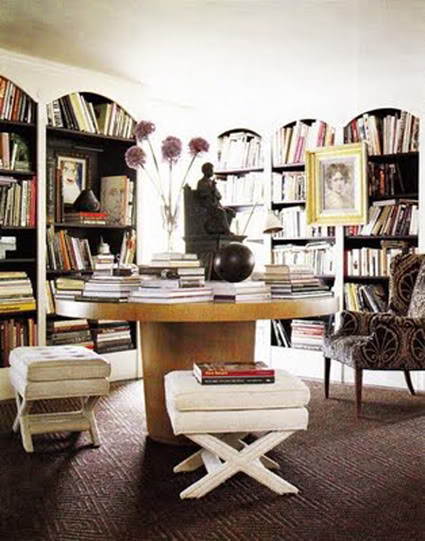
Remember this post where I shared my love for arched bookshelves?

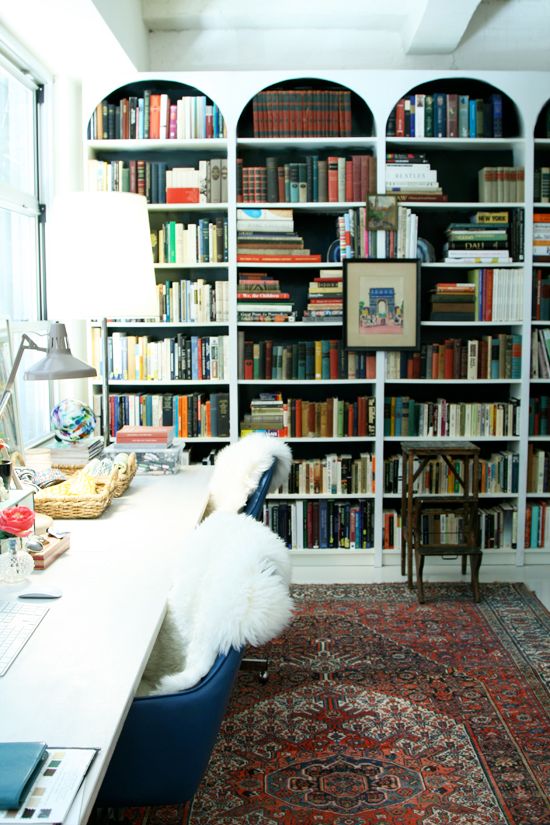
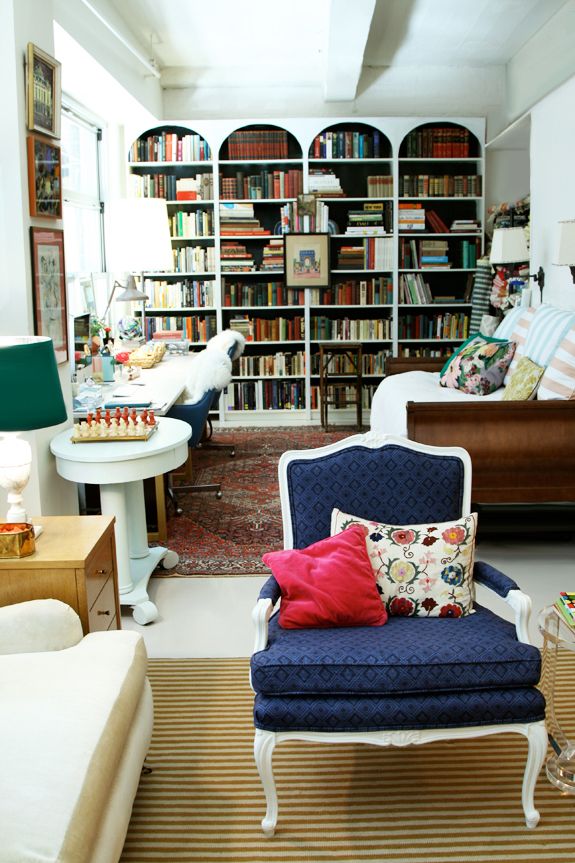
We decided to put a wall of bookshelves in my office, so it would sort of feel like a library. We already had two white Billy bookshelves from IKEA, so we bought two more for $50 each, and then eight $10 extender shelves, so that the shelves would go up really high. I wish we could have gone all the way up to the ceiling for the true ‘built-in’ look, but the rafters in our loft made it tricky.
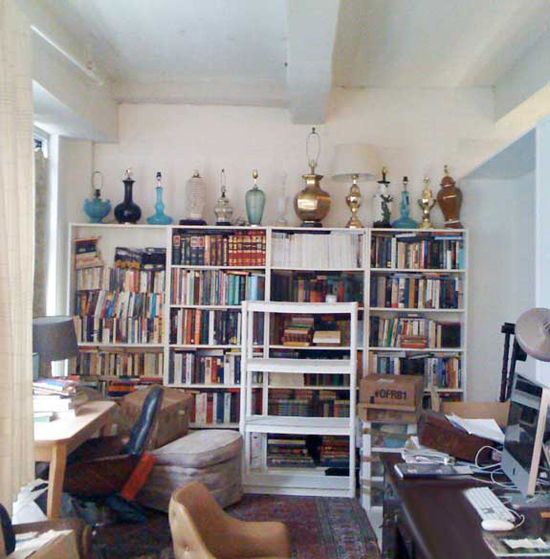
This is the super sad before photo from the week we moved in:
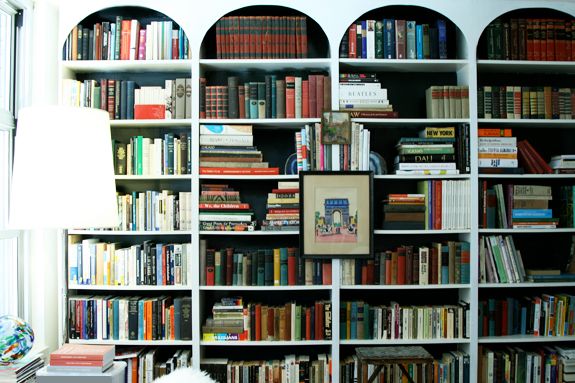
And now:
It was a crazy-easy project! (I know I always say that, but it’s true!) Here’s the break down:
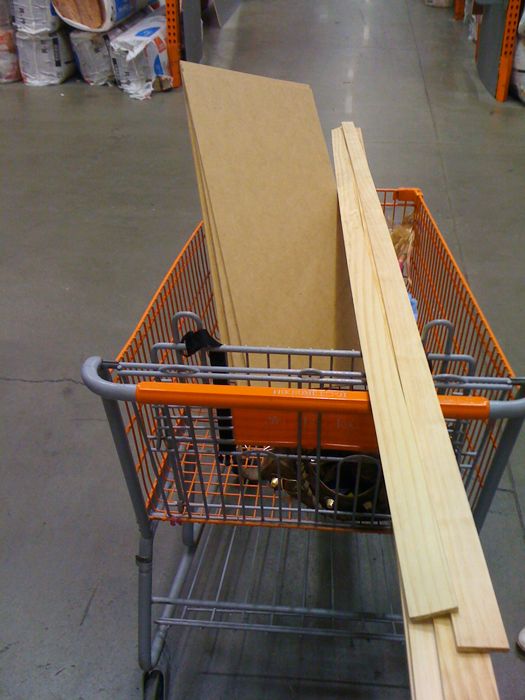
I went to Home Depot and had four pieces of 1/4″ thick MDF cut in to 14″ x 32″ rectangles. While I was there I also picked up three 8′ lengths of 1/4″ thick x 2″ wide and two lengths of 1/4″ thick x 1″ wide flat trim moulding.
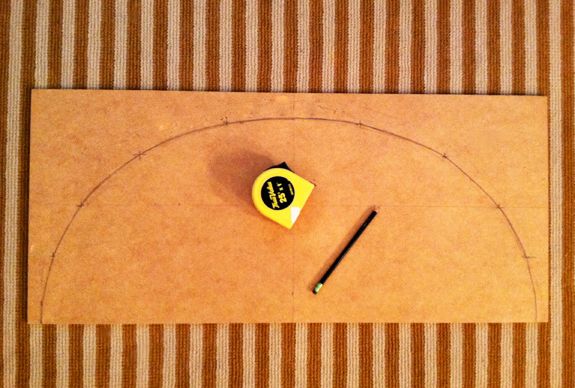
When I got home I sketched out my first arch one of the MDF pieces. If you’re not comfortable with measuring out and eyeballing this step like I did, you can use a flexible curve to give you a more exact curve.
To get arches that look like mine, the top of the curve should be about two inches from the top of the MDF rectangle. No matter how high your arch is though, you’ll need the bottom edges to be 1″ wide.
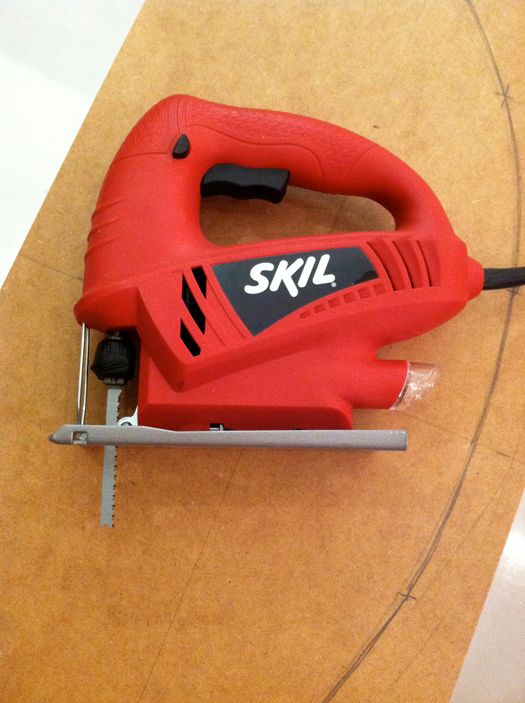
If you are new to the world of electric wood cutting tools, I think the jig saw is a good place to start. I have this $30 model and it works great. My advice here is to go slow and cut carefully. If you start to move off your line while cutting, slowly readjust back to your line. The goal is as smooth a curve as possible, so try not to jerk back to your line.
I used that first cut out arch as a template for drawing my other three arches. It was an easy way to make all the arches identical.
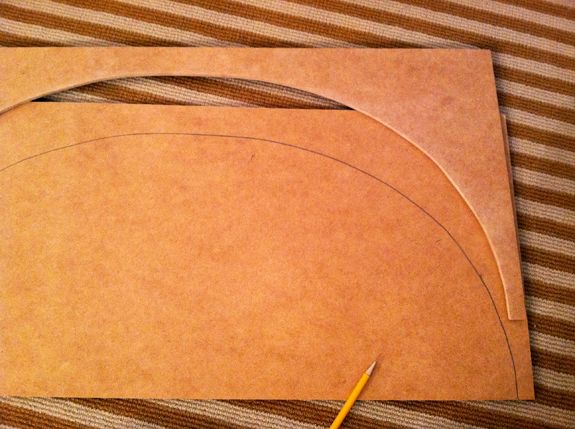
After all the arches were cut out, I hand-sanded the arches a little, just to smooth out some imperfections. I love those big double wide sanding blocks! They last forever.
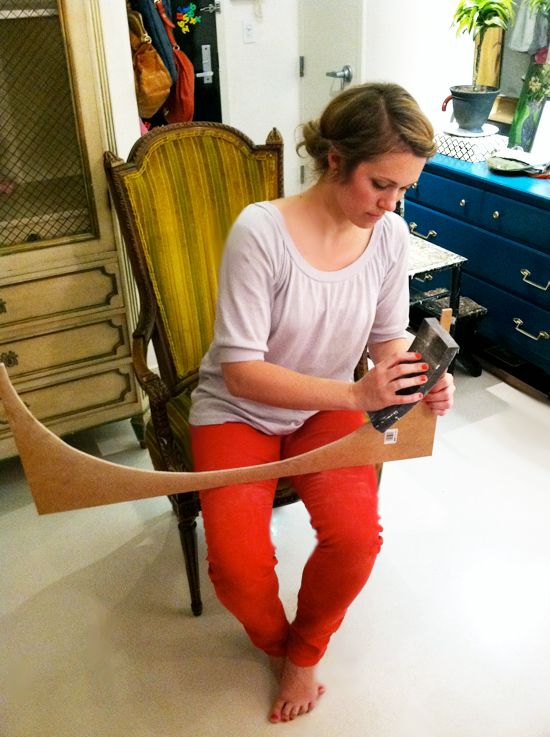
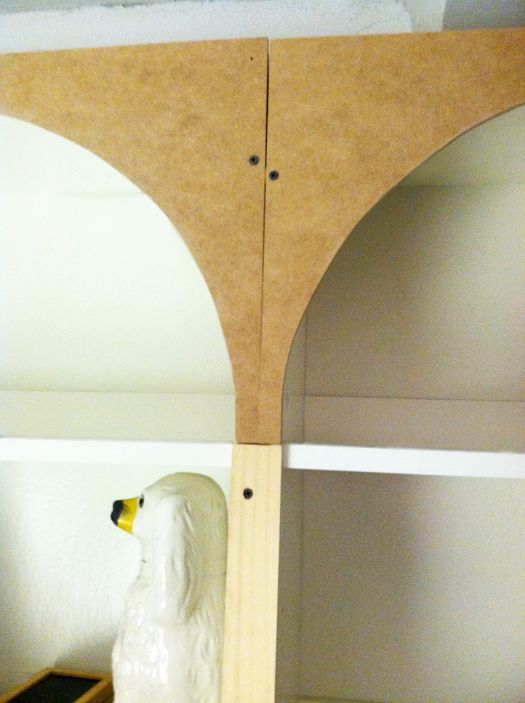
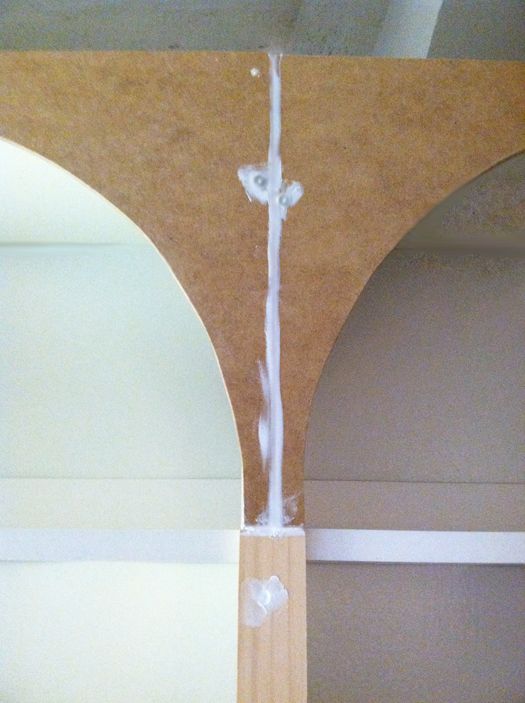
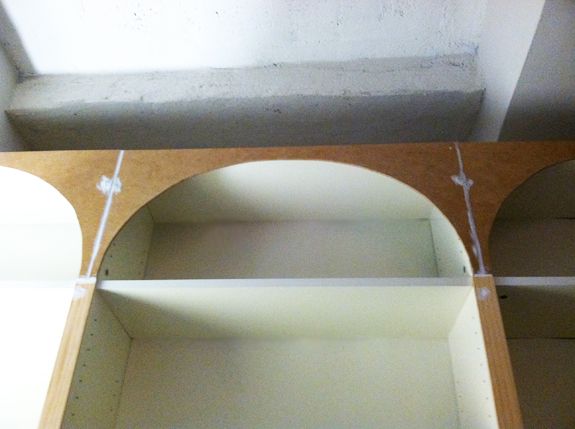
Michael helped me hold up the arches while I drilled in a few pilot holes and some dry wall screws. It’s a good idea to really get those screws in flush with the MDF or even counter-sunk so you can’t see them later. We installed the flat trim in the same way.
The idea is that the 2″ wide flat trim covers where the bookshelves butt up to one another. The 1″ wide flat trim is for the too far ends of the bookshelf walls.
We’ve had two of these Billy bookshelves for like six years or something (you can see when I first painted them peacock blue here), but the other two shelves and all of the extenders needed to be primed and painted.
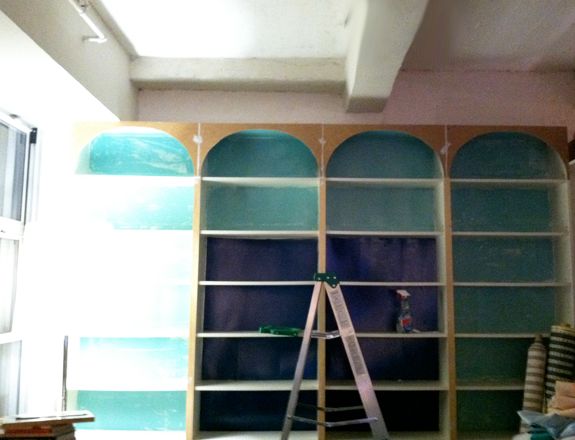
It was worth it though. I love the contrast! The dark green, almost black, paint really makes the crisp white arches pop.

PPS In yesterday’s Babble post I shared my secret weapon for productivity: Teux Deux!


That is genuis. It looks awesome. You ARE AWESOME.
Love your pants!
What a transformation! Great job.
Uhhh…you're amazing. These bookshelves rock!
Those looks absolutely AMAZING! It totally changes the look of the room. Love the dark background too!
truly truly awesome… LOVE these! But as a renter, like you, I wonder how you will take these with you when you move? I'm really tempted to try this but I'd hate to have to leave all my hard work behind. What are your plans?
Those look gorgeous, Jenny! I just posted my bookcase makeover this week too! Added cheap molding to the top and fabric to the back. Even mounted art on the fronts of the shelves!!! Clearly your blog and ideas are rubbing off on me! :)
Hi guys! Thanks for all the lovely comments!
I haven't decided what we're going to do with these when we move. I might leave them here just because I love any excuse to redecorate. :)
But truthfully, I think I could probably find the screw holes and dismantle the set to sell or take with us.
Thanks again for the comments today!
xoxo
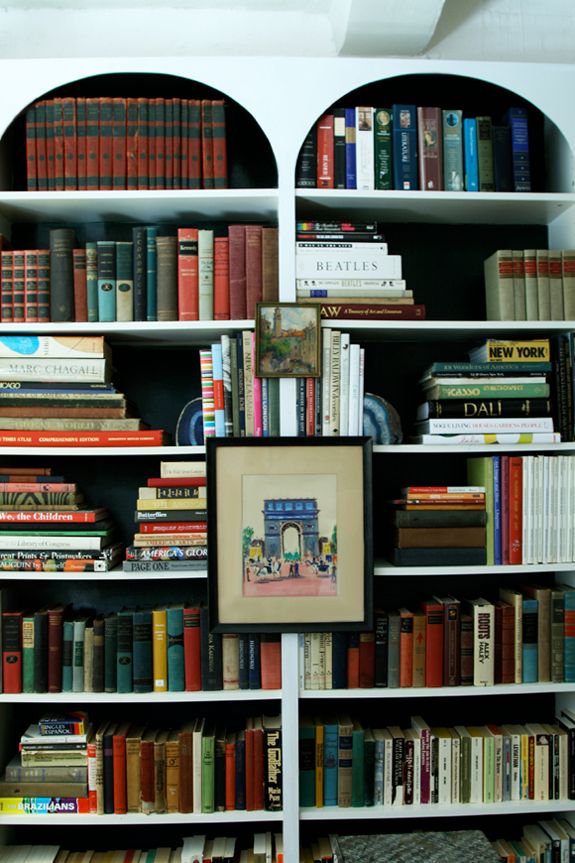
Not only are the arches fantastique, but I have to say that I love the bookshelf full of books and very little else.
Camille
These look amazing, I have yet to come across a more fabulous DIY Queen. Your blog is a great inspiration and motivation for me. Thankyou sooo much for sharing all these great details with us =)
Congratulations on being featured on DS! I love the bookshelves. You did a fantastic job on that project!
I love that I first read this article on Design*Sponge (one of my other favorite blogs) and immediately picked out the newly upholstered chair and realized this was a Little Green Notebook submission.
My favorite blogs collide!
we will remember this for our forever house…way cool for the hubby's office!!
It sounds like the hardest part was all the painting so I'm not surprised there. This is such a great project and looks so custom yet hardly cost a lot of money. Great job Jenny!
this is amazing! great job.
You never seize to amaze me with your projects. Ikea never looked so good ;-) And now you can say something snobby and sophisticated like, "I'll be sitting by the library if you need me, dear!" LOL!!
amazing amazing amazing! I am totally going to do this in my living room. Ps- I can't stop reading your blog.
As usual, amazing. It just looks SO good! Custom, in fact. Well, I guess they are custom now. You must plan on staying in this loft for a while?
I love the bookshelves, everything from the arches to how you've styled them. They look amazing!
Jenna,that is amazing!
Jenny, this is insane. It looks so amazing. I think my favorite project from you yet (and that is saying a lot)
LOVE the arches! Very clever and totally do-able. Thank you, thank you!
Great job! Love that blue desk in the background of your sanding photo too!
Looks amazing! And, I'm also drooling over the cabinet w/wire grille that is pictured behind you when you were sanding.
We'd never know you diy'd those arched bookshelves! Where did you end up storing all of your lamps?!
Even my husband read this post with me. I must find the time to try something like this!
Jenny you are so cool! I have been following your blog for like a year now and I always think she can't top this project, and yet you do every time you post a DIY. Wow so awesome!!! My head is still spinning from your Ikea chandelier.
Becky:)
Jenny-
I love the bookcases, but moreso love your recent posts. Thanks for sharing more about your family (on babble and A Cup of Jo), it makes me enjoy your blog even more. Im not sure how you do it all!
Really nice work! I'd love to know more about the dark red encyclopedia set on the top shelf. They look identical to a very old set I used as a child in the 70's and 80's…and just gave away! (Hope I don't regret that but you can only have so many books).
You are just about the best…I have done ikea bookcases with fluted molding and I thought they were fantastic but yours are super duper…Keep up the good work …Flournoyfrance
ha ha, and I have taken up your tool to hyper-productivity too! Tuex Duex is my new home page!!
xox
they look SO great, as usual. you are so impressive!!!
Painting laminate IS a thankless job. I circumvented the problem by "wallpapering" the back of each bookcase. We also decided, since she was of a changeable mind, that we would apply the paper to a piece of smooth cardboard cut out to fit the back of each shelf so she could later pull the cardboard out and recover for a different look. she now has two sets – a summer one and a winter one. Where there's a will…
"She" being a friend of mine; hate it when I type too fast and don't proof what I have written…
Wow you're awesome. You amaze me every time come to your blog!
I cannot believe how great these look! Such a cool custom look for not that much money…thanks for the inspiration!
This is the most inspiring before & after I've seen in ages… ABSOLUTELY LOVE IT. Wow.
Great Project! Did you think of adding a piece of trim right at the top or a small piece of crown like the inspiration picture? I think it will make it look even more finished and built in. Love all your ideas!
Love this! I think I might need to try this on my billy's. We tricked ours out by taking the back panels off the billys and painting the wall (measured out just behind the shelves behind a dark grey. Once the shelves are anchored to the wall you cannot tell that they are missing that flimsy back piece.
They look wonderful!! Thank you for sharing :)
This is so BRILLIANT. Congratulations! They're absolutely gorgeous. You're an inspiration. :) bb
GORGEOUS, Jenny! Love, love, loving this DIY. Question: did you secure your Billys to the wall? I would love to try something like this but we're in a rental and I'm not sure how well that would go over. Any advice would be appreciated! Thank you!
a-mazing! i never would have thought of such a simple solution, inspired!
flemingfiles.blogspot.com
oh my heck Jenny. Really?! You're too cool. These are INCREDIBLE!! How do you just whip up this stuff and make it look so designer chic??? These are my fav. bookshelves ever!
You never stop amazing me! These turned out so completely fantastic…I would've never known that they are shelves from ikea…incredible! I really don't know how you keep coming up with these amazeballs ideas, but keep 'em comin'! And I'm *loving* those hot red pants that you are rockin' (c:
beyond fabulous. i mean fabulous!!!!!! you are incredible.
i am so in love!!! way to go girl!
Your shelves are pretty loaded, do you have any trouble with sagging shelves?
Rhonda
It could be an illusion, but it looks like your extender shelf with the Chagall book & the red comprehensive atlas might be a little warped. Check it out! This looks beautiful and it'd be terrible for something to happen to it!
Lovely job, the colors are fantastic. Why is the blade in the Skil reversed?
Question is not clear. WHAT top? just the horizontal piece behind the upper face frame? Is the pic what you have now or just the idea of what you want? You need to be more specific.