This post is sponsored by Glad. We’re taking small steps to do our part and want to help you waste less too. Visit GLAD.com for more information.
I’m so excited to finally share this tutorial with you! This skirted table is my fourth or fifth of these DIYs, between my house and my client projects (remember the original one here?), but somehow I haven’t managed to put together a tutorial until now. The steps are simple and completely NO-SEW! Ready to jump in?

After we moved to New York, I was looking everywhere for a bookshelf or console table to use as the base for a skirted console for our TV to go between the two fretwork cabinets. I checked Craigslist for a couple weeks with no luck, and just as I was about to cave and buy something new, Michael came to the rescue. One of our neighbors left this vintage bookshelf in our building’s recycling room. Not only were the dimensions *perfect* but I was glad to save this sturdy little piece of furniture and give it a new life.

I’ve been trying to add some still-bright-but-less-primary colors to my living room. I told my friend that I was buying a forest green velvet for my console and some burgundy linen for my settee and she gave me the most hilarious look and goes “WHAT.THE.90s!!!!!! Gross!!!!” :)
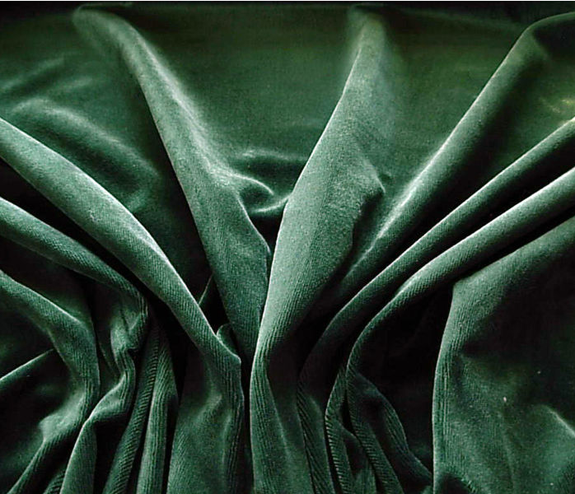
Look how pretty the green is though! Mossy and muddy with a tiny bit of blue undertone. I lucked out and got it on eBay for $4/yd.
Before the fabric arrived, I went trim shopping at JEM in Tribeca (they have a killer selection of vintage trimmings) and found this really pretty lilac herringbone trim. I wasn’t looking for something purple at all, but I had just finished reading Katie Ridder’s new book Rooms (sooooo good, btw), so lavender was on the brain and the color drew me in.

And then for the first time in my life, I was thrilled to see an astroturf rug. JEM has a green grass rug that seemed close to my velvet that was being shipped. I loved the colors together! Sold.

I was still happy with the color combo when the velvet arrived and couldn’t wait to get started. I wiped the recycled bookshelf down with a bleach-water solution and got my fabric, trim and supplies ready…
Here’s what you’ll need for a no-sew skirted console:
Iron
Tape measure
Tailor’s chalk
Scissors
Magnatac or other strong fabric glue
Staple gun and staples
STEP 1 – MEASURING and CUTTING
Measure your bookshelf/console and come up with a game plan with your measurements. I added 2″ of hem to every side and 3″ of hem to every BOTTOM (no hems on the top!!).
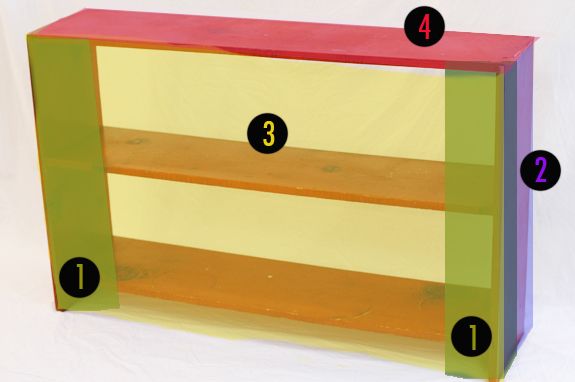
Components are as follows, in order of appearance:
1) Inside flaps (green)
These two flaps will hardly be seen. They are like camisoles for you console. No one wants to see bare corners! Cover them up with some simple flaps. Mine were about 4″ wide on the front and another 4″ wrapped around to the side. I added 4″ more for my two 2″ side hems, and 3″ to the bottom just to keep things neat and to minimize fraying.
2) Side panels (purple)
There are also two of these panels, made to be the exact depth of your bookshelf sides. You’ll want a good 3 or 4″ of extra fabric for the top in addition to a 3″ bottom hem. Again, don’t forget to add 2″ for each side hem.
3) Front panel (yellow)
One big flap that covers the top and fronts of your bookshelves. Again, at least 4″ of extra fabric after your hem, for the top part where you’re stapling.
4) Top panel (pink)
Made to fit the top of your bookshelf perfectly. Just add a 2″ hem on all sides.

Now that you’re all organized and prepped with your measurements, mark out all your pieces with a tape measure and tailor’s chalk on the back side of the fabric and cut them out. If you are using velvet like I did, make sure not to mess with the orientation of the pieces. You want the piles of each piece to lay in the same direction or else the sheen and color appearance will be totally off. (This applies to other velvet upholstery projects as well! Be careful with the pile directions!)


STEP 2 – PRESSING and GLUEING
My mom always says the most important part of any sewing or soft goods project is the pressing. It’s so true!! For velvet, you don’t want to iron directly on the pile. I used a tea towel as a protective barrier and that worked fine to give me a strong crease for all my hems. Again, I did about 2″ on all sides and 3″ along the bottom. I used my tailor’s chalk markings and a ruler to keep my hems even.

Then simply put down an even coat of fabric glue on the hem flap. By keeping the glue application to just the flap you’re reducing the chances of leaking. I glued the sides first and the bottom hem last.

This is getting a little nit-picky, but try not to let the side flaps poke out of bottom hem sides. You might have to overcompensate and pull in those side flaps a little more before glueing the bottom hem.

STEP 3 – HANGING and STAPLING
Once all your pieces have been ironed and glued, it’s time to assemble! Go in order of the chart above. First are the inside flaps. So, the real trick of a no-sew skirted table is to focus on the break of the hem, not so much on the top part yet. It doesn’t matter how much fabric is on top or if it’s crooked or whatever, just move the panel vertically until it perfectly and evenly hits the ground. I probably like it best with a 1/4″ break. Nothing is worse than too-short curtains or console skirts!

After finding the right length, just put in a staple every two inches or so to keep the fabric in place without sagging. I couldn’t be happier with my Powershot Pro staple gun (used with Powershot Staples – it makes a serious difference!).

After hanging the inside flaps, do the side flaps next, and then the front piece.

Because velvet was so thick, I didn’t want too many edges on the top. So I took the top piece all the way to the back. This really helped to keep the top surface flat and even out all those edges from the other pieces.


I could have stopped with this step and have the front piece be the top piece too, but I really wanted this to look like a sewn skirt, with seams.
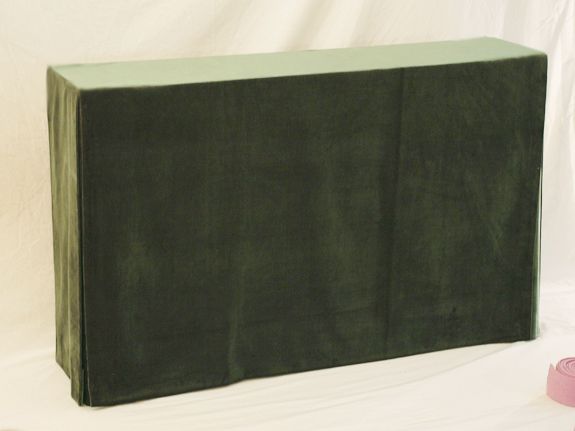
Before putting on the top though, I glued on the trim. My assistant Colleen and I went back and forth on whether to do a full boxed border, but the trim is so thick we decided to go with the upside-down U, and I really like it.
Remember to always inset your glue line about 1/4″ from the edge, otherwise the glue will leak out from underneath when you press the trim into place.

I don’t like to cut trim for mitered corners. It never looks right to me. The trick to folding a mitered corner is to keep all your fold angles at 90 degrees and 45 degrees.

You have to play with it for a minute to get the trim to lay right, then glue in all the folds and really crease and press the folds into place.

Then finish off your trim with a little turned under hem.

The last step is securing the top piece, so don’t put away the glue just yet. Glue evenly and press down hard to make everything lay flat.

You can see in the photos above and below how the inside flaps cover the corners.

All done and nary a needle or Singer in sight!

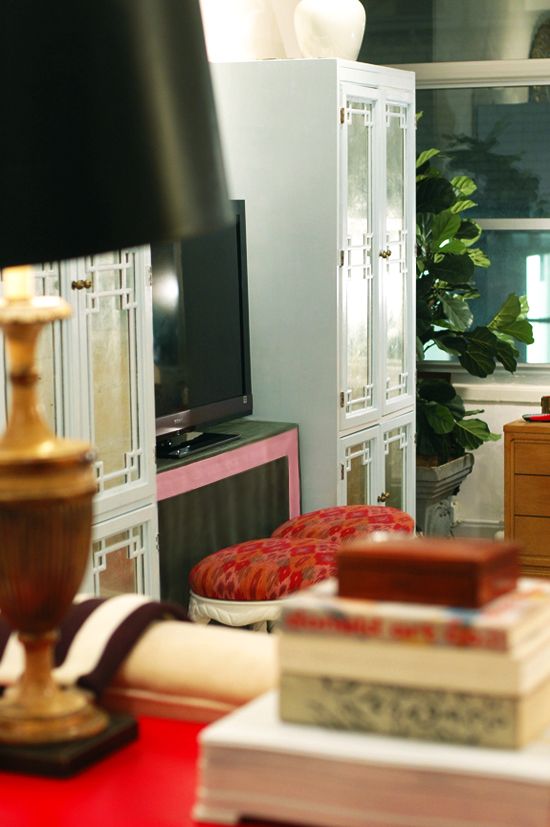
We have all our cable and video components under the skirt. The remote works with a little sensor thing we got off Amazon.
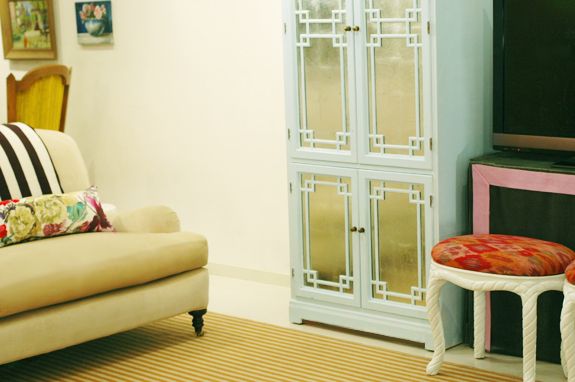
Everything’s still easily accessible, but completely hidden. I love, love, love skirted consoles for any house, but especially for small homes or apartments where every piece of furniture really has to count. You can pack a lot of stuff under there!
As a side note, I know some decorators really hate a glass top on skirted consoles, but I’m thinking it’s a necessity here. Between the dust and the sticky little fingers, I’m pretty sure I’m going to want a protective surface on top of that velvet!


Hey Jenny:
I can't tell you how excited I am to have this tutorial – I was JUST telling my mom this morning that I want to skirt our media cabinet, but am not sure how to measure for fabric, etc…
Needless to say, she and I have a new project to tackle while she's visiting us in Brazil!
Thanks so much!
alison g.
MLHP
Well done! This is before you had red nails ;)
This is beyond lovely! Love the color combination!
Fantastic job! I am going to do this for my daughter's room;)
Hi Jenny!
Thank you so much for the tutorial! I have wanting to do this project for a while..have a few insightful places that I'd rather cover up. :)
Love your blog!
Sarah
Wow- you're pretty awesome!
Bethany
http://powellbrower.blogspot.com/2011/12/its-beginning-to-look-alot-like.html
Hi,
It looks beautiful, and i have been looking for really specific directions for a while, so thanks!
but: what would you recommend if i cannot use staples? I'm trying to cover a plastic folding/card table…
Do you think it's possible to use hem tape or more fabric glue to create a removable skirt?
Thanks a lot: )
Beautiful transformation! I love how it's no-sew, too! Thanks for sharing.
Thanks for this tutorial! I just decided on a fabric to do the same thing but I was planning on sewing! I've even seen these done in dining rooms as buffet tables and it's looked amazing! Thanks for sharing! – BOO
Nice tutorial! I just made a skirted table last week to cover, guess…a giant, horrendous, chewed up dog kennel that was killing the vibe of my bedroom but we use on a daily basis. A simple piece of plywood used as a tabletop, then covered with a skirt like yours makes an excellent vanity table these days with a mirror and lamp on top…you'd never know there was a kennel underneath! Skirted tables are genius for small apartments like mine!
Oh my goodness…it's absolute heaven and with the no sew option, I can totally see this as something I might be able to pull off- thanks for such a fabulous tutorial- your skirted table is divine!!
Where are you pink loafers from!?! I neeeeed them!
Great tutorial, as always! Can't wait to try!
Beautiful job, Jenny! I never would have been brave enough to try that color combo but it is absolutely FAB. Of course it is though! Well done.
Jenny, I am so enjoying your blog lately. It is so refreshing to see good content consistently! Magazines just don't come often enough, but I get to check LGN every day and I know it will be good and super entertaining!
I know this is a lot of work to keep up, so thank you from all of us for all your amazing efforts!
BAHAHAHAH!! Still cracking up about what your friend said about 90s colors! I would have said the same thing…but if anyone can pull it off, it's you Jenny! Loving the green…
Thanks for a great post!
Allie
I never would have thought about skirting a console, but it looks great! Now I'm wondering what else could be skirted…
what a great color combo! Thanks for the tutorial!
Soooooo beautiful! Thanks for posting such a detailed tutorial!
Oh wow! That last shot is amazing! I can't wait to see more of your house!! Love it!
I would love a link to your remote thingy you bought on amazon, for the tv and DVD components….Thanks! Also, great shoes! Where did you get them?
Awesome job, Jenny! Thanks so much for this tutorial! My favorite posts are your DIY jobs. I'm pulling out a hutch top that I've had for years and couldn't figure out what to do with. That bitch is getting skirted!
Great tutorial Jenny! And I love the colors you chose! Lovely last photo of your room too. Will you share what kind of potted tree that is? xoxo
I'm sewing illiterate, so this is right up my ally. And I have a big eye sore of a tv stand that could use this treatment. Thanks for this genius idea!
I think I'd be like a id in a little candy shop if I got to just walk around your house and look at your decorating. You have some mad skills girl, mad
Love it! I made one a few months ago and it hid all our diapering stuff in the living room:-) I did a piece of reverse-painted glass on top (stole the idea from you,) and recycled a really thick glass top from a table from my store that got chipped in shipping) and it kept it so much cleaner than the one I had before, which was just a fabric top!
Hi Jenny,
Can you share a link to the remote sensor on Amazon? I did a search but I'm a bit electronic equipment illiterate! We got a cool sideboard to use as a TV stand, but currently we have to leave its wooden doors open so the remote can talk to the cable box & DVD player – no good with a curious 6 mo old!
Thanks!!
Amanda
So, I asked Michael to hook up our remote extender while I was out the other day and when I got back the remote worked with the new skirt on, so I just assumed it was because of the new extender. Turns out Michael didn't have a chance to install it yet and the remote just works through the skirt! BUT! I used Todd and Emily's suggestions for remote extenders and they're great options:
Less expensive option:
http://www.amazon.com/Terk-Leapfrog-Remote-Control-Extender/dp/B000069EV0/ref=sr_1_2?s=electronics&ie=UTF8&qid=1317946581&sr=1-2
Best, more expensive option:
http://www.amazon.com/Link-Remote-Control-Booster-System/dp/B00023JJV6/ref=sr_1_1?s=electronics&ie=UTF8&qid=1317947235&sr=1-1
another beautiful tutorial! Congrats on your successes~
So, I asked Michael to hook up our remote extender while I was out the other day and when I got back the remote worked with the new skirt on, so I just assumed it was because of the new extender. Turns out Michael didn't have a chance to install it yet and the remote just works through the skirt! BUT! I used Todd and Emily's suggestions for remote extenders and they're great options:
Less expensive option:
http://www.amazon.com/Terk-Leapfrog-Remote-Control-Extender/dp/B000069EV0/ref=sr_1_2?s=electronics&ie=UTF8&qid=1317946581&sr=1-2
Best, more expensive option:
http://www.amazon.com/Link-Remote-Control-Booster-System/dp/B00023JJV6/ref=sr_1_1?s=electronics&ie=UTF8&qid=1317947235&sr=1-1
What an amazing color!!!!! I'm GREEN with envy (har-har!)!!!!
I'm searching around my house for something to skirt now- hmmm I might have to buy something new just to skirt it!
Another one hit out of the ballpark Jenny! Love it!
I love the detail you put in to your tutorials. They're acutally do-able! So very kind of you to share you knowledge with us lesser folk!
keelly
Loooooooooovvvvvvvvvveeeeeeeee moss green and lavender together! You are a color genius! KUDOS!
I wasn't' so sure about not putting the bottom on that ribbon border, but of course you were right! Looks much better that way.
A designer's strength is in restraint!
xoxo
Hey Jenny. Would this work for a reallly looong console? I don't want there to be sagging or rippling.
thank you.
thank you!!!!i have always wanted to know how you did that!
What do you think about a mirrored glass top, lightly foxed? I was thinking of that for my cup-scarred dresser and thought it might be an idea for your tv stand.
Love your site & all the great tips!
I love everything you do! I espically love the pictures you take of your design process. I am look for a new camera what kind of camera do you have??
Excellent and easy directions on everything you do. Beautiful work.