Thank you again for your votes with the Homies! It’s the home stretch (voting ends tomorrow! yikes!), and the race is so, SO close! If you have a minute, I would love your vote HERE and/or HERE. Winning would mean a lot of great traffic for me for years to come. Thanks a million! xo
One of my most popular posts ever is a no-sew project where I made roman shades by glueing fabric onto mini blinds. I think it was one of the first tutorials I ever put up. So crazy to think about how long ago that was! I’ve done the no-sew project a bunch of times now and I’ve figured out a few tweaks that (if you’re willing to pull out your sewing machine) make the shades look a little more professional and will help them last much longer than the all-glueing method.
You’ll still use the mini-blinds mechanism for the base (which helps keep the cost of this project way down), but the vinyl slats get ditched. The result is a slightly more relaxed shade, which I often prefer over perfectly stacked flat folds of fabric that look a little too-uptight or something. Also, I usually suggest a linen for DIY-ing roman shades because the loose weave is super forgiving for those of us that struggle to cut an exactly straight line. :)

Okay, let’s jump in!
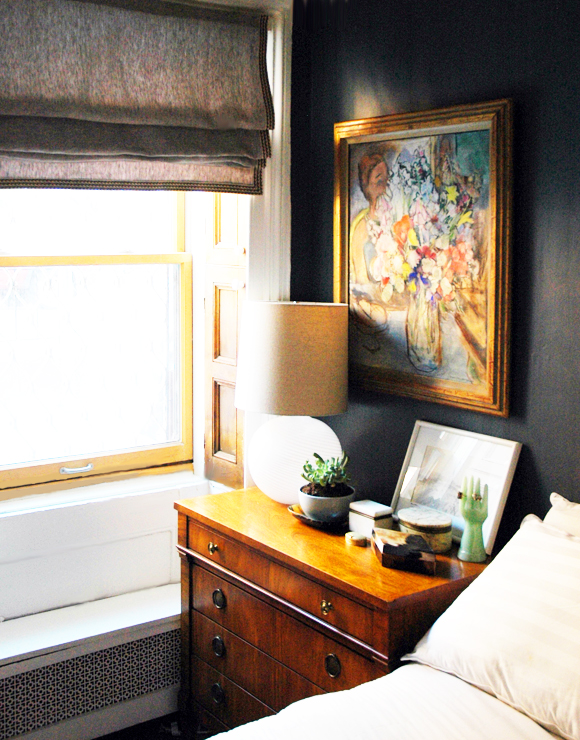
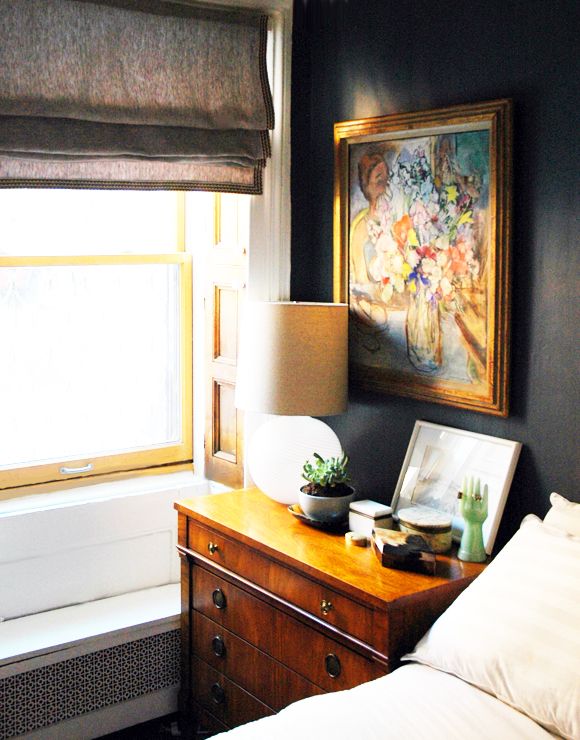
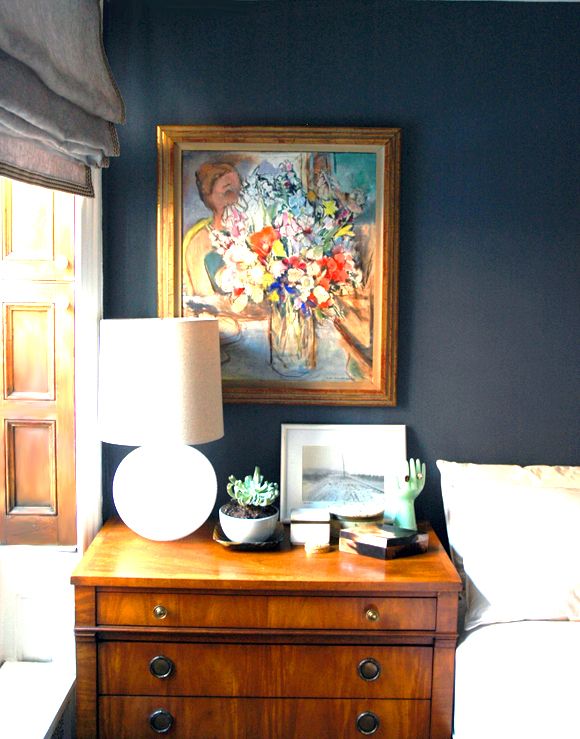
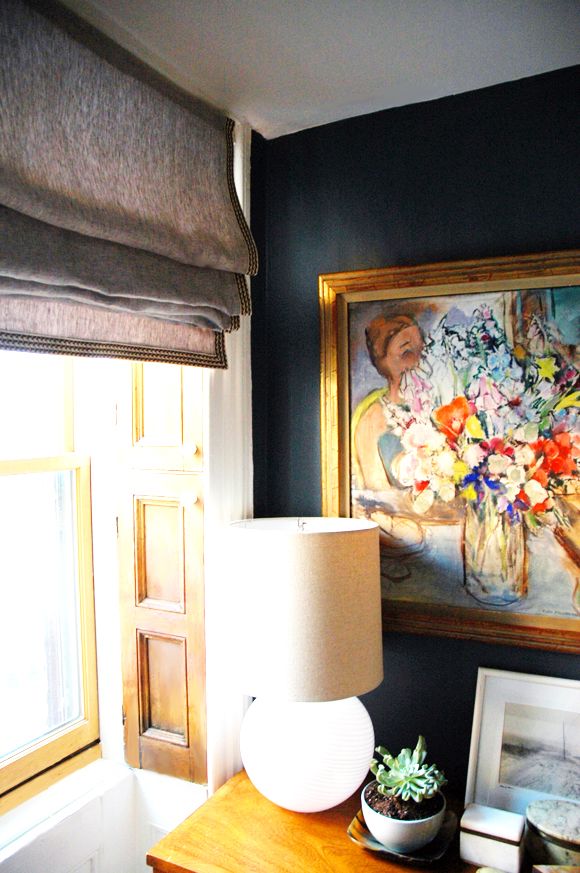
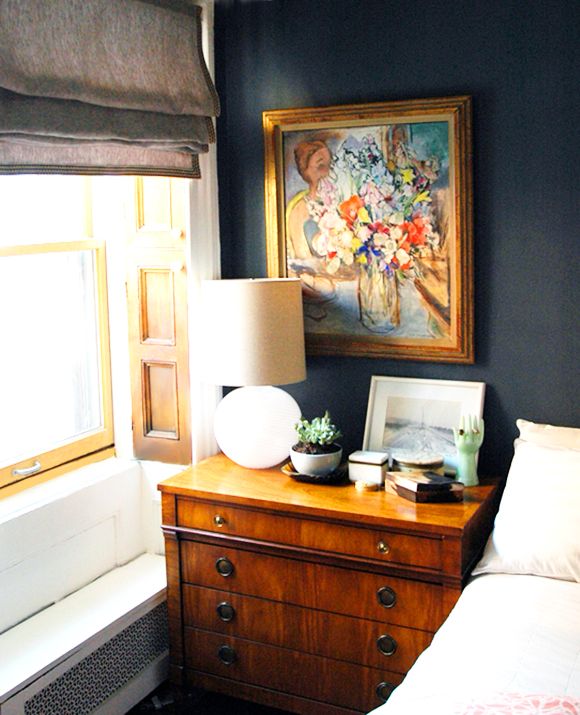
As you can tell from the photos, I ended up going dark on the walls in our master bedroom. The color is Benjamin Moore’s Anchor Gray. I’m in love – it’s really pretty and moody. I wanted to find some fabric for shades that complimented the wall color, but that was still in on the lighter side. I popped into Mood and they had this really pretty linen from a Marc Jacobs line that called to me from across the room. (one of my favorite things about Mood is they often tell you what fashion house made and used the fabric first – the printed silk section is OUT OF THIS WORLD)

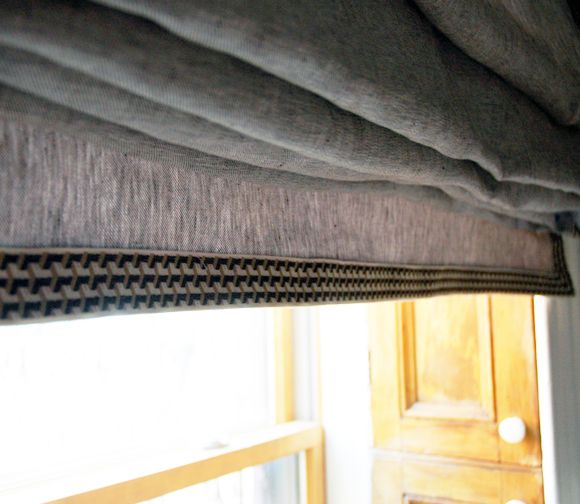
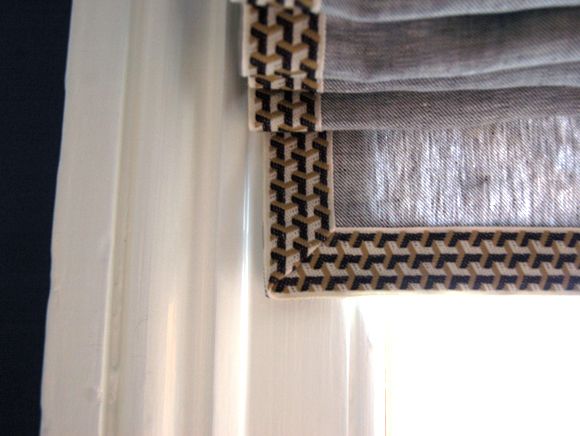
The linen had just the right amount of black and brown and blue to work right with the new wall color.

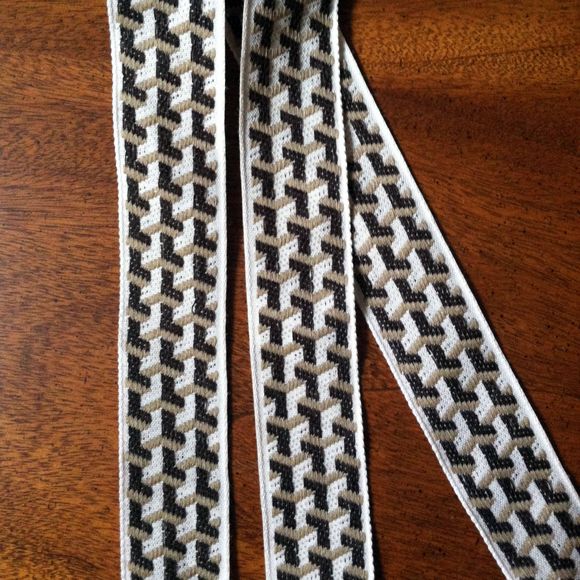
Then Mood came to the rescue again. As I was waiting for the elevator after checking out, I was admiring the tumbling block pattern on the floors (remember here?) and I suddenly thought of a vintage trim I bought years ago and had been hoarding for the perfect project.

I checked and there was barely enough to trim out two roman shades (so it must have been fate), and I was ready to roll. :)
So, I know tutorials (especially ones involving sewing) can be a little confusing, but trust me that picking out the fabric is the hardest part of this easy project. :) If you’re tackling this make sure you read through all the steps first so you have a general picture of how everything works together. The individual steps will be a cinch once you get the full picture.
1) Buy a cheapie vinyl mini-blind to fit your window (you can choose to mount it inside or outside of the sash). Cut your fabric to be three inches wider and four inches longer than the dimensions you want the finished shade to be.
2) Press your seams with a hot iron. For the seams along the sides of the shade, I folded a little more than half an inch, twice:

And then along the top and bottom of the shade, I folded about an inch of fabric, twice, so that the raw edge is hidden:


Then just hang your shades like you would a mini-blind, using the mounting hardware that came with the blinds, and you’re DONE! Unless you want to add trim like I did, but that’s just a matter of a quick line of fabric glue. I usually do shade trim in a U-shape so the top of the shade has no trim.
The biggest benefit of this approach over the no-sew version is there are no ugly mini-blind slats peeking through the fabric. And the finished product is probably more durable.
I love how soft and relaxed the linen looks and I think it works for my space, but if you’re looking for perfectly straight folds with no slouching at all, you’ll have to sew in wooden dowels along every fold. I’ve done it once before and it was about three times the amount of work and ten times the cost of these relaxed shades, but they are really lovely.
It is SO nice to have window treatments up so we don’t have to keep the shutters closed all the time! And seriously, isn’t this trim just perfect? So worth the wait to use it here!


havenot read thru all the comments
but if not mentioned, there is a special tape with the ring hooks ALREADY SEWN ON that you can buy.
used to get mine at the great shop on West 57th Street – GREENBERGS, sadly long gone. But somebody in the Garment district will have them … look for a ribbon and notions type shop
Life saver and turns making these into even easier!
I Love your shade valance! And this blog, thankyou!
One word to describe wonderful
OMG!! I so love your blog! I desperately need to make these for my bedroom. I was always confused with all the parts, but using cheap plastic blinds as the base is brilliant!!
You are so talented and have great ideas. I'm loving your living/family room. It's looking amazing. I so wish you could help me. You really are talented and have a great eye. It's very hard to do the soft creams with sea grass look and the cool NY contemporary/trad look with some fun. I mean by one person. And you can do it all. Thanks for always sharing your fantastic sources and paint colors. I OMG love your blog. Congrats on homies. I'm still waiting for that post where you share you won them!
Karen
Thank you thank you for saving my Roman Shades. I too had made them with the slats. They looked horrible but had put so much work into them I couldn't stand to throw them away….I put on the rings and I actually used the bottom of the blinds as my "wooden" slate. Put the eye hooks in there…even more $$ savings. They now look fabulous..Thanks Again
I’ve been wanting to make faux Roman shades for my sewing room for ages. Today was the day. I used some really cute fabric that I’ve had for years, backed it with loose weave muslin. Your tutorial was excellent! I much prefer the rings to gluing the fabric to the mini blind slats. It looks so much neater and more professional. The only thing I did differently than you was to use the bottom of the mini blinds to weight down the shade. I just ran the draw cords back through the tiny holes and tied knots, then replaced the buttons. Thank you for the inspiration!!
How do you install them without the bracket fold down clamps showing?
On the shades that I bought, the cord comes out the front, which makes me think I should glue the fabric onto the front? But you specify having the cord come out the back? Would you confirm? Thank you!
This is just wonderful! THANK YOU!!
One thing: I want my folds to be staggered. In other words, the top fold would be small, the next one would hang a bit below that, etc. I’m guessing this would mean that I need to increase the distance between the rows of rings as I progress down the shade?
This article is very useful for me.
A very useful article. I loved those blinds. I was looking for perfect designs for my windows! I never found those type of window blinds in Chennai. I got very valuable information from your blog.
I am making a roman shade for my daughter’s bathroom to match the shower curtain. I like your curtain best because it is lined and won’t look unsightly from the outside of the house too. With a little bit of modification, I am combining your directions with a couple of the other videos and am going to attempt this tonight. Thank you for the directions.
I used modpog for glue…what a mistake! It left stains where the glue was. Had to start over.
Your shades are really beautiful! Are they difficult to operate with the pulls behind the shade?
Love these Roman shades. Much simpler than gluing slats and I like the softer look of the folds.
Thanks for your tutorial. Your photos along with the description step by step were spot on! Will be trying this, but with the dowels. Instead of buying them, I’ll make them. Very easy, and will keep the cost down. Thanks again.
Alex