With all this talk about work schedules and approaches, I thought it would be fun to share some photos of my home office in progress.
(See here for the story on my vintage office chairs.)
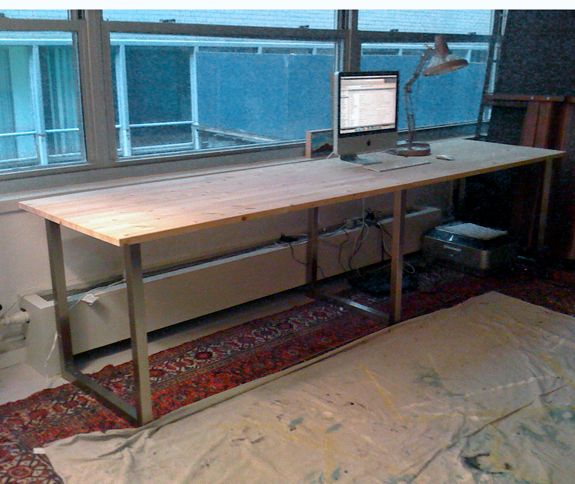
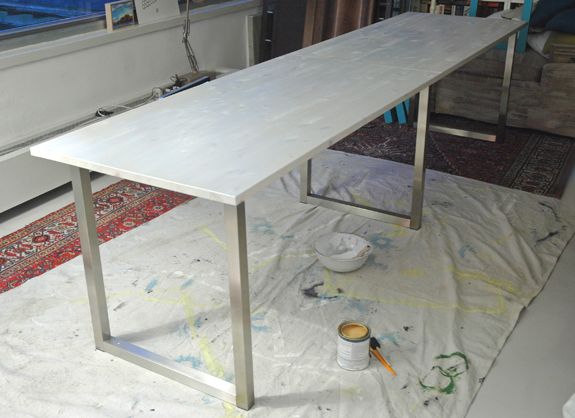
Our loft has two long banks of windows. One is in our living area and the other is in our office/guest space (both these rooms are open to each other). I wanted the desk to basically run the length of the windows so an assistant could work there during the day and my husband at night. I wanted a shallow desktop. Also I needed something with legs that were or could be pushed forward so the desk could sort of sit over the top of the radiator vents. Sounds like a custom job, right? No good for me ($$$$$), so I figured I’d have to build something myself (like this).
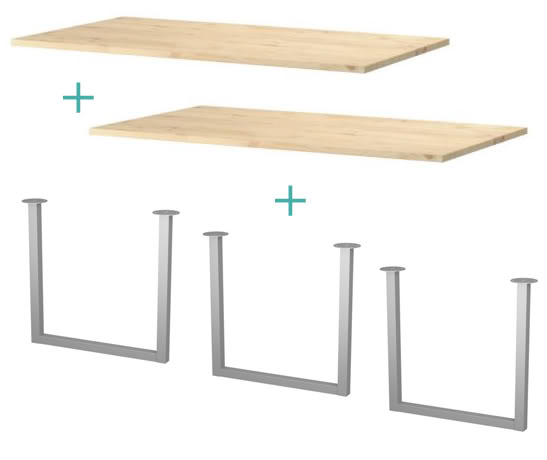
Then I remembered that IKEA sells interchangable table tops and legs at really reasonable prices. I was hoping for something on the more modern/streamlined side anyway. I was able to buy two of the VIKA pine wooden tops and three of these metal legs for about $90 total (the pricing is/was a little less in-store — I bought the legs for $10 each and the tops for $30 each).

The legs attached very easily with the use of a drill and the provided screws. Just make sure to measure where you want the legs to sit, so that the legs line up together.
We were a little nervous that putting a single leg under the seam of the table tops (in the middle) was a bad idea, but it has been really fine – no problems here. I really just didn’t want the added bulk of a fourth leg. Then it would just look like two desks pushed together. I’m so glad it worked to just use three legs. The result was exactly what I wanted.
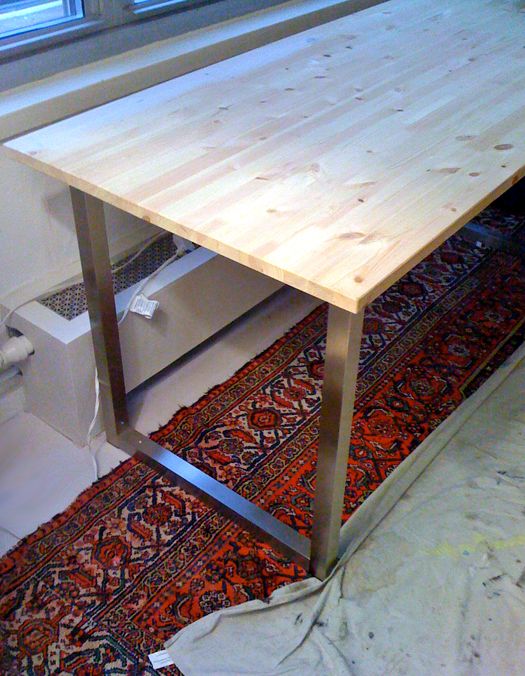
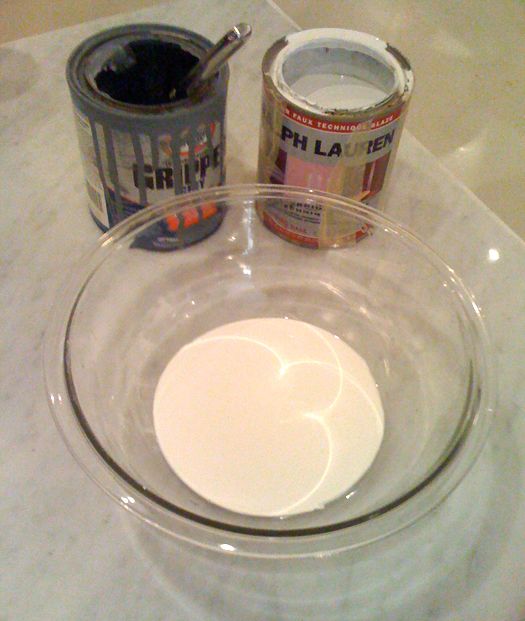
Once I had everything put together, I whipped up a quick pickling paint concoction with a little bit of white paint, some gray primer (because that’s what I had around in the dark gray department) and water. I would say I ended up with four parts water to one part paint. I wanted it on the watery side.

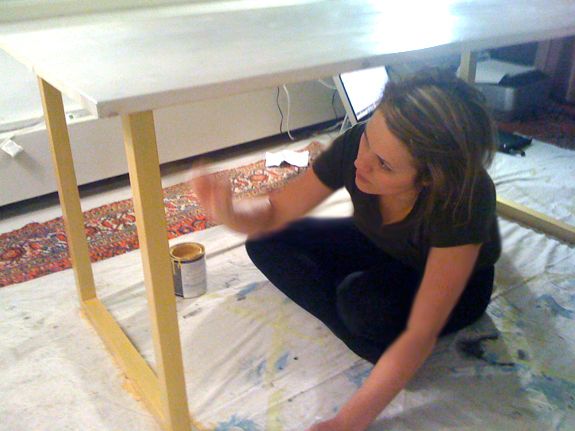
I wanted a brass look on the legs, so I broke out my quart of Ralph Lauren Regency Metallic Parlor Gold and brushed it on the legs with a foam brush (no primer first, because I was feeling a little lazy – it was after bedtime. See me in my jimjams?). I did two or three coats and then sealed the gold painted with Polycrylic.
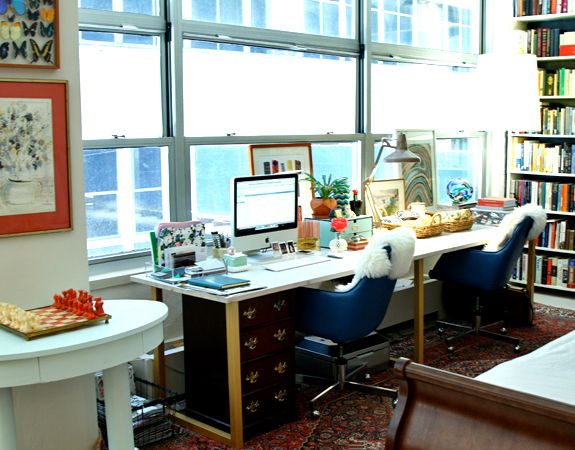
I made this desk a couple months ago and it has held up beautifully. No chipping on the legs and the tabletop has withstood it’s fair share of rogue crayon/marker scribbles.

I’m happy with the look of mixing the pickled wood with the modern brassy legs. And I really love how much surface space we have in that room now. It’s great for a second work station, but I also use it a lot for laying out fabrics and samples. Two thumbs up for this great IKEA product.
More on my office next week. Hope you have a wonderful weekend!! xx


Perfect time to post this Jenny! I was telling a friend to do this in his recording studio so now he can get a visual of what I meant. This looks great!
I have a question about the center leg. Did you straddle the top bracket so that it attaches to both tops? And did you seal to seam at all to secure it?
What a great idea! As a recent grad, I'm loving this budget idea!
I am making a home office for myself and 5 children. I love what you have done with the Ikea desk. I have the room painted a light oatmeal and the wall that the desks will be against an organge/red, the room has medium dark wood floors and white trim. What color would you suggest I paint the desk top. Also should I finish it with a sealer to protect it from the wear and tear of the family. You have really inspired me.
Thanks,
Ann