When I caught my four year-old gazing longingly at PBK and Serena & Lily catalogs, I knew that something had to be done about her boring bedroom. Both of my girls love color. They are girly, but not too girly, so an all-pink room wasn’t going to do.
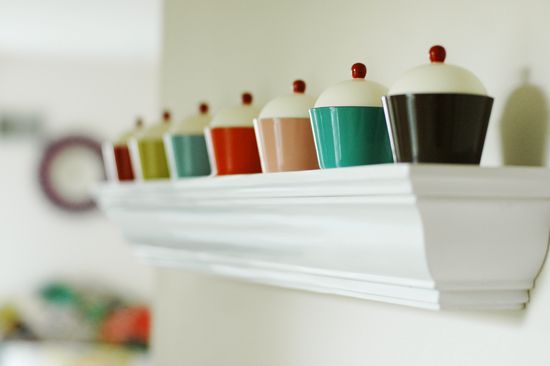
Here’s what we came up with on our very (very) small budget:
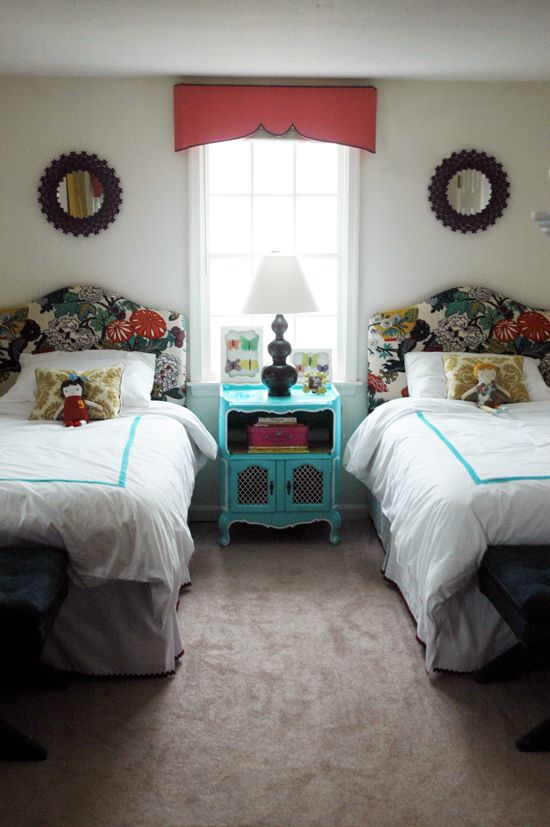
I already mentioned that I did a lot of the ‘shopping’ for the room in our basement storage area. It was fun to work with things I already owned.
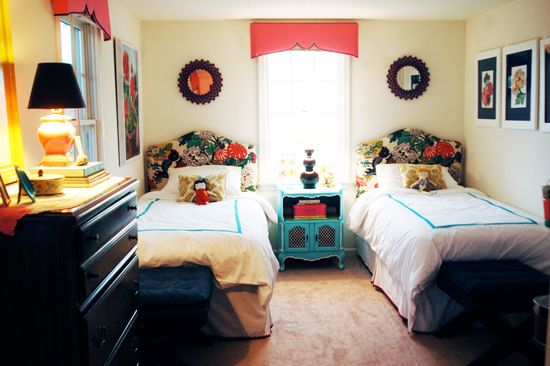
I really wanted new duvet covers for the twin beds – something simple and mostly white, but with a colorful trim that matched a color in the Chiang Mai headboards. I could have just bought some bedding like this from Pottery Barn, but I figured I could save myself a few hundred bucks and just get creative with a pair of all-white duvets we already owned and some turquoise single-fold bias tape.

The sewing is not perfect, but the result is honestly better than I expected. I like the punch of color in the sea of white bedding.

While I had the sewing machine out, I added a few yards of dark purple ricrac to the bottom hem of my cheap Target bedskirts.


I bought this cute little french nightstand at a vintage shop a few years ago. It’s seen better days and badly needed a paint job.

I went with turquoise again and trimmed out some of the moulding details with white paint.
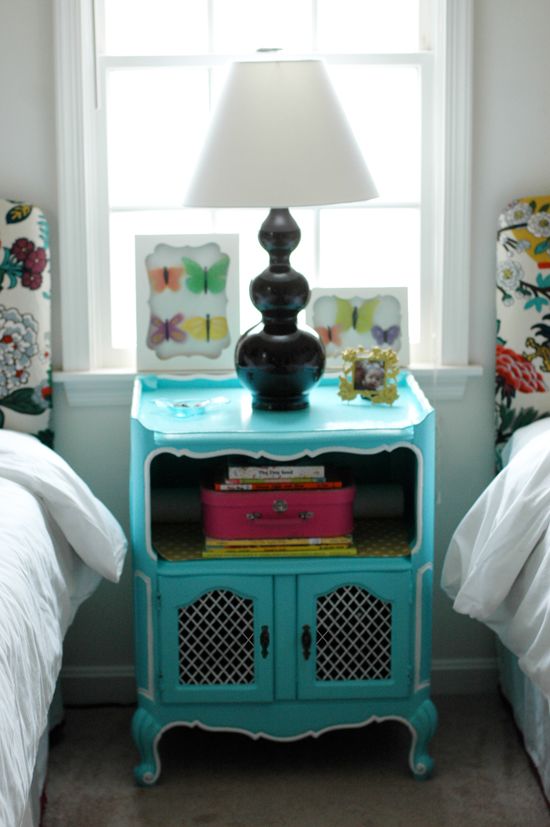
Michael’s had a bunch of the Martha Stewart collage frames on clearance a while back and I finally decided to do something with the two that I picked up. It was fun looking at pictures of butterflies with my girls and picking out shapes and colors to mimic using vellum paper.
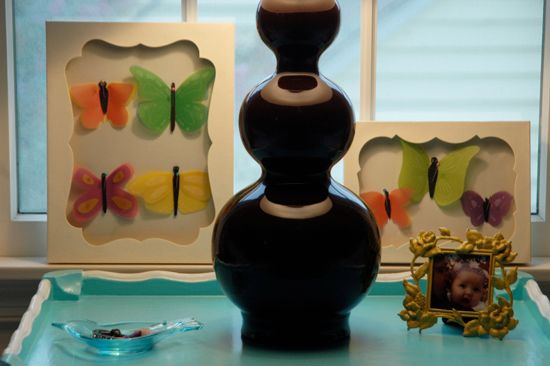
The lamp was $18 at HomeGoods, and while that price included a nice shade, it was badly damaged in our move (see before pic), so I had to buy a new shade at Target. I’m loving clean parchment shades these days.
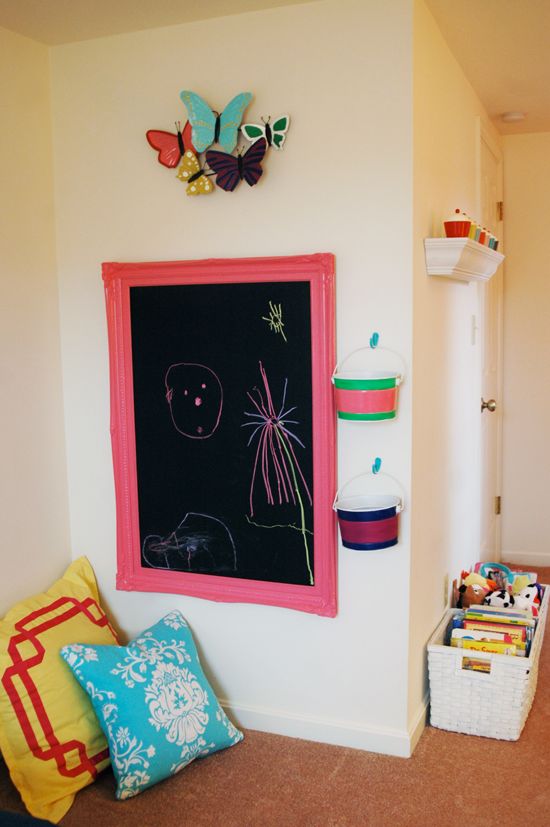
On the opposite wall from the twin beds, I reused a large frame and a piece of sheet metal to make a chalkboard. Here’s the before shot…

I mounted it low on the wall for easy kid access and also hung some freshly painted galvanized buckets filled with chalk. The floor pillows are from HomeGoods and Target. Above the chalkboard, I hung a metal butterfly wall sculpture thingy from Target’s clearance aisle. It was all black metal when I bought it a few days ago, but I (shocker) decided to paint the butterflies.
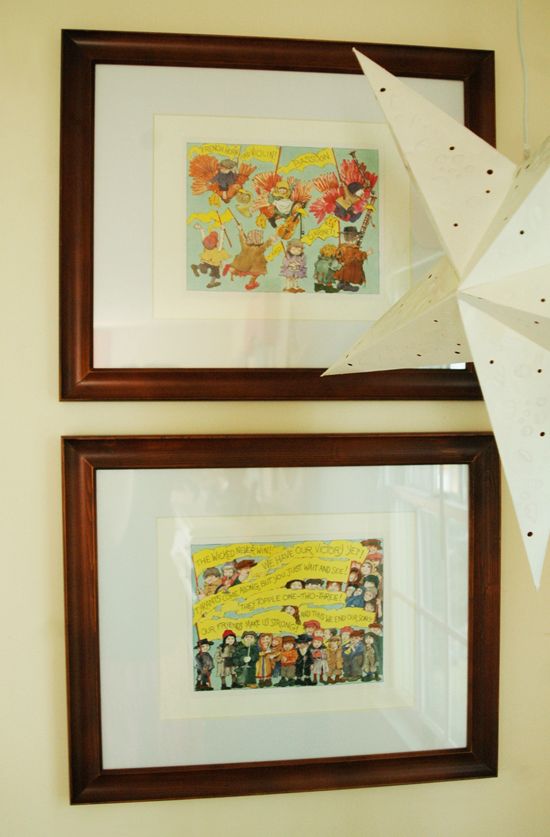
Years and years ago in college, a roommate gave me a paper star chandelier. It’s been in storage for a long time and I’m so glad I thought to dig it out for this project.

The colors weren’t right for the space, so I painted it white and now I love it in the room.

The star hangs over a striped slipper chair we found just sitting in our basement when we moved in and some framed pages from a favorite children’s book, Brundibar.
Also from our storage supply was this white mirror I bought a very long time ago at Nordstrom (well, really, Last Chance for all you AZ natives) for $20.

The old paint finish was a little too shabby chic for my taste, but I decided that yellow would be just the right pop of color for the above the dark brown dresser (which we can’t paint). In this picture you can also see what the white star looks like when it’s lit up. It’s the perfect night light for my girls – my two year-old calls it Twinkle-Twinkle.

The little pink lamp on the dresser used to be green. I found it at a thrift store for $0.50 and used a small brush to apply some glossy pink paint. Good as new.


I also found the embroidered linen table runner at the same thrift store.

The room’s not completely done yet – I still have some finishing touches to make – but I like the progress that has been made since last weekend.


Fabulous Jenny! Love the pink valance.
So darling! I love, love, love the duvet idea and your headboards turned out fabulously! This is a room that guests would feel right at home in should the need arise, as opposed to sleeping on too-small beds with polyester Disney Princess sheets and no bedside lamp for reading. And I loved all of your inspiration rooms as well.
is it terrible that I am completely jealous of your 2 and 4 year old and they're amazing bedroom??
Great job! I love the night stand and the valance.
It's great!!!!!!! ALL of it!!! Wonderful taste, great budget!
What lucky gals! Terrific job all around. Great vision. I love that you did all that with thrift and imagination. I'm loving that pink valance. What's the story on that?
Oh my gosh, I love it! I love all the different colors, what you did with the duvet covers and the rickrack on the bed skirt, and all the butterflies. It looks really great! I even want to sleep there!
What a great job! I love all the pieces that you painted, like the mirror, the pink chalkboard fram and the bedside table.
The ric-rac was a great touch as well.
What lucky girls!
Who needs Domino? We have Little Green Notebook!
Really pretty. I love the colors.
Wow! Your use of color is amazing! Magazine worthy makeover!!
Amy
I am just over the moon for this room – honestly, it is so awesome! And I love how it will work for your girls even as they grow older. Now I'm dying to go switch up some of my rooms!
oh my gosh- I LOVE IT! This is adorable! I love it all…. the colors, the fabrics, the bias tape and ric rac on the white (what a little thing that makes a big difference!)… That turqouise table is adorable, one of the cutest things I've ever seen! The star, the mirror and chalkboard… wow, all of it is adorable! And looks like you found some great deals. The thing I love most is that you took great deals and made the best of them! I love to see something not so cute become the perfect touch to a room with just a little paint and touch of love. Your girls must be in heaven here!
Wow! It's so cool. Your girls must be thrilled.
Absolutely beautiful! The colors are exuberant, but not overpowering. You have a wonderful talent and two very lucky little girls!
Eeek! I love it! Did you already tell us about the curtain thingy, because I'm dying to find out about that!?!
Fabulous! What a great room. I love the bright colors.
Absolutely fabulous!
I love the pops of color in all the furniture and accessories.
I'm curious, how you make the chalkboard. Did you just paint chaulkboard paint directly onto the sheet metal? or did you have to prep the metal in any way?
Thanks!
Amazing! I love all the details…you are so talented. I have never painted anything before… could you possibly give us a "painting furniture 101" with some tips on how to do it, and what to use? Thanks!
Thanks for all the nice comments, guys!
Alexandjess- I used Rustoleum's chalkboard spray paint right on the sheet metal. I didn't bother to prime – just applied several light coats, with drying time in between.
Lindsey – Painting furniture is a breeze. I don't think there's even enough info for a full post! Pretty much anything can be painted, especially if you're willing to use a primer first and/or sand the old surface a little. In the case of the turquoise night stand here, I did neither. Just used hi-gloss interior latex paint right on top of the old white paint. Similar to what I was saying above, the trick to a long-lasting and smooth-surfaced paint job is several light coats with drying time in between. Resist the temptation to slab it all on at once in a thick coat!
Hope that helps.
Oh – and for those who asked about the pink valence/pelmets, I'm writing a post about those now. Come back tomorrow (afternoon/evening, probably).
J
That looks amazing! LOVE it!
The transformation is absolutely beautiful. You guys did a brilliant job!
so pretty and adorable. you did a FANTASTIC job!!! wowowowoow… so creative. i love how everything compliments each other but its not matchy-matchy. i cant stand matchy stuff. and, i love that you did so much of it yourself .. that even makes it more special. can you come to my house and help me! please show more posts of your home… i want to see. :)
Too too cute. Wish I had a storage area like yours! Either way I love how you inspire me to think big within my (limited) budget.
I'm wondering if you repaint lamps just as you do furniture–no primer is needed? Will most any surface accept paint?
Looks awesome!! You have a great knack for accessories and I'm sure G & C absolutely love it! :)
Jenny, you did an amazing job, love it all.
X
V
WOW WOW WOW!!! I absolutely LOVE what you've done! Now you can come and do my girls rooms! Norway isn't that far away, is it?? :D :D
what a beautiful bedroom – your girls are so lucky!!! i wish i had grown up in a room like that. much inspiration as well…thank you for sharing!
The room looks so great! Makes me feel sorry for my daughter! Love the inspiration!
AMAZING Jenny! Your blog is my 'must' read on a daily basis and it is truly inspirational. The way you do everything on a budget sets you apart from the rest! I really appreciate all your posts and refer back to them on a frequent basis! Great job!
Oh my god it's soooo nice!
I love it!
I want this room! I love the new duvet covers and the blackboard and I ADORE the cupcakes and the top of the dresser. Ooh and the bed-side table.
And pretty much everything else !
What a great project. It's gorgeous x
I love the duvets!! the ribbon adds the perfect pop of color. the best part? Although perfect for your little girls the room doesn't scream kiddie room. Great job!!
Simply amazing!!!! I can't believe how cool of a room it is for so little money! LOVE the mirror painted yellow!
You won my giveaway so e-mail me when you get a chance!
darling, just darling!
really freaking cute! those valances are magnificent! Love all the color! You are painting master.
WOW! That is gorgeous and incredible. You've outdone yourself!!
so lovely and fun! the rickrack looks awesome.
simply amazing!!!!!
That is absolutely adorable! What you can do with very few dollars! Thank you for sharing.
Also, I was wondering if one could paint porcelin and have it turn out like porcelin again, like you did with the green lamp turned pink-apparently you can? What type of paint do you use?
Fan!
~Dina in Atlanta
I am in love! The trim on the duvet is genius!! WTG!!
I was just going to ask the exact same question as "Dina in Atlanta" How did you get such a great finish on the lamp with a brush? What kind of paint did you use?
Oh, forgot to say that everything looks amazing! You would never know this room was done on a budget!
Jenny- I love it. I love your creativity and your willingness to do so many 'crafty' things yourself. Great, great work.
I love how you did this. I love your ingenuity, reframing, repainting, repurposing, renewing, reusing.
And cheap! Yay you.
Gorgeous, sparkly room for kids which is not to kiddie. Brava.
Jenny- It all looks so wonderful. You are so stinkin creative, it's very inspiring.
hi again!-do you mind sharing the paint colors you used? pink lamp and turquoise table?
Amy
Everything looks amazing! Those headboards are just stunning (I'm a huge fan of that print and don't think it can be used enough!) and everything else compliments them so nicely. How lucky are your girls? They must love it.
Love it! Love it! I am looking forward to hearing about the valance. It is probably my fav part of the room.
Looking forward to your post about the valances…it's like you reached inside my brain and pulled out my imaginary guest room valances, sewed them, and dangled them before my eyes! This is EXACTLY what I've been picturing for my guest bedroom, which I want to be vintage and feminine.
WOW. That is all I can say. Just, WOW.