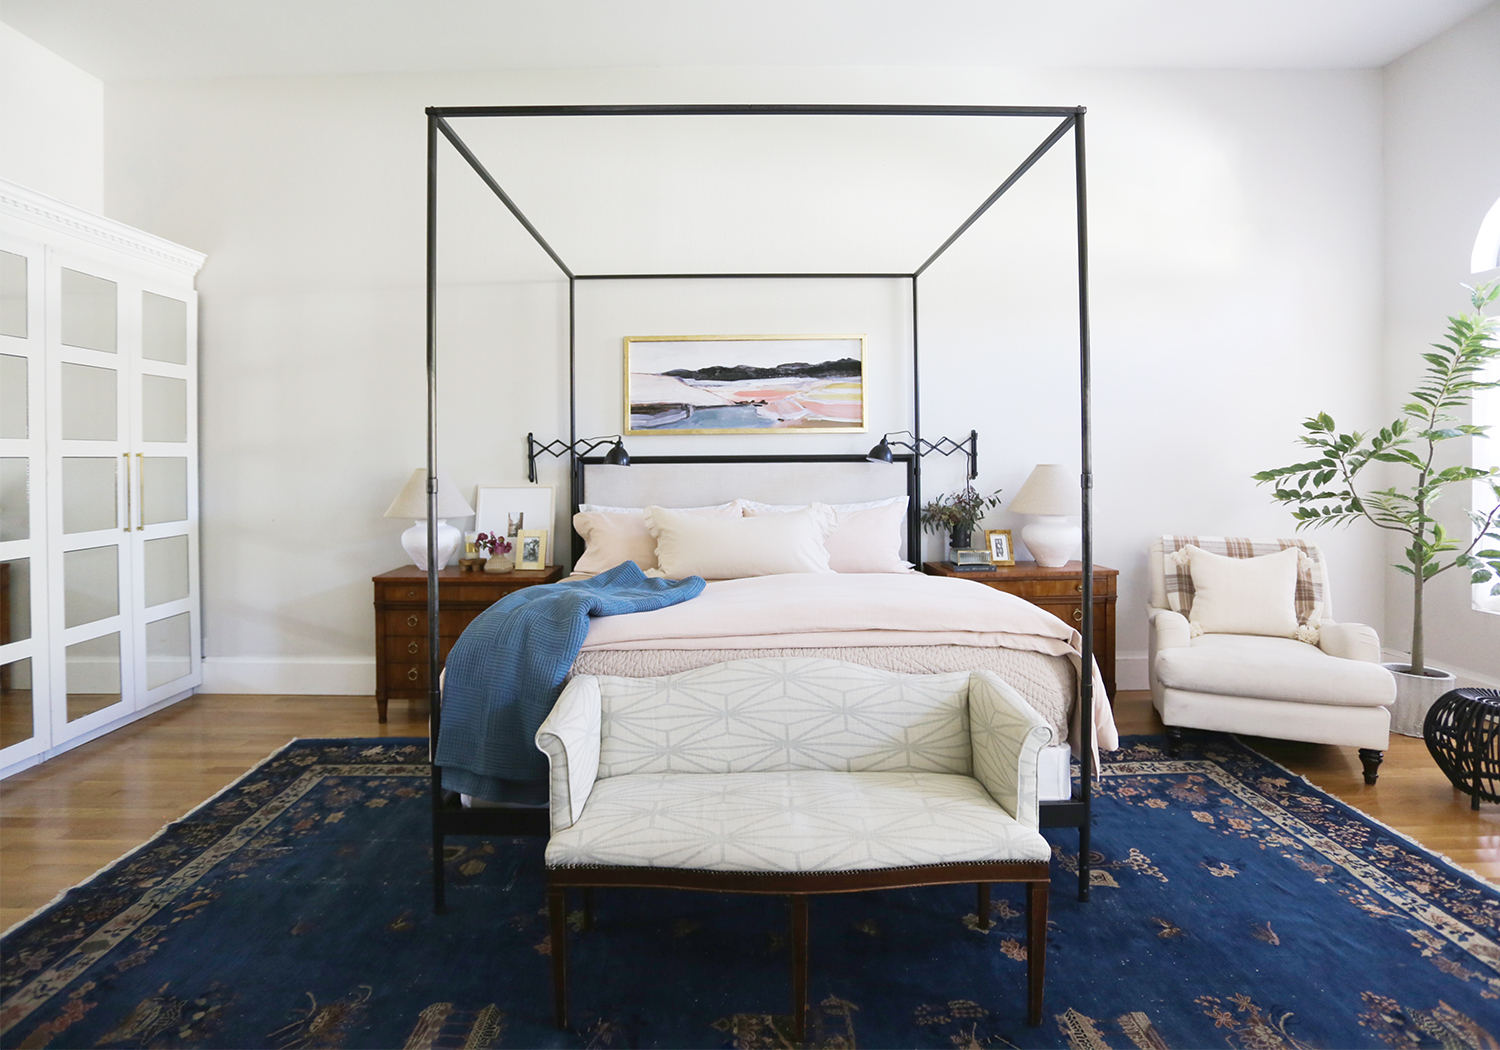
Yesterday we shared some pictures of my bedroom refresh and discussed mostly the bedding. You had so many questions on sourcing around the rest of the room that we decided to do a second post today sharing more of the elements of the room and a quick tutorial for the lamps I plastered! A lot of the items here in my bedroom are vintage, but we did the best we could to find pieces that have a similar scale and look, as well as some budget-friendly versions.
Sheet Set // Quilt // Blush Duvet // Down Duvet Insert // Ruffled Sham
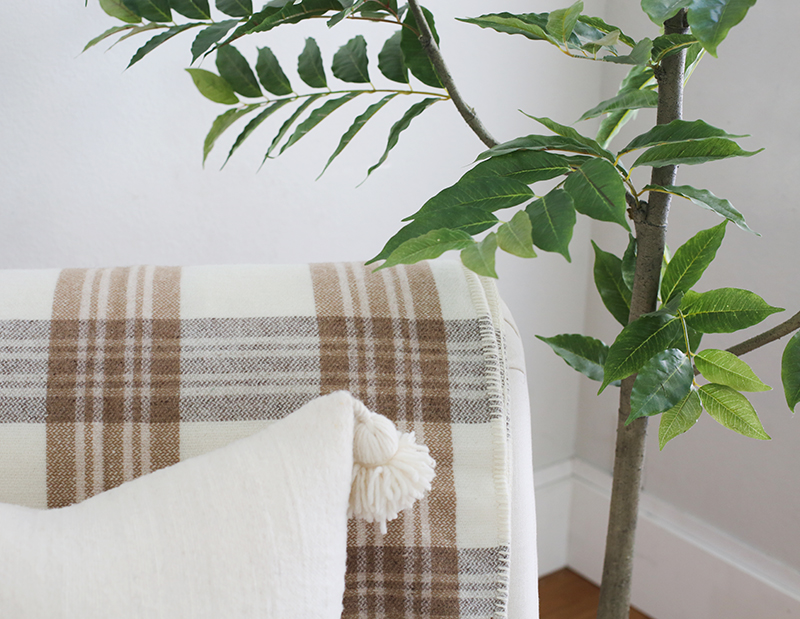
Floral Shams // Blue Throw Blanket // Plaid Throw Blanket

Bed Frame (similar) // Ottoman (similar) // Wall Sconces // Burl Frame
Glass Box (similar) // Roll Arm Chair // Vase
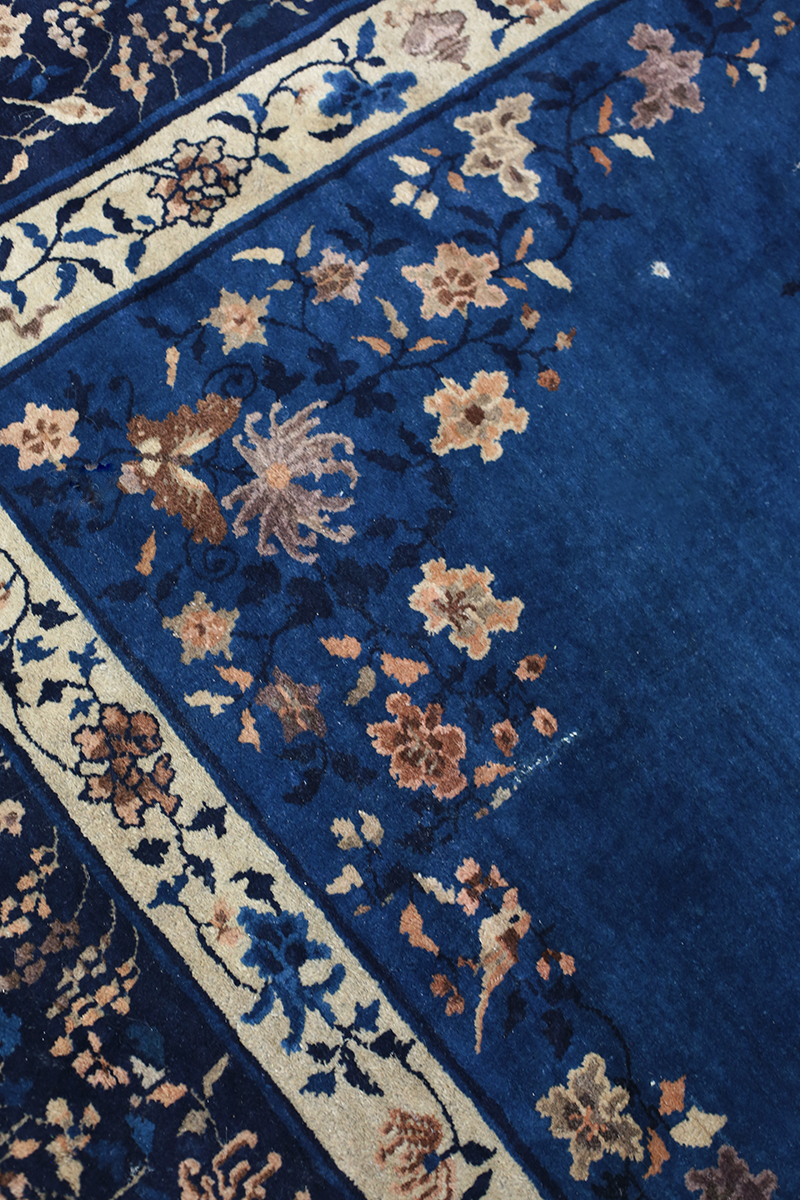
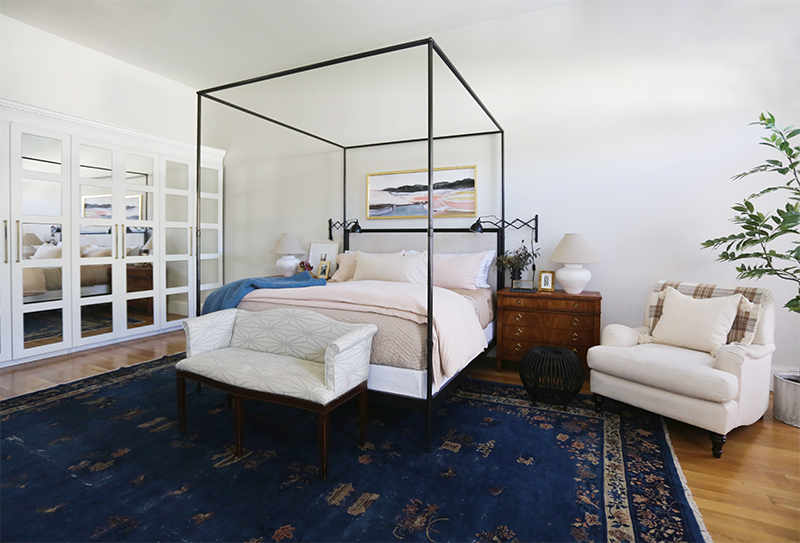
I bought this antique Chinese rug for $250 on eBay years ago, and while it’s seen better days, I still love it and would have a hard time replacing it with another rug. The indigo blue ground color is punchy and vibrant but still livable, especially with the more neutral bedding and wall paint color (which is Benjamin Moore Classic Gray). I love using sources like Ebay and Etsy to find vintage rugs like this one. I linked a few really similar options here below. While they aren’t quite as inexpensive as mine, these are still great prices for vintage rugs of this size! And if you are checking these searches regularly, those special deals will definitely come up! Online vintage shopping is a lot like thrifting – the name of the game is consistency!
Vintage Rug Option #1 (similar) // Vintage Rug Option #2 (similar) // Vintage Rug Option #3 (similar)
Budget-Friendly Rug Option #4 (similar)
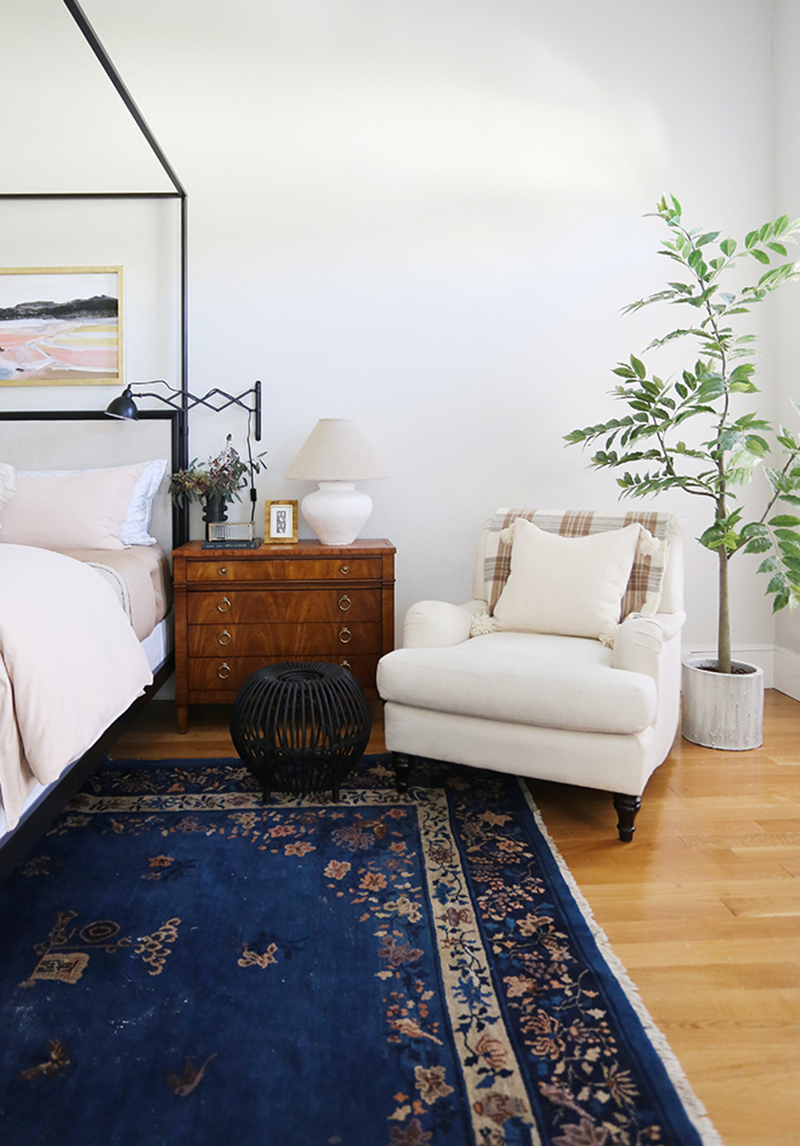
We have always had a faux fiddle leaf fig tree in this corner of 0ur room, but I was excited to swap it out for something a little different. I love seeing and using real and faux trees with smaller leaves these days. And with faux trees, it is so much easier to make smaller leaves look realistic! This faux Nandina tree is one of the best I’ve seen and it’s right about $100! Here I used the 72″ size.
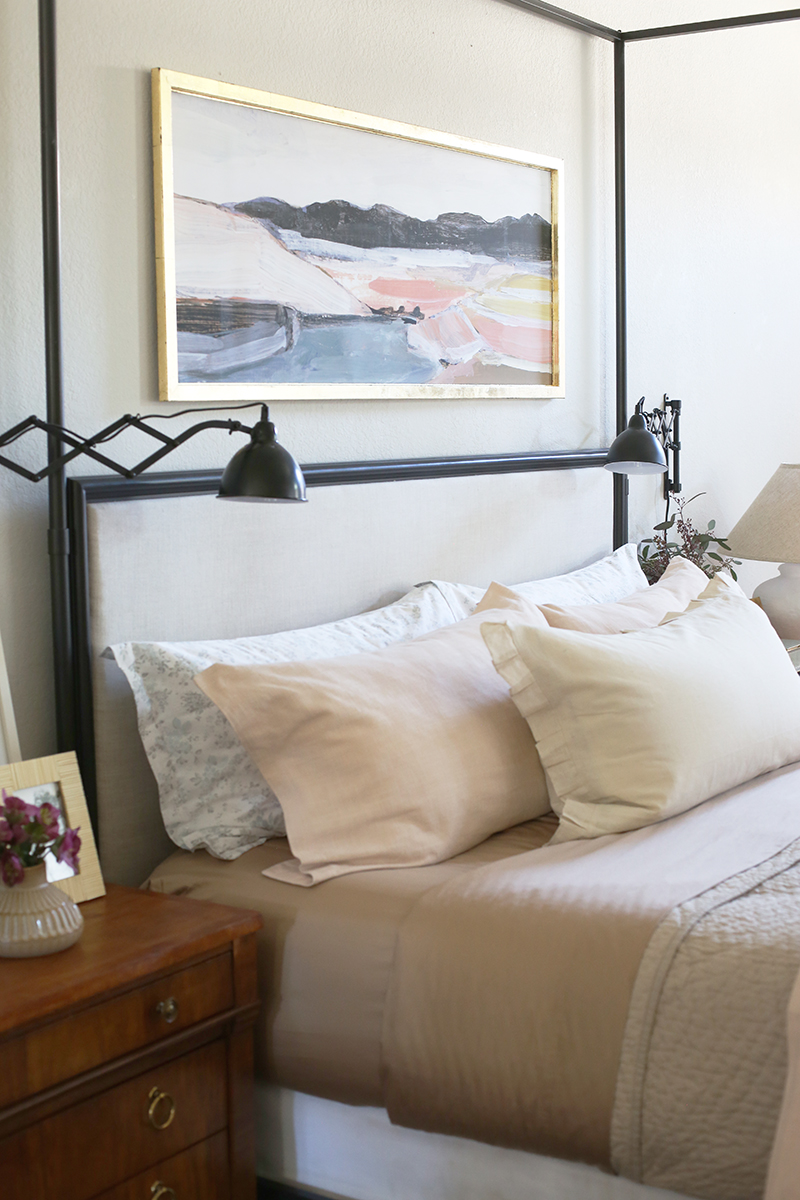
A lot of you asked about the art above the bed! It’s a new print for Juniper Print Shop by artist LaurieAnne Gonzales called French Cove. We are releasing it next week with a whole collection of prints in this 22×55″ size, which is perfect above king and queen beds! We suggest using IKEA’s Bjorksta metal frames for our oversized prints and I gold leafed one for my bedroom refresh. You can check out my Insta story highlights for a quick tutorial!
Sheet Set // Quilt // Blush Duvet // Down Duvet Insert // Ruffled Sham // Floral Shams
Speaking of beds, we’ve had this upholstered canopy bed frame from Restoration Hardware for a long time! It was an investment piece, but absolutely worth it. I found a few similar options for those of you trying to recreate this look on a smaller budget. A quick tip about canopy beds – I think these usually work best in rooms with ceilings that are 9′ and taller! Otherwise the canopy can close in the room a lot. We have really tall ceilings in our bedroom and I think the canopy helps make our space feel a little less vast and more cozy.
Bed Frame (pictured) // Bed Frame Option #1 (similar) // Bed Frame Option #2 (similar)
We have had this classic roll arm chair for years and every six months or so the cream sailcloth upholstery starts to look a little dingy. But it’s nothing a quick session with my absolute favorite upholstery and carpet cleaner can’t handle! We use the same product on our oatmeal linen slip covered sofa and it works wonders! (Just be sure to do a test spot before cleaning your furniture or carpets!) I also use this super handy rechargeable fabric shaver to remove any pilling or snags. These two things keep my upholstery looking great, even with four kids and a giant dog! But a quick warning: Do not use either if you are short on time! It’s almost impossible to stop using these products once you get them out! No sofa cushion or sweater will go untouched when I’m on a roll! ;)
Cream Roll Arm Chair // Budget-Friendly Cream Roll Arm Chair Option #1 // Budget-Friendly Cream Roll Arm Chair Option #2
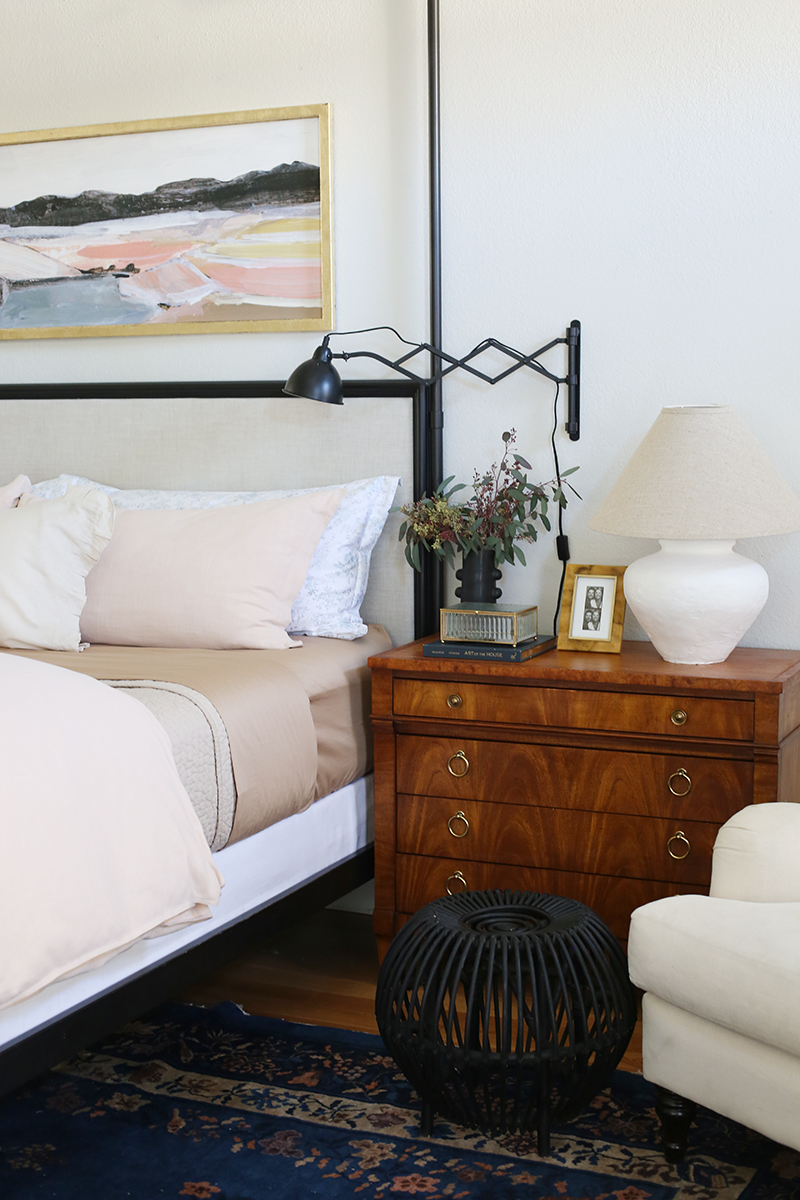
I also had a lot of questions about my nightstands. These are antique mahogany chests and if you’re looking, I’d search Facebook Marketplace or Offer Up for something similar. I love the character and age of these nightstands! They add a lot of warmth to my space.
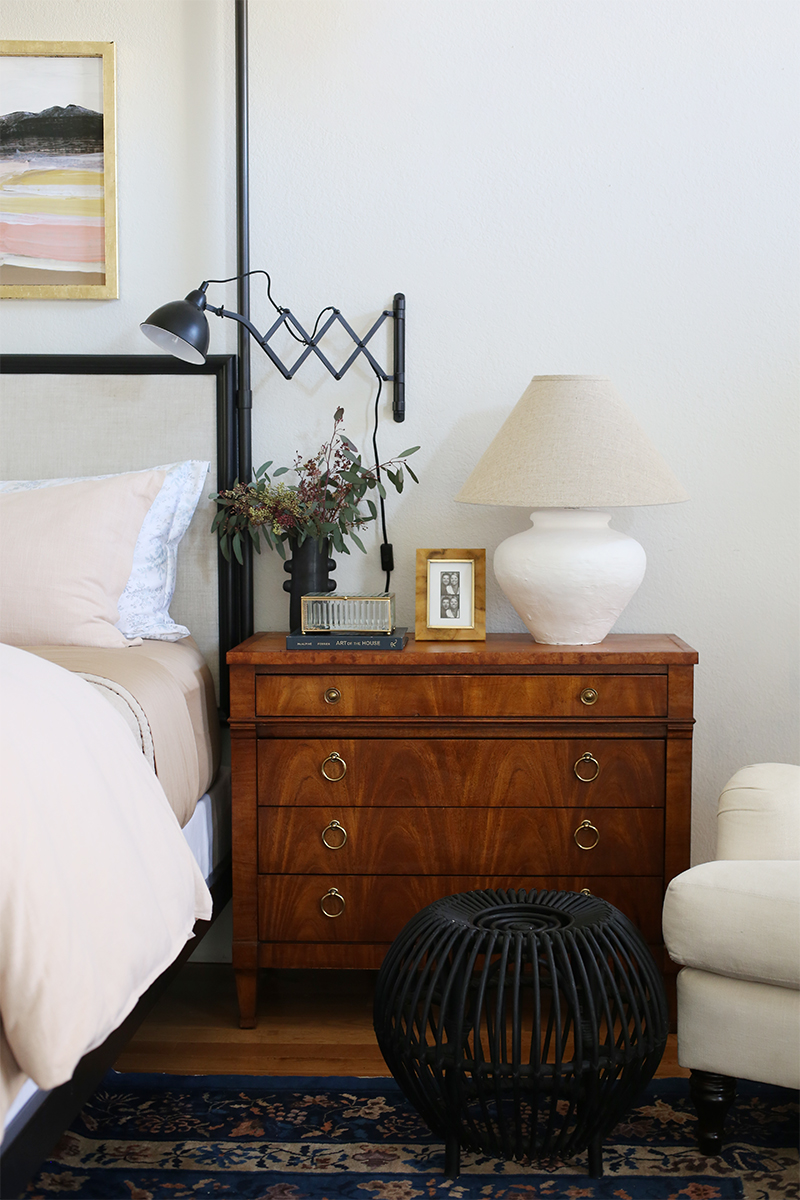
Let’s talk about lighting next! Since I opted for camel color sheets instead of my usual crisp white, I really wanted to add a healthy dose of white in other parts of our room. I also wanted to pair some wall sconces with big beautiful table lamps on our nightstands. I love that combo! I was hoping to use table lamps I already had, and knew I could figure something out with these that we bought for the Evergreen Sunroom. I loved the shape and size for my space, but the finish was not right. But that’s the easy part to change! Plaster to the rescue!
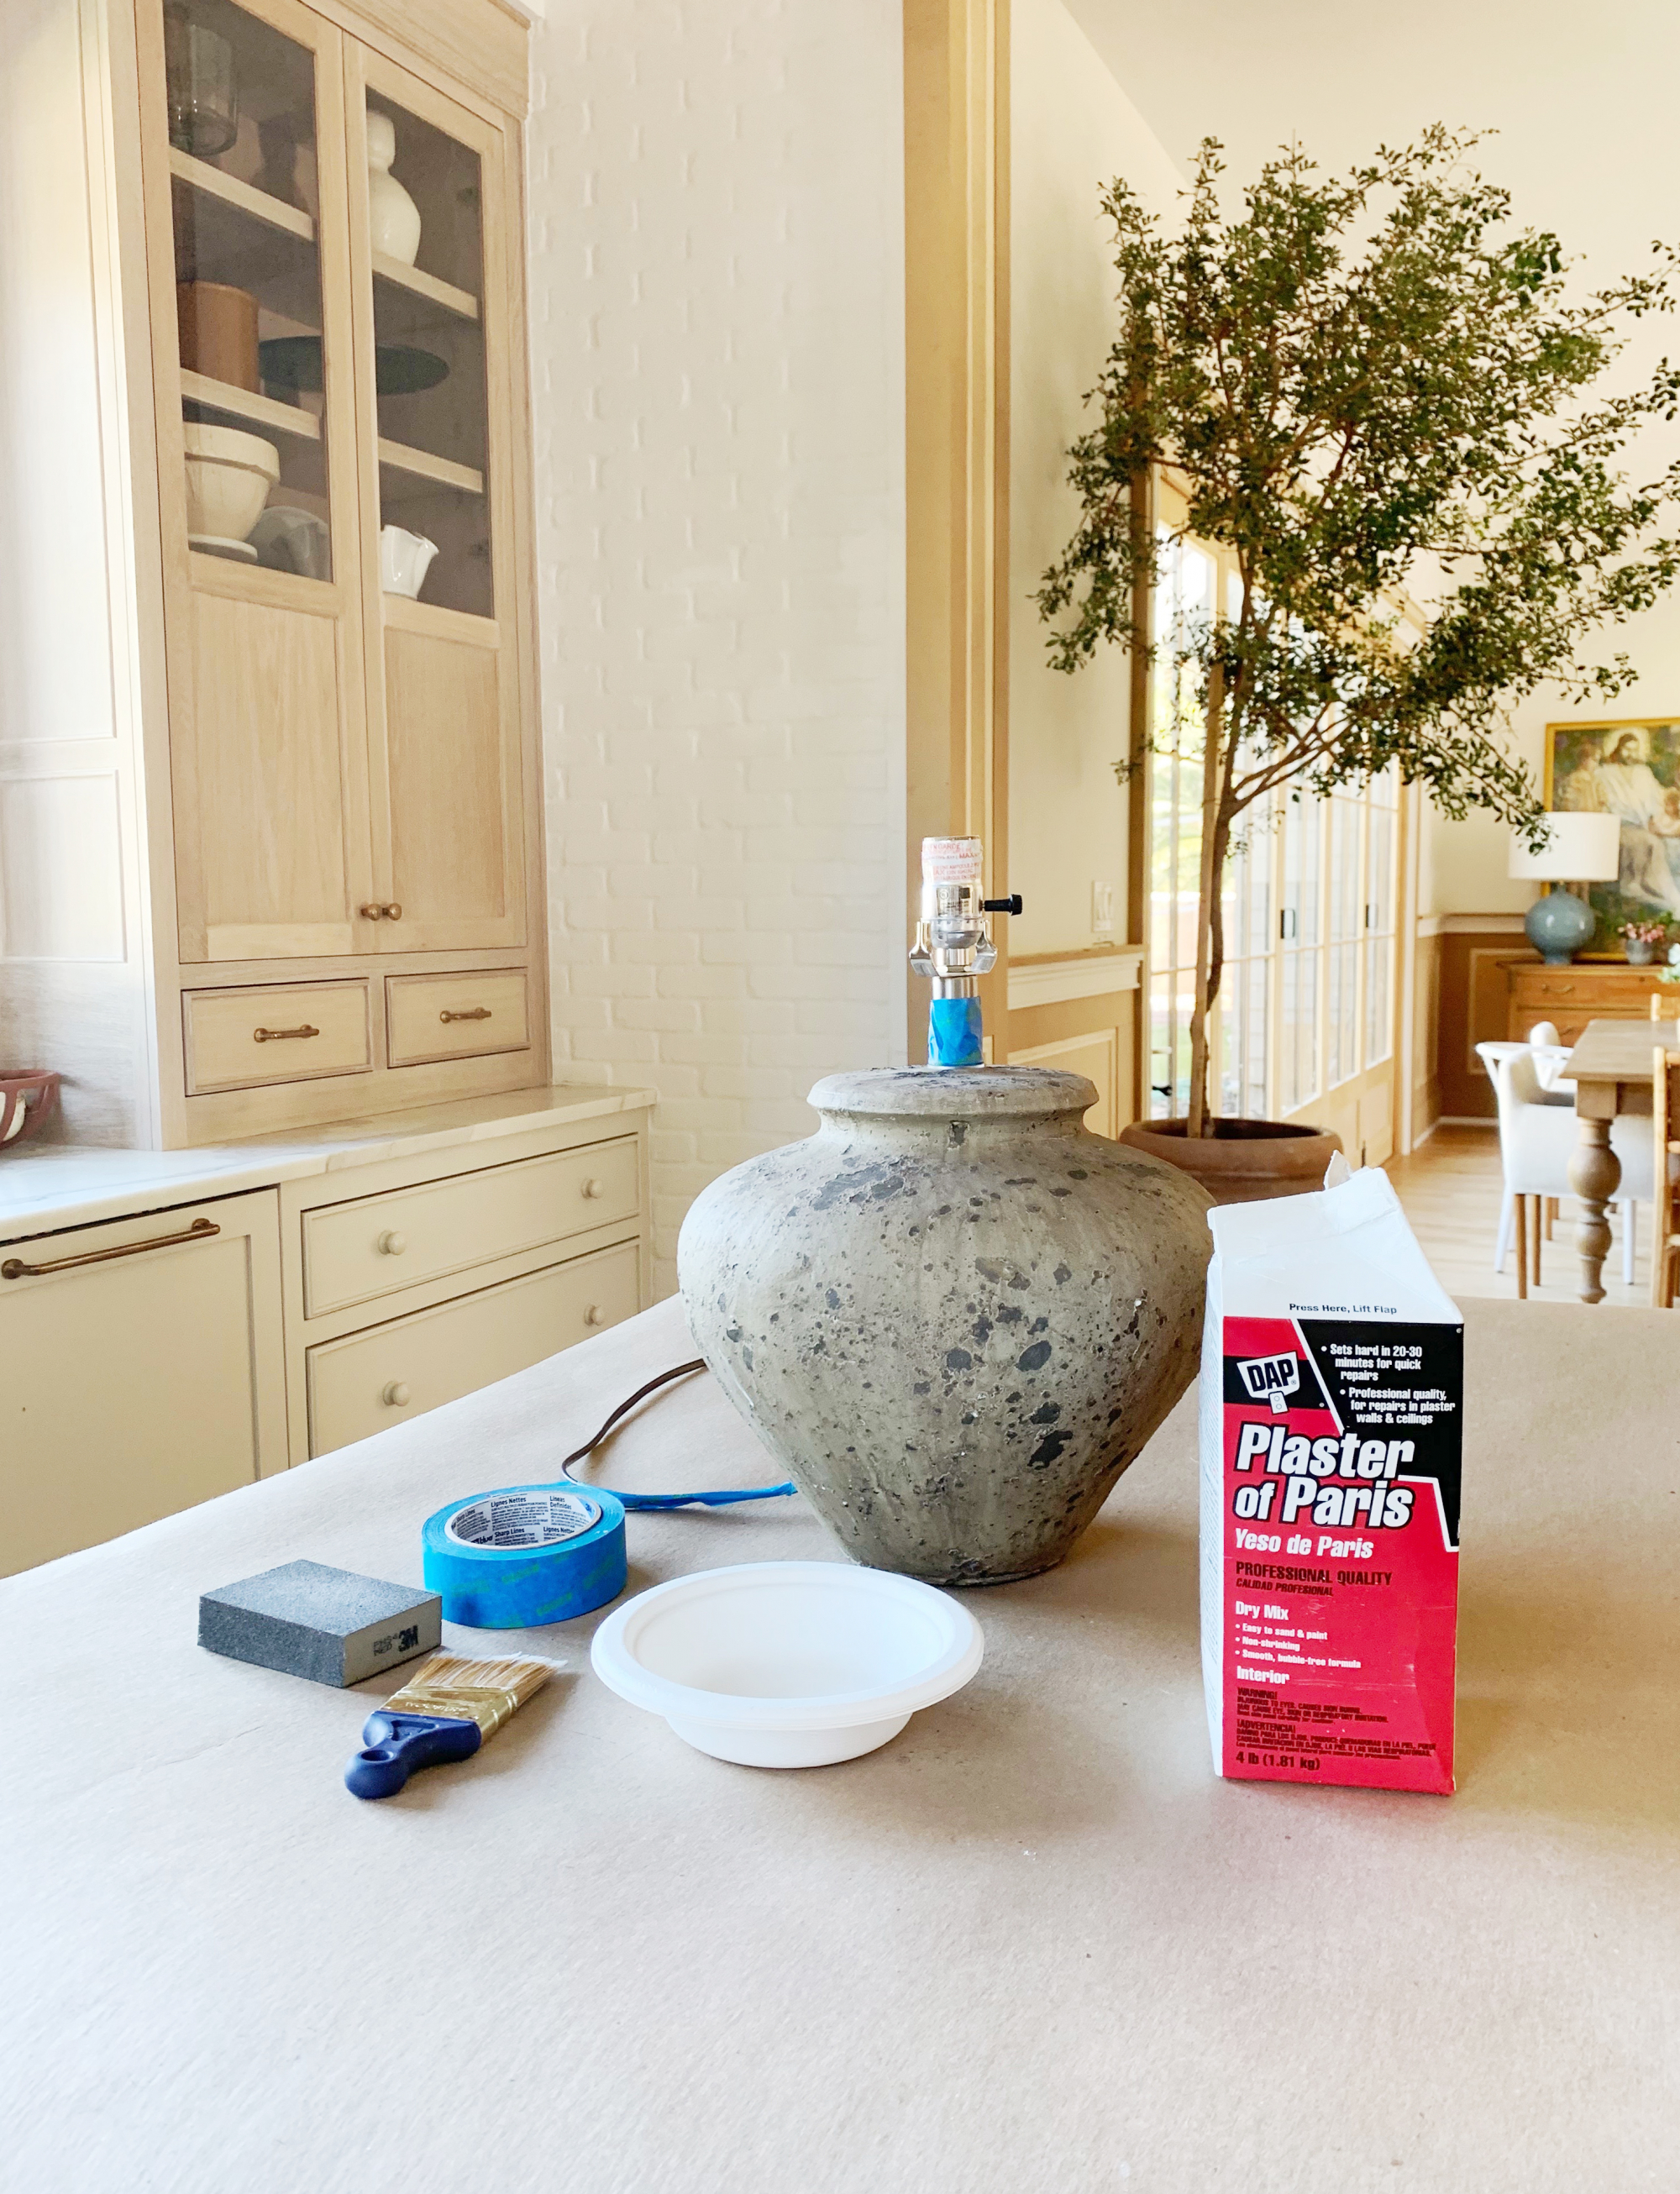
Plaster of Paris // Sanding Block // Paint Brush // Painter’s Tape
Wall Sconce // Burl Wood Frame // Glass Box (similar)
You can use any type of lamp for this project – try checking thrift stores! It’s definitely more about the shape and size than the finish. You can even use this technique on glossy, glazed lamps! Just start with a layer of white spray primer so the plaster has something to grip on to.
Start by taping off your cord and metal pieces on the lamp neck with blue painters tape. When doing this type of DIY it’s a good idea to take a little extra time on this step to ensure a crisp, clean line. A dead giveaway for any DIY project is messy brush marks where paint or plaster should not be!
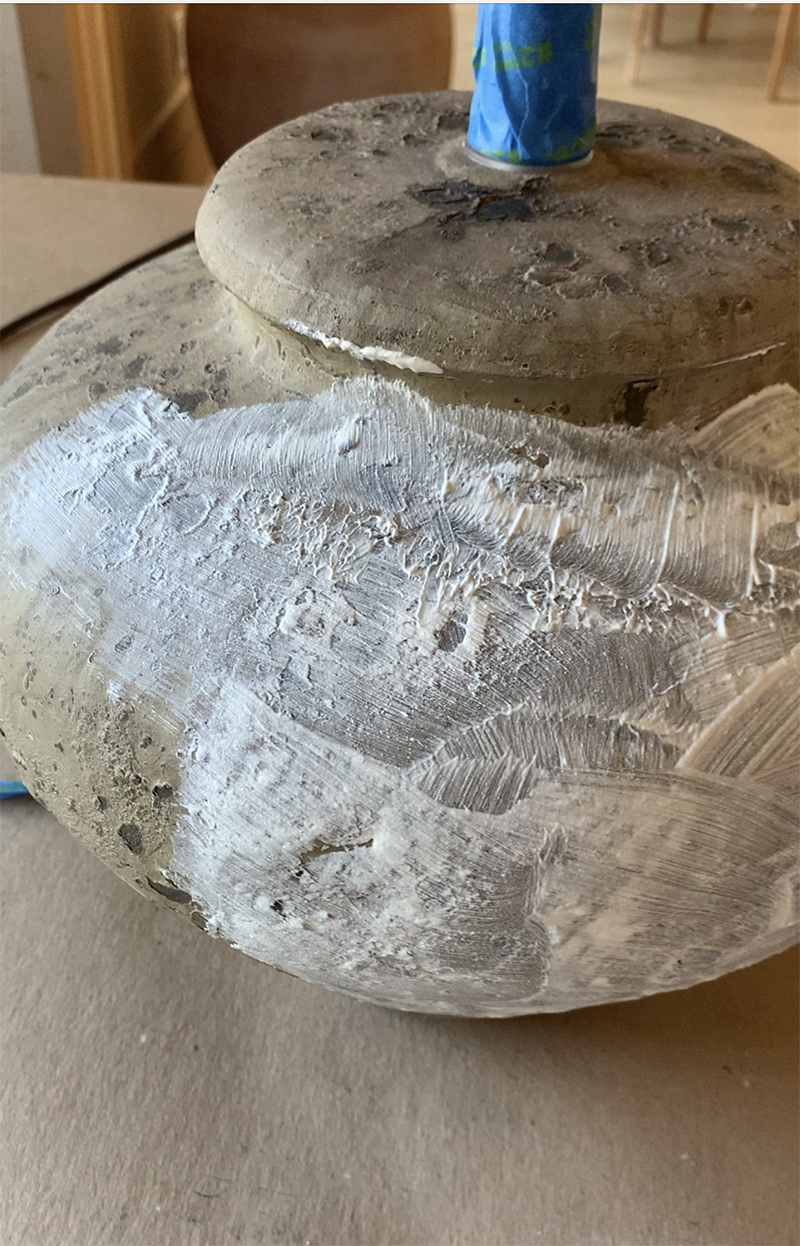
Mix your dry plaster with water and stir until you have a consistency similar to pancake batter. Using a 2″ angled brush, start applying your plaster in a single thin coat. You will need to work relatively quickly. Wet plaster has about a 10 minute window before it starts to harden. As the plaster starts to harder, it’s easy to use your brush to sort of “dab” away any paint lines and add a little bit of texture to the finish.
I like how these lamps looked here, after just one coat and was really tempted to stop here. But I wanted a solid, almost cast plaster look, so I kept going with a second coat and light third coat for full coverage!
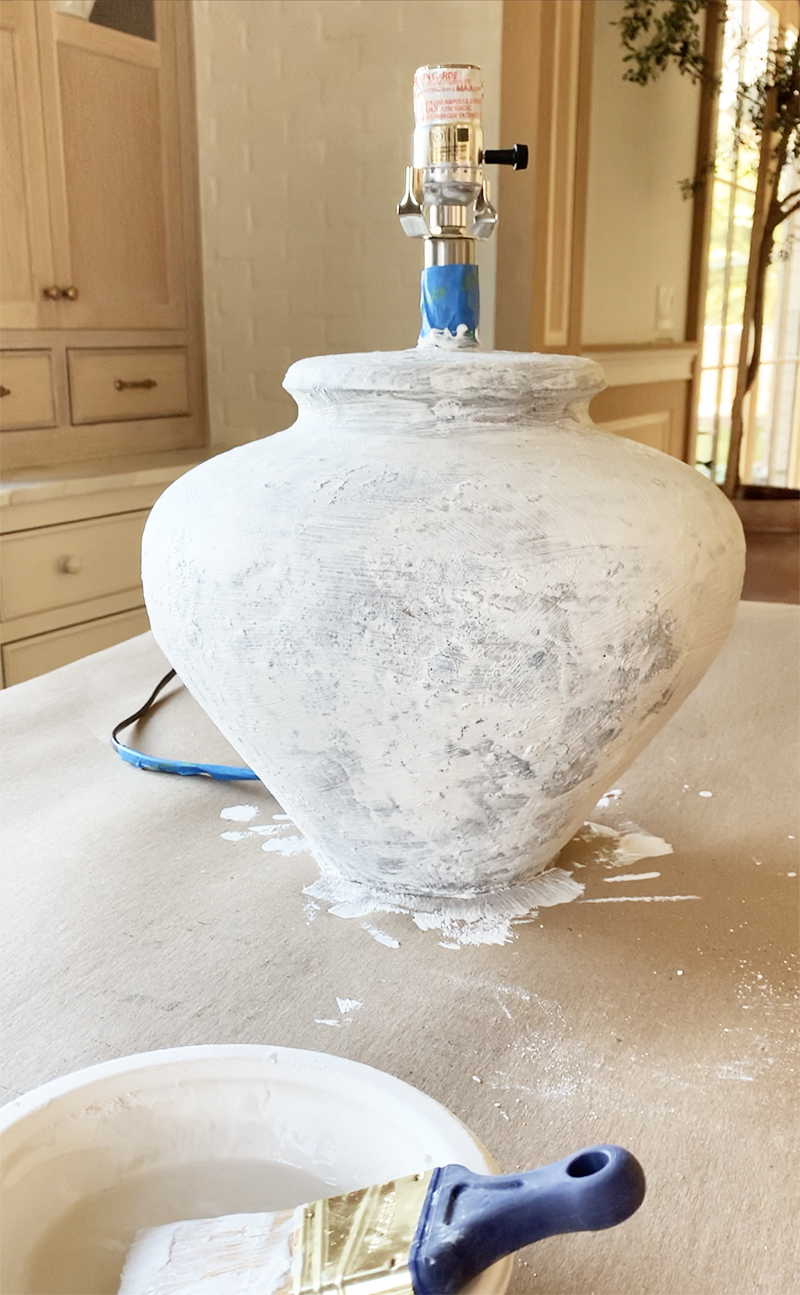
On my final coat, before the plaster dried, I used just water on my brush to sort of wet sand the plaster and smooth out any rough parts or brush marks. You can seal with a Polycrylic sealer or a wax to protect your raw plaster after it has completely dried. And if you want to see a video tutorial of this DIY, I posted a step-by-step on my Instagram stories in a saved highlight called “Plaster Lamp.”
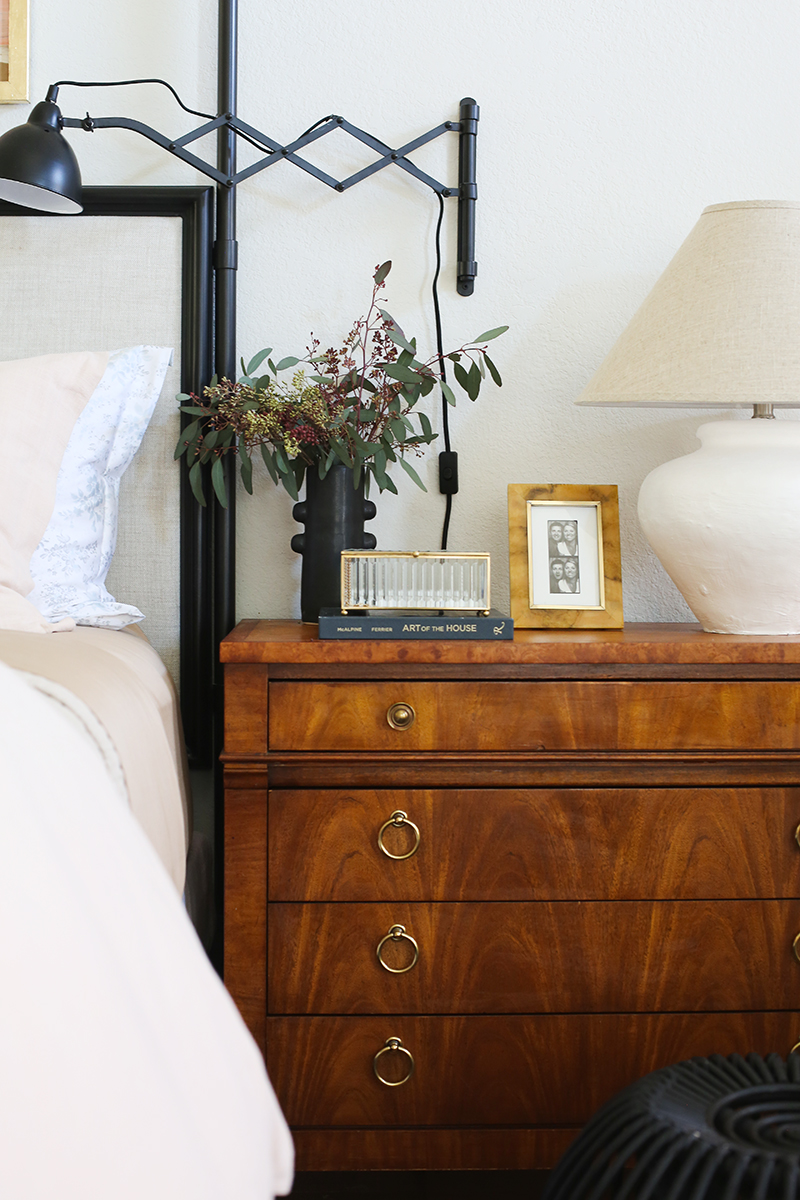
Here’s the finished result! I love to subtle texture and imperfections! I replaced the original lamp shade with this Empire style linen shade, which has a more exaggerated cone shape that I’m really loving again after years of using mostly drum shades!
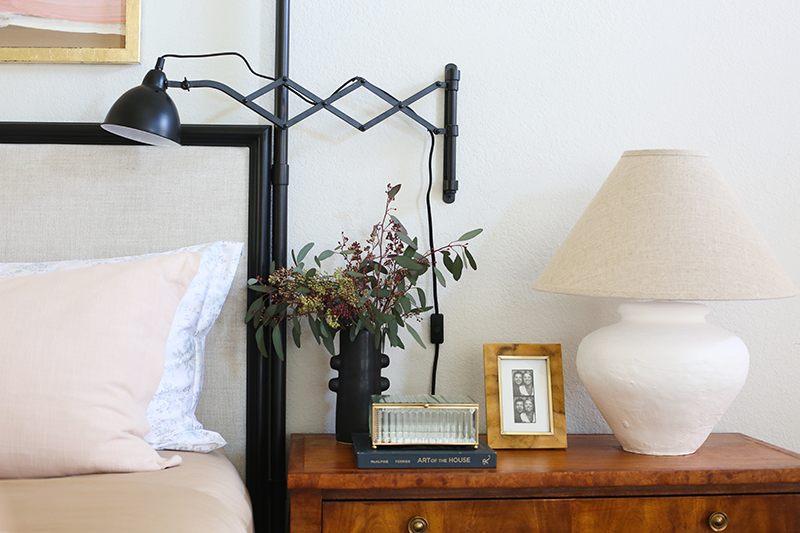
We put together a round up of some ceramic table lamps here that I really love as-is but that I think would also look great with this plaster tutorial. I usually gravitate toward a gourd style lamp, where the base is at least 50% as wide as the shade diameter, ideally even more than that, but absolutely feel free to get creative on the shape!
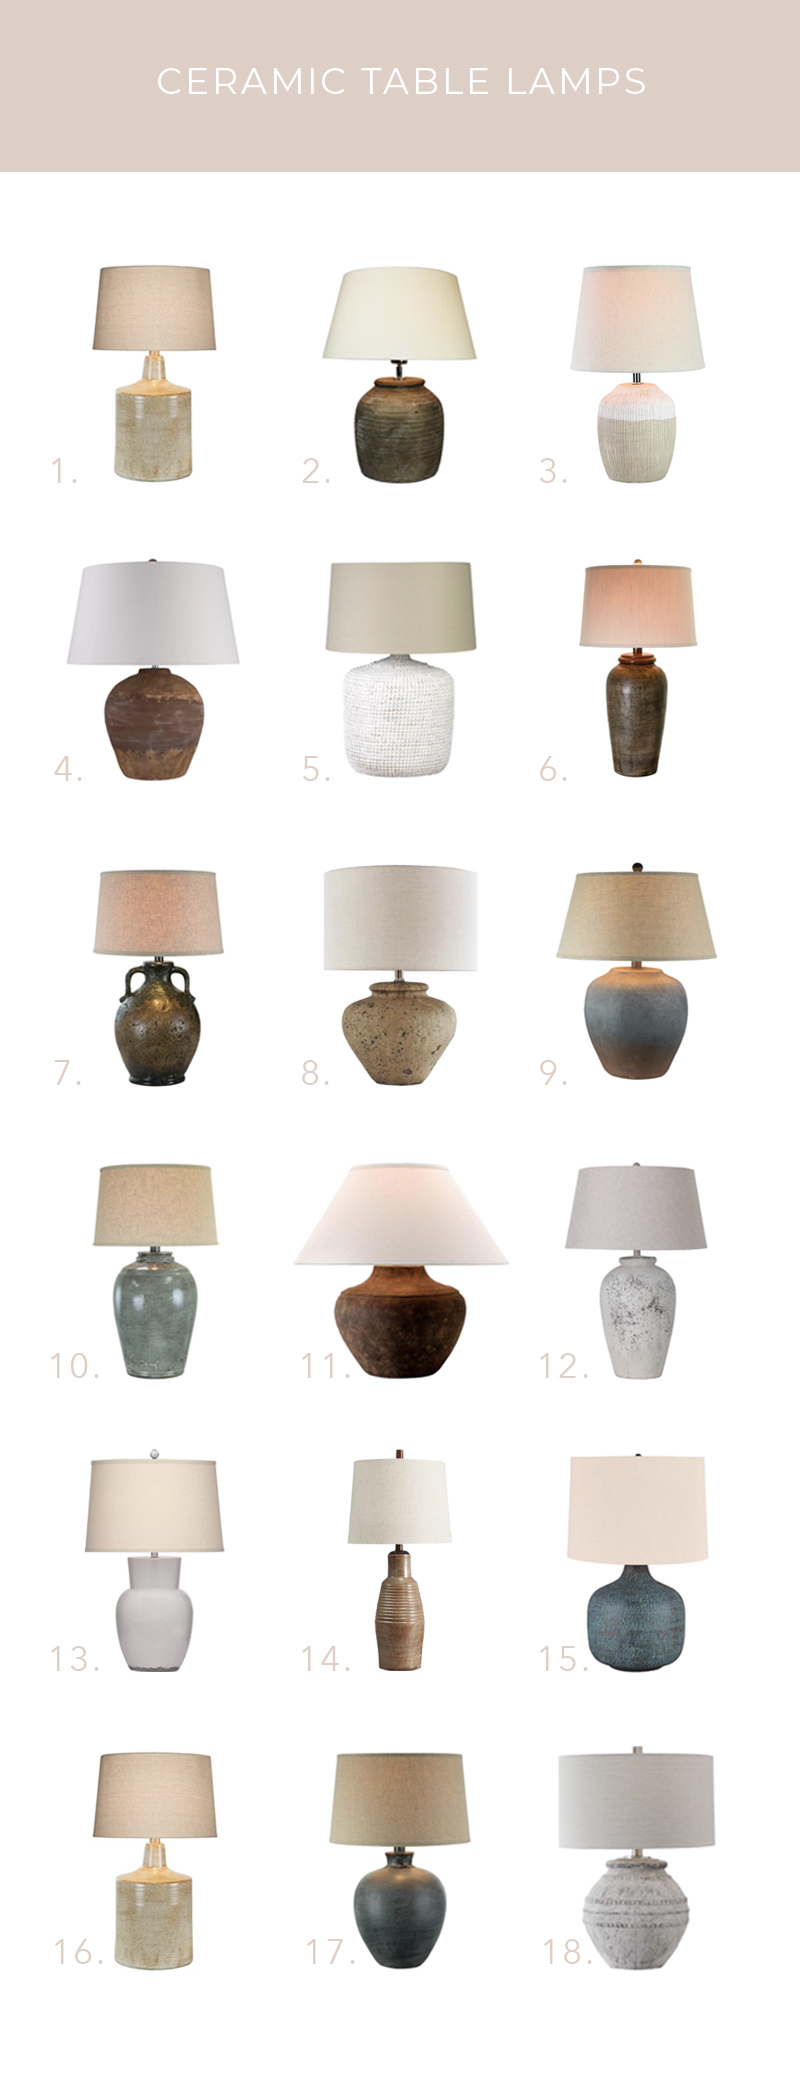
1 // 2 // 3 // 4 // 5 // 6 // 7 // 8 // 9 // 10
11 // 12 // 13 // 14 // 15 // 16 // 17 // 18


I love it. Where did you find the little black stool?
What size is your bed, king or queen?
This is a king!
I have been seeing this type of projects and also with dirt, or sand cement and water. Can make it like pancake consistency or like thick if making a brick. I love those techniques and l do have lots of pots l want to do it. So thank you for showing yours
0hjnnv