Are you ready for some crazy before and after photos?? Last year we started working with a local orthodontist practice to completely overhaul their dark and outdated Queen Creek office and now that we’re finished, I’m just about ready to move in, office or not! It’s such a pretty space and I’m so happy with how it all came together! :) Click through for the back story and all the photos and sources!

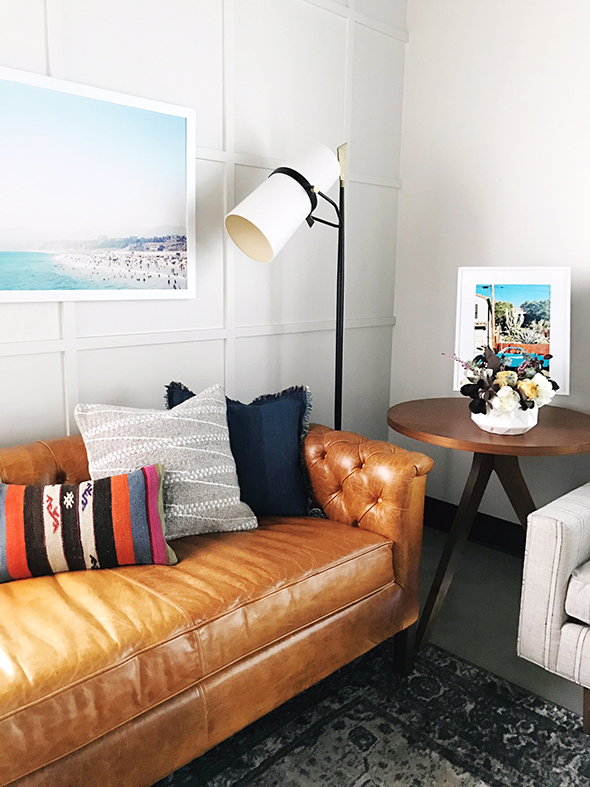
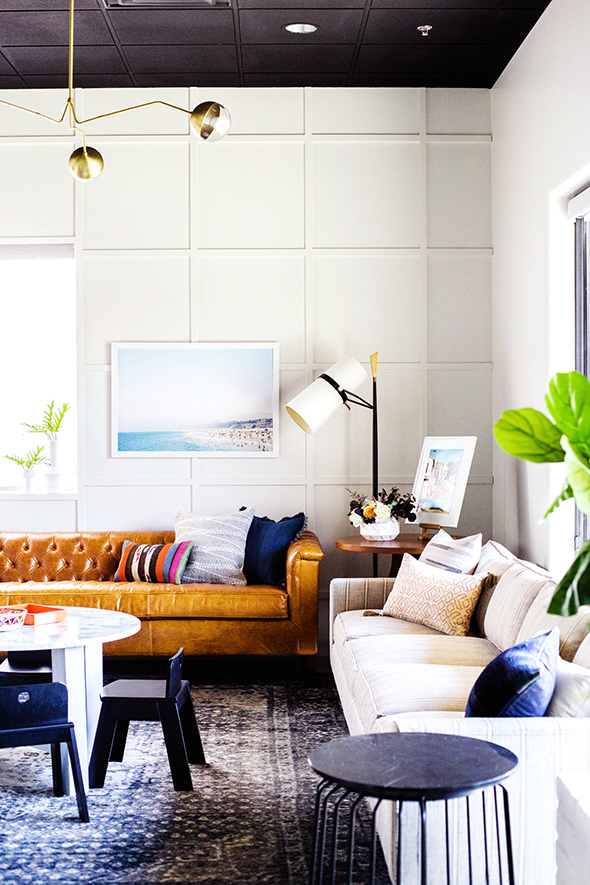
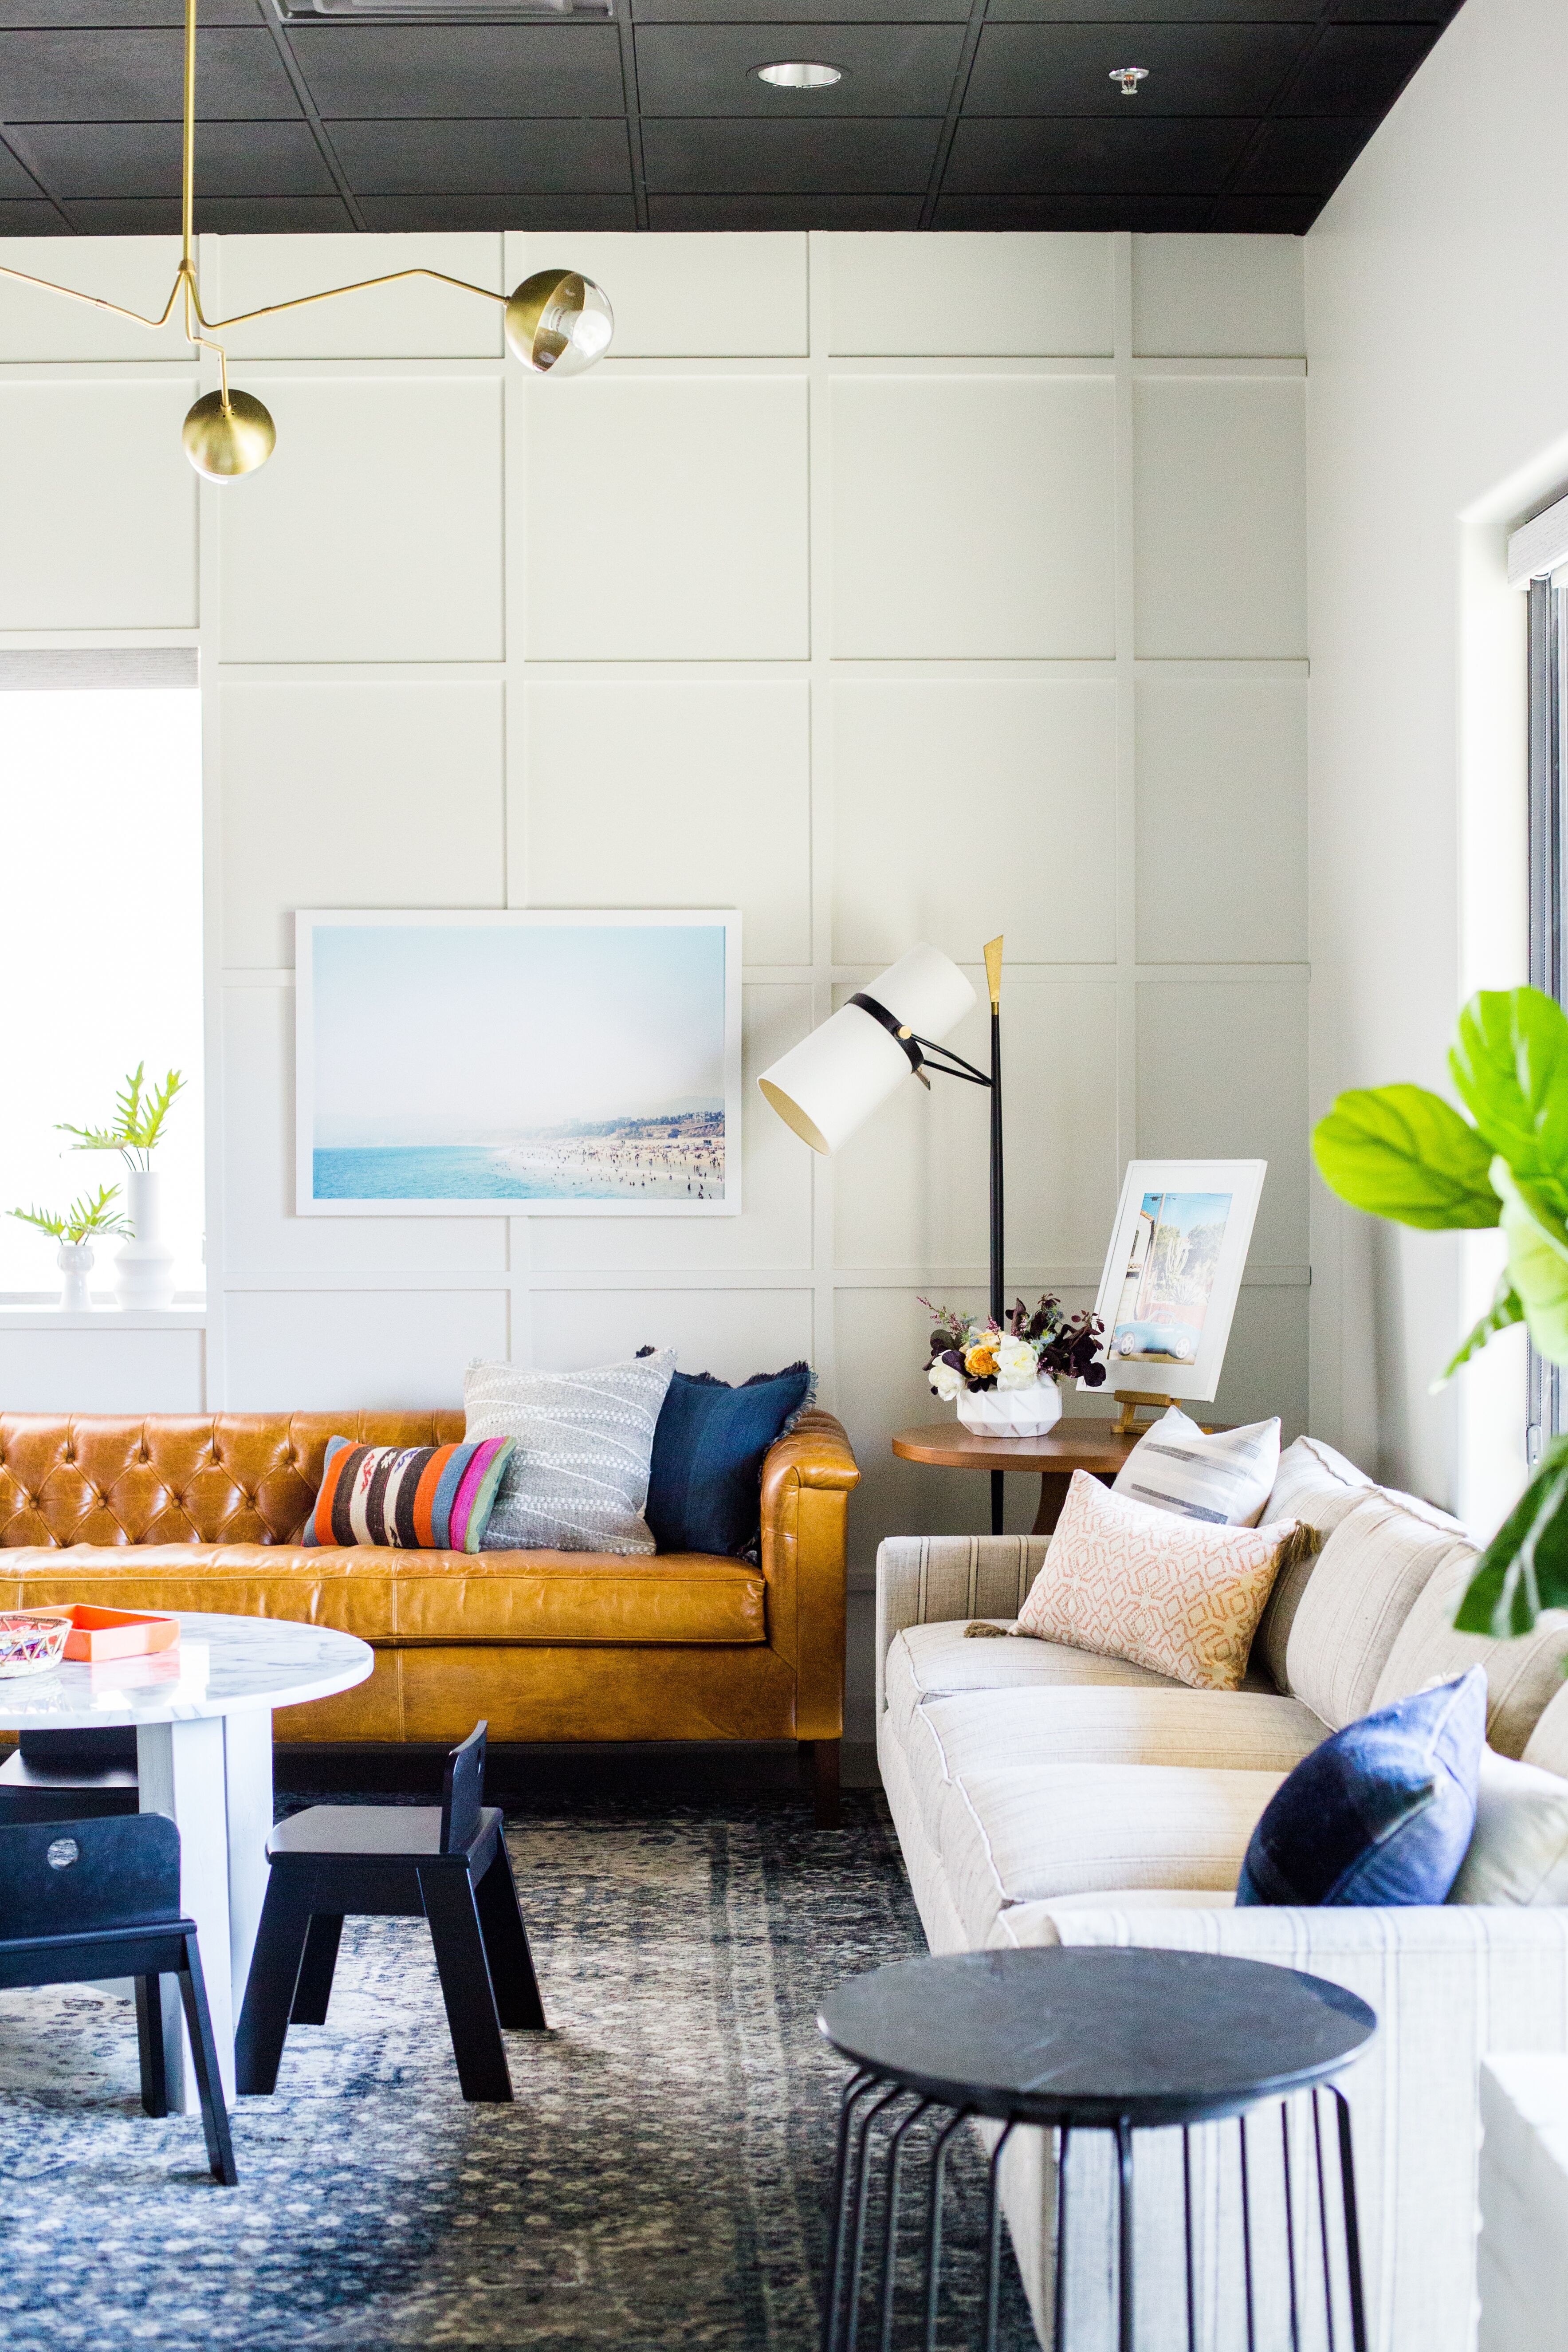
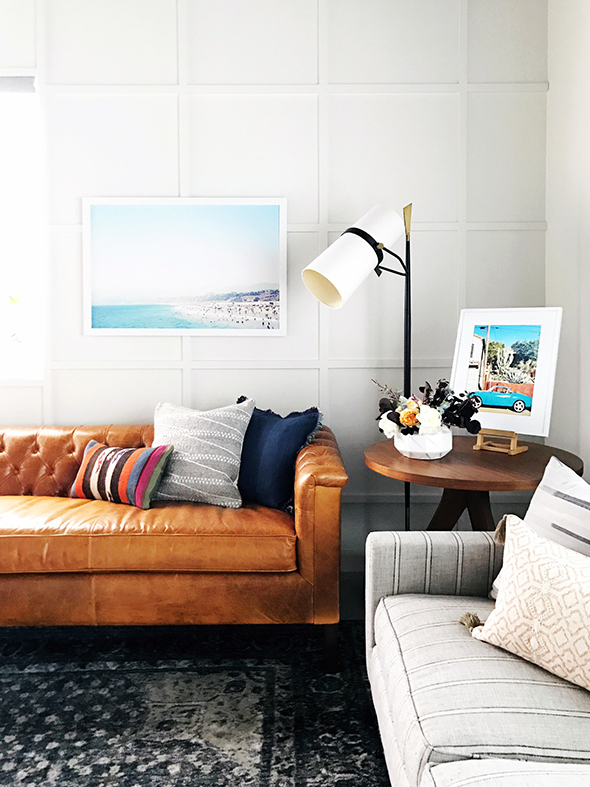
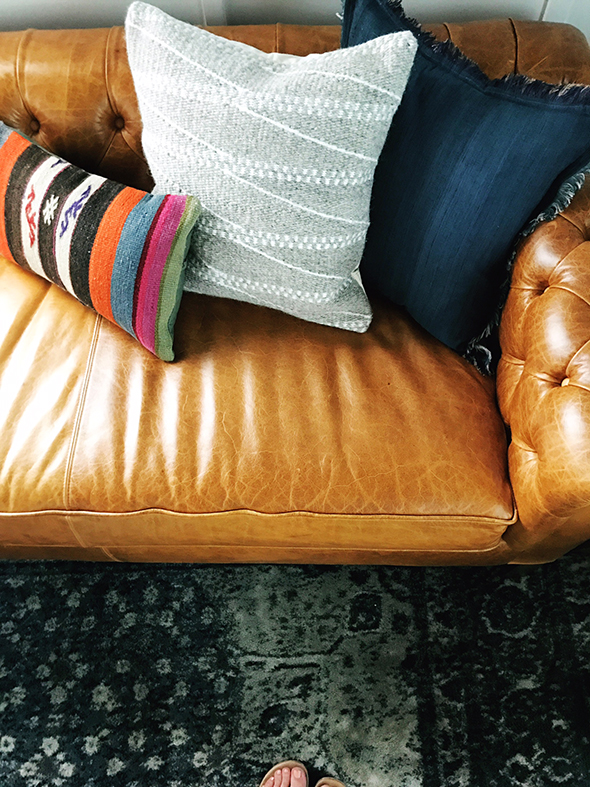
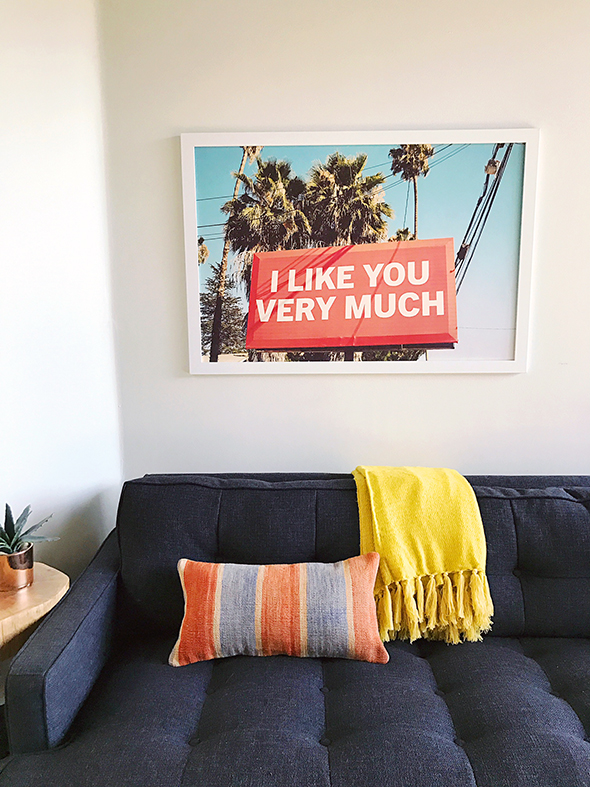
kilim pillow (similar) // rug // side table // floor lamp
kilim pillow (similar) // rug // side table // floor lamp
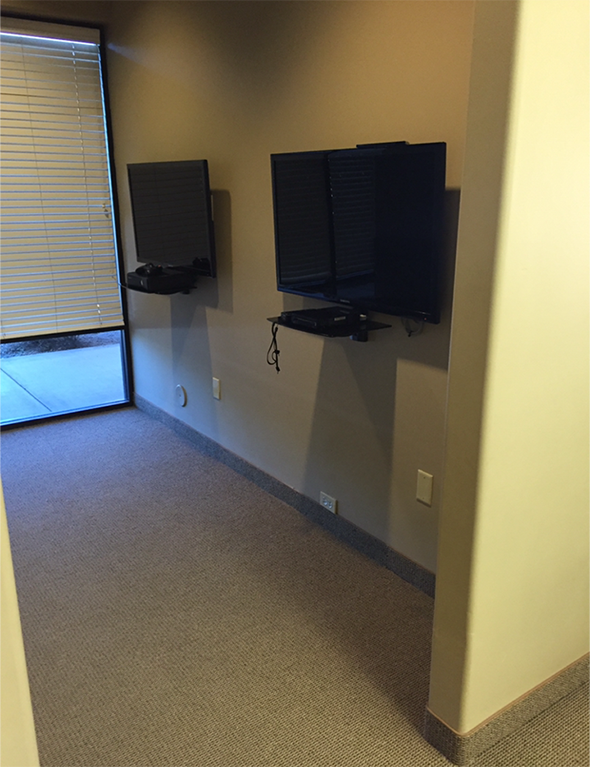
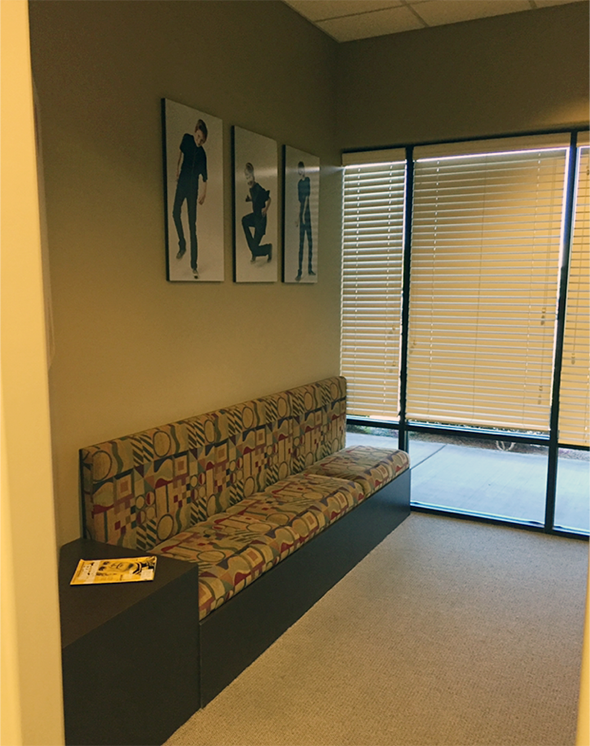
Here are some of the before photos of the front reception area. It’s insane to me that this is what we started with! What a huge difference, right?
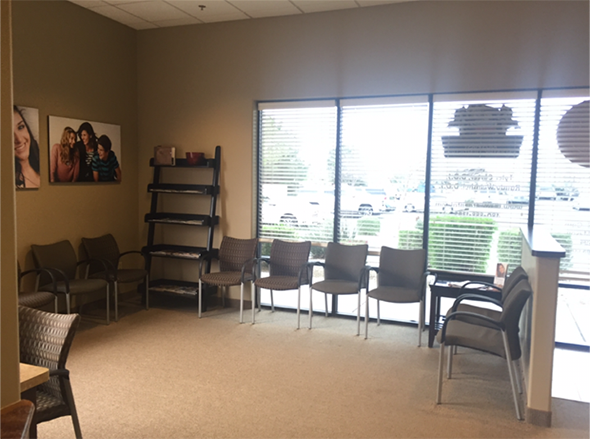
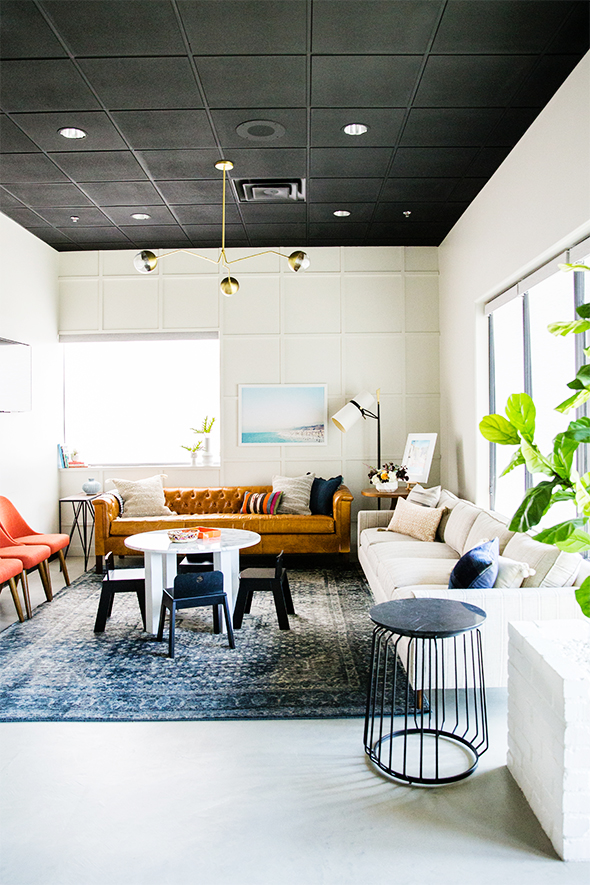
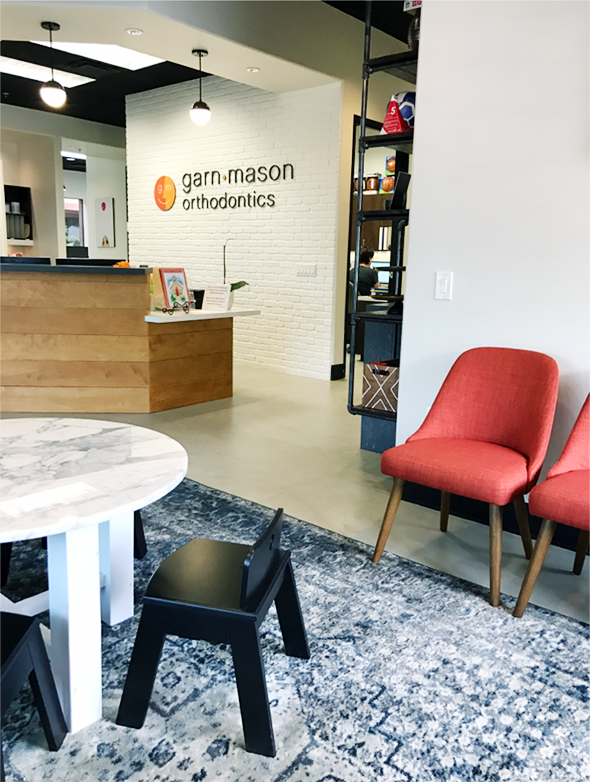
The old carpeting was removed and the concrete was resurfaced. We bought a lot of rugs for this project and the blue rug in the reception area is hands down my favorite. You guys, this rug is a 9×12 and it was SO AFFORDABLE!!! It is gorgeous, durable, and soft. The color is that perfect shade of blue-black that looks good with every other color you layer on, just like a pair of jeans. Two thumbs up for this amazing find! I’ve bought at least three more of these rugs since this project for my own home, friends homes and other projects. You just can’t beat that price (and it looks like it’s on extra sale today)!
kilim pillow (similar) // rug // side table // floor lamp
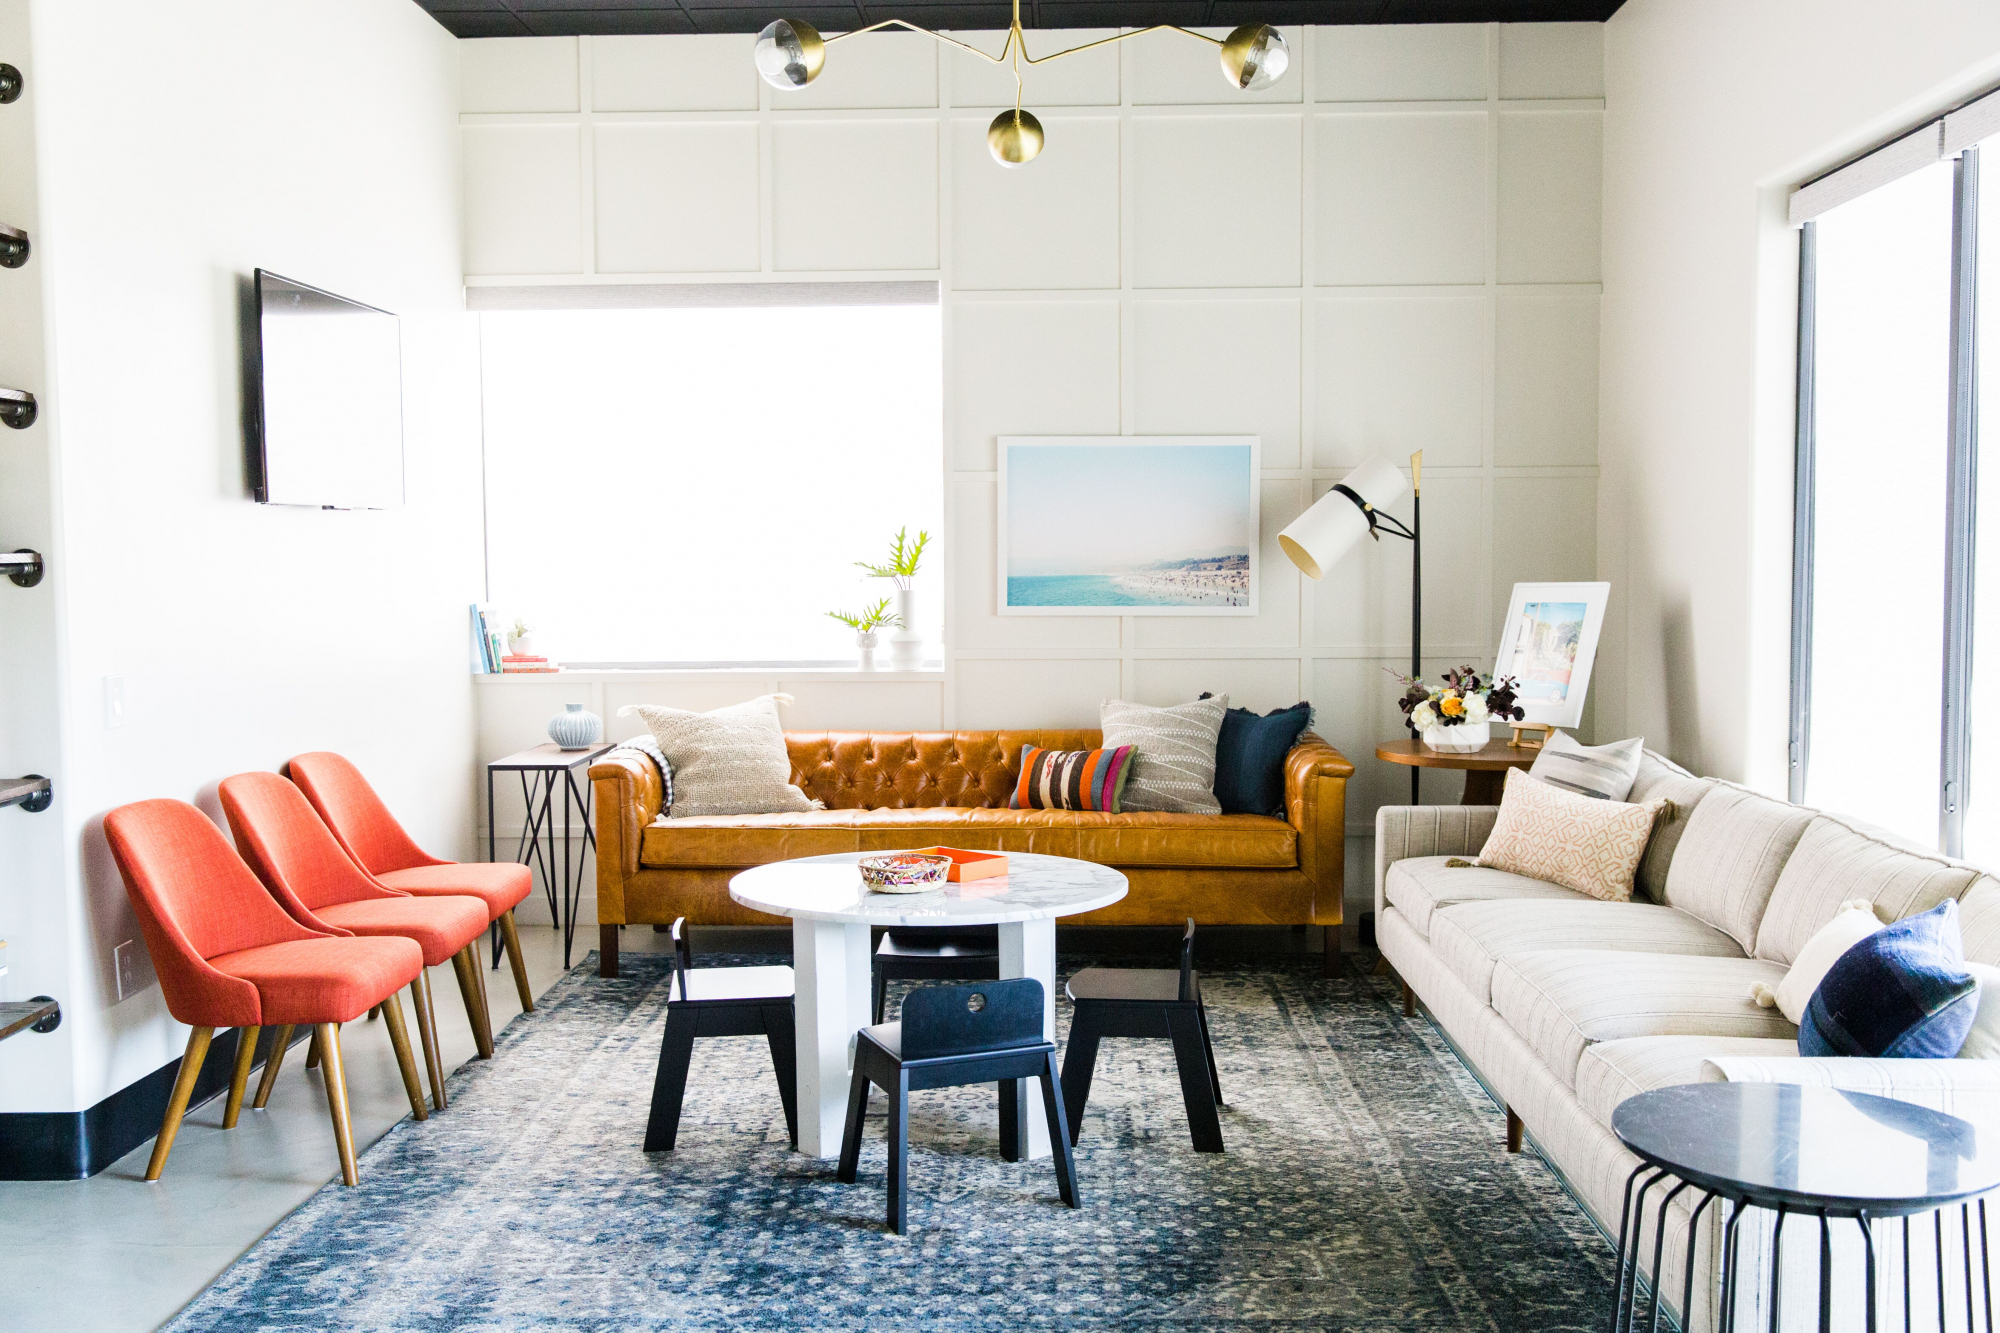
red side chairs // fiddle leaf fig tree
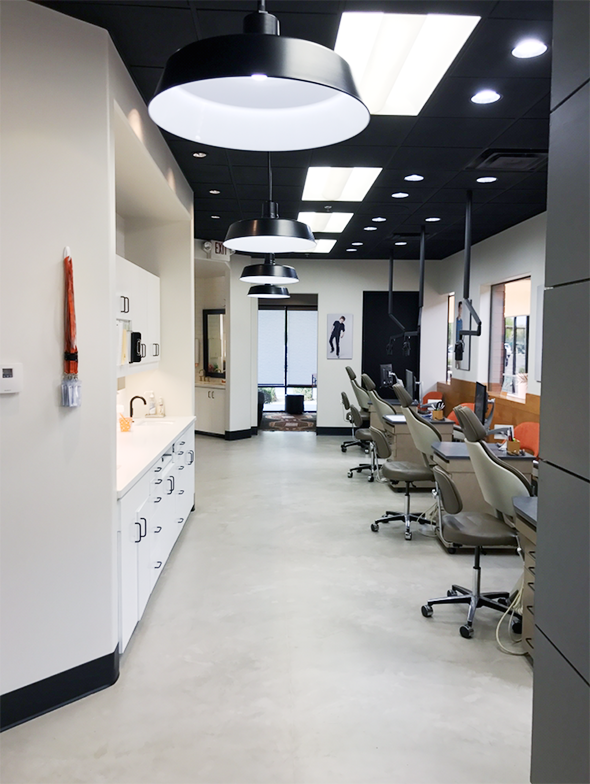
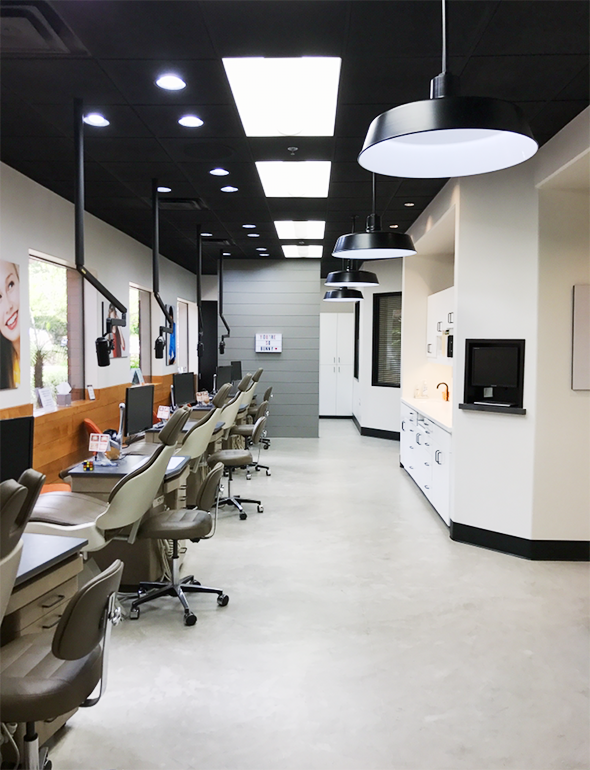
The color on the walls is Benjamin Moore’s Classic Gray, which is bright and light but not as stark as pure white. We painted the ceiling tiles black as an inexpensive fix and replaced all of the light fixtures with pieces from Lucent Lightshop.
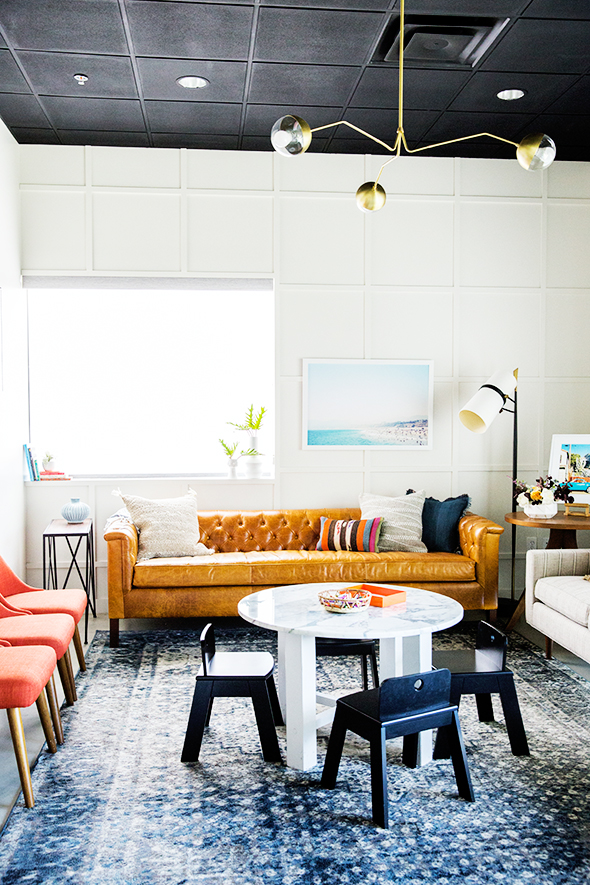
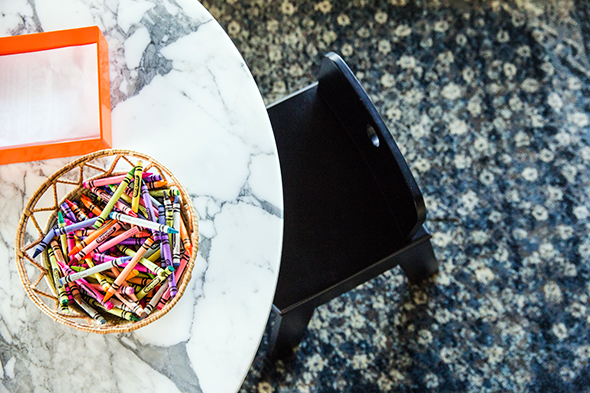
This beach print over the leather sofa is from our latest release on Juniper Print Shop. I found the vintage marble top at an antique store and had my carpenter build the base of the coffee table/kids table to perfectly fit those cute little kids chairs when they’re pushed in all the way. I love how this kids table turned out!
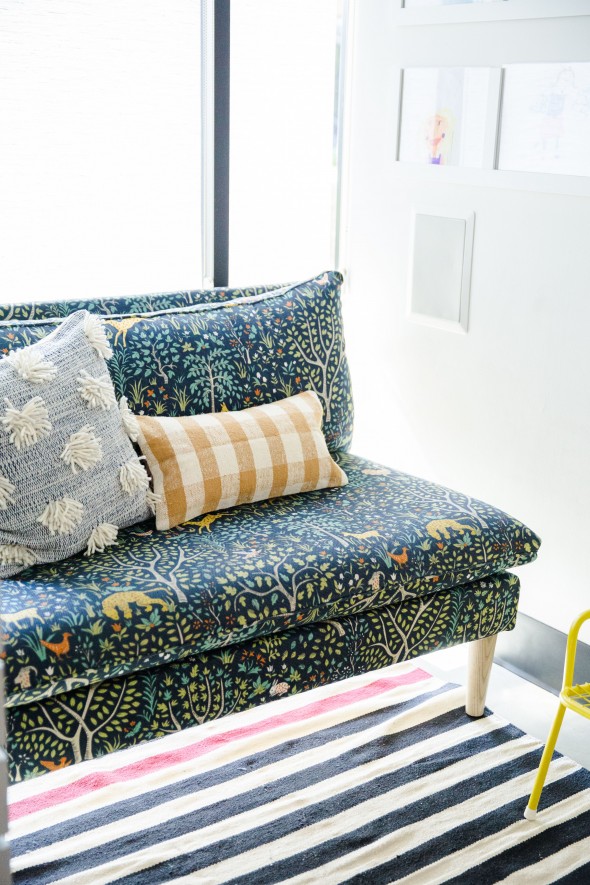
I had four sofas made for this project since we were working with tricky sizing and needed to use fabrics that could hold up to commercial use. The two 10′ long sofas in the reception area are my very favorite though! I used Monarch sofas to build these and they were SO great to work with. They have manufacturing facilities in Texas and in California but they ship their furniture everywhere! I sent them all of the fabrics to use for this project, but the leather is a color called Hampton Brandy and was selected from a sample they sent me. It is gorgeous in person.
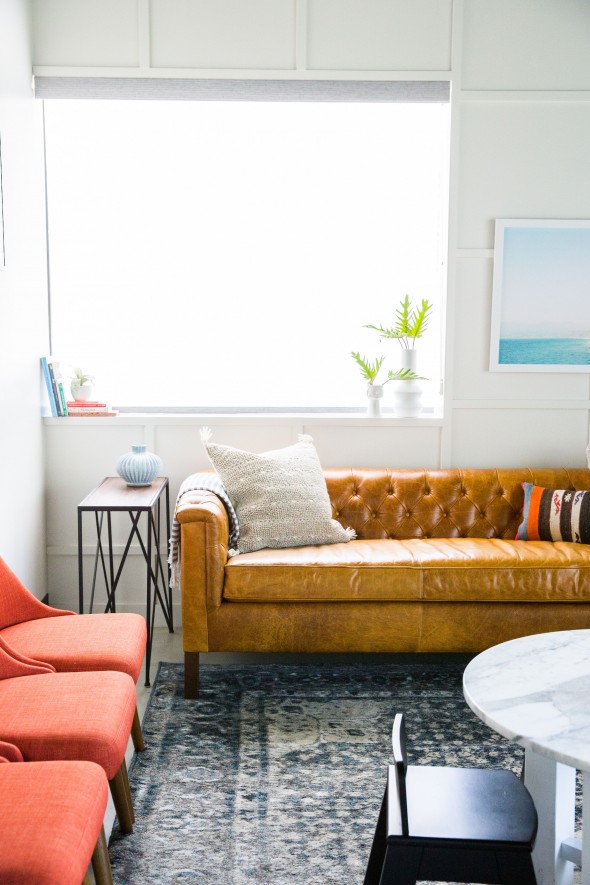
Everything they make is customizable, so I started with the Roxy frame and added a bench cushion and changed the leg style and the depth of the seat and the height of the back to fit under the window easily. Honestly, Monarch was a dream to work with and the sofas are lovely. (And they are not sponsoring this post! Just passing along in case you are looking for something semi-custom!) :)
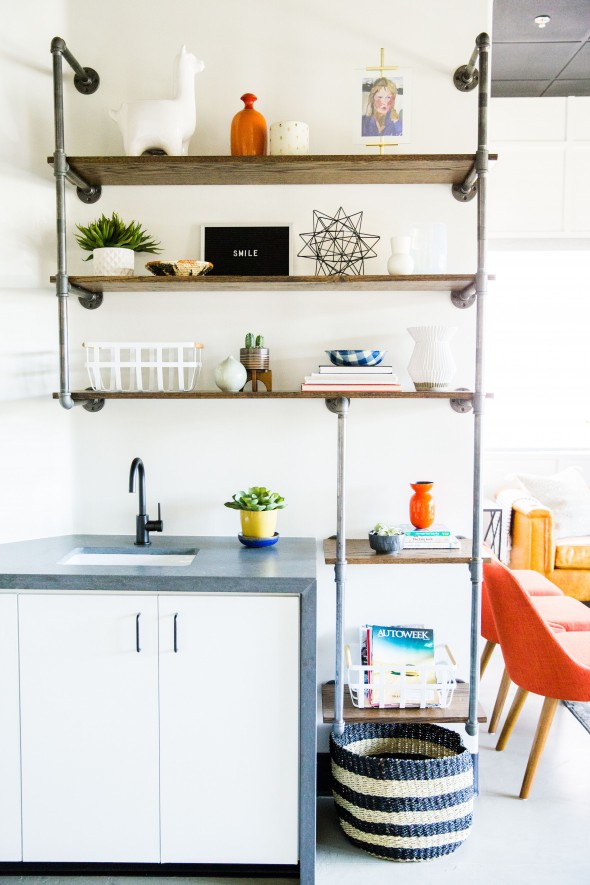
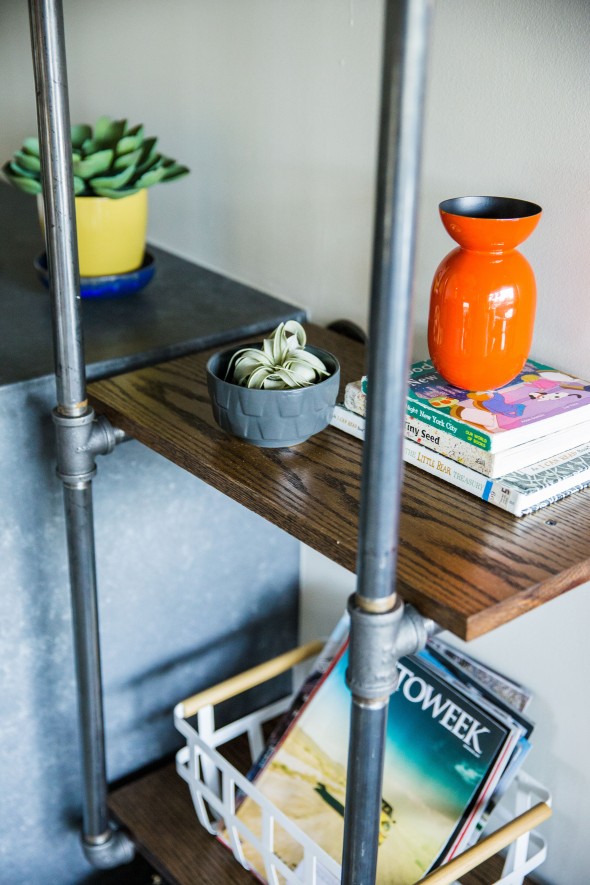
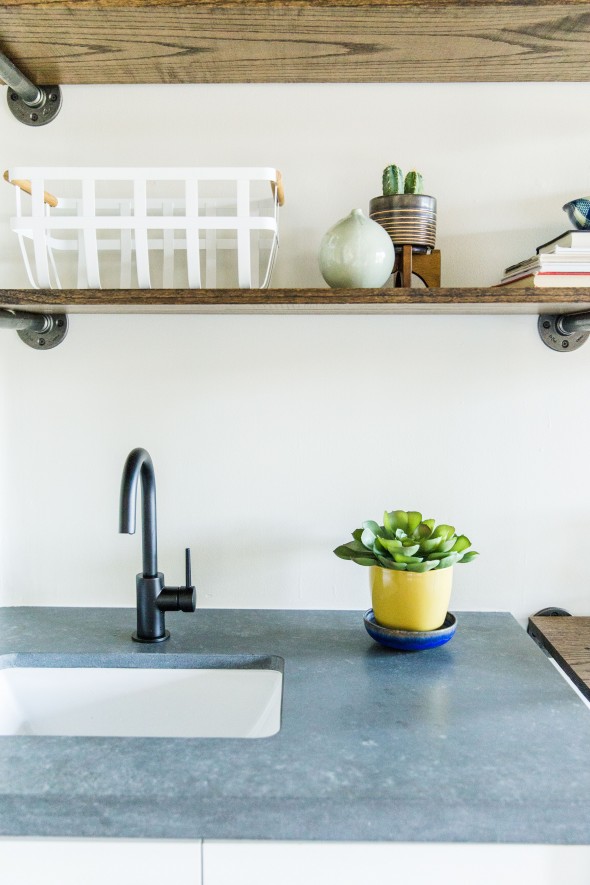
Just around the corner from this seating area is a little shelving unit we made out of gas pipe and wood from Home Depot! Super simple and completely customizable! Here is the before:
And after!
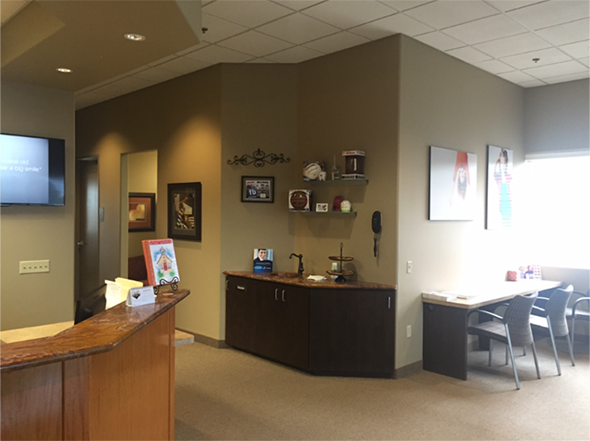
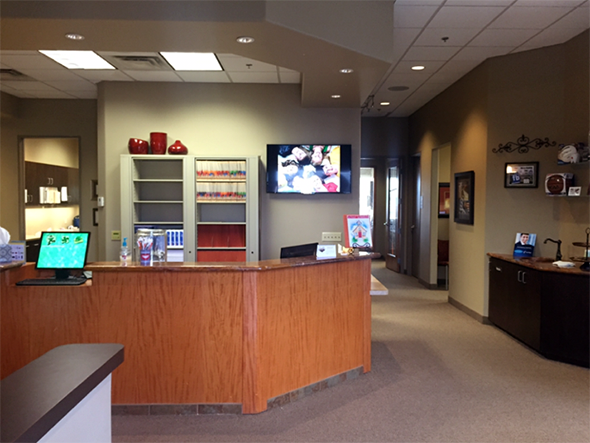
Here’s what the reception desk looked like before:
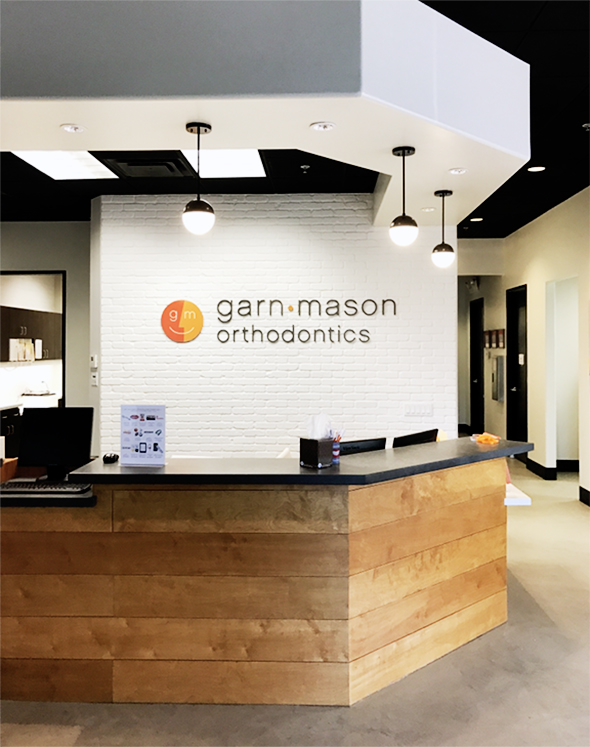
We planked the front desk with teak wood, changed the counter tops and tiled the wall with brick veneer and then painted it white before hanging the new sign. I love it! :) Lights are all from Lucent Lightshop!
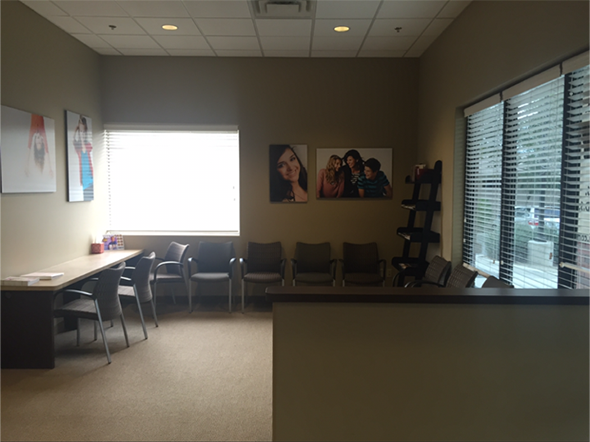
Here’s what the other side of the reception area looked like before:
We used another Monarch Sofa base in a shortened size on the other side of the reception room. I love the white legs!
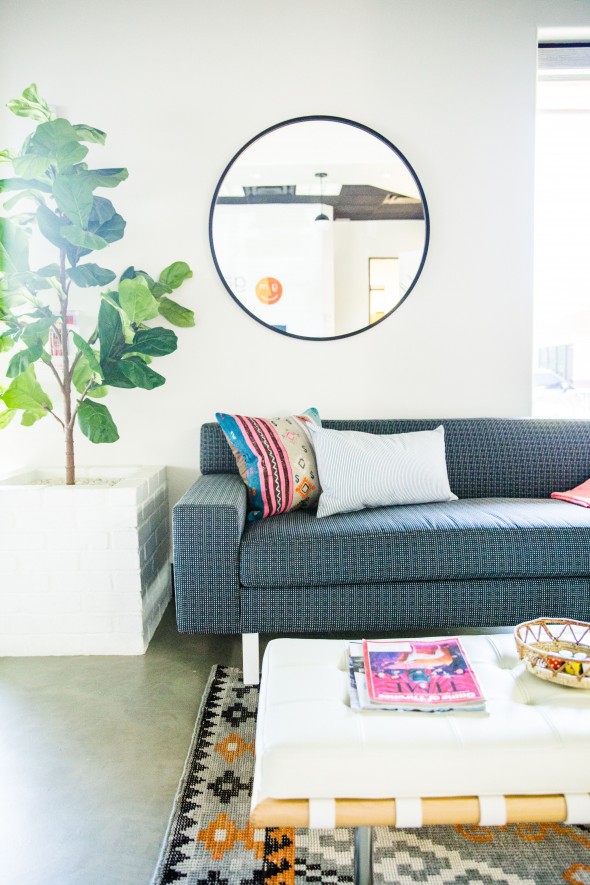
vintage rug (similar) // white ottoman bench // fiddle leaf fig // mirror
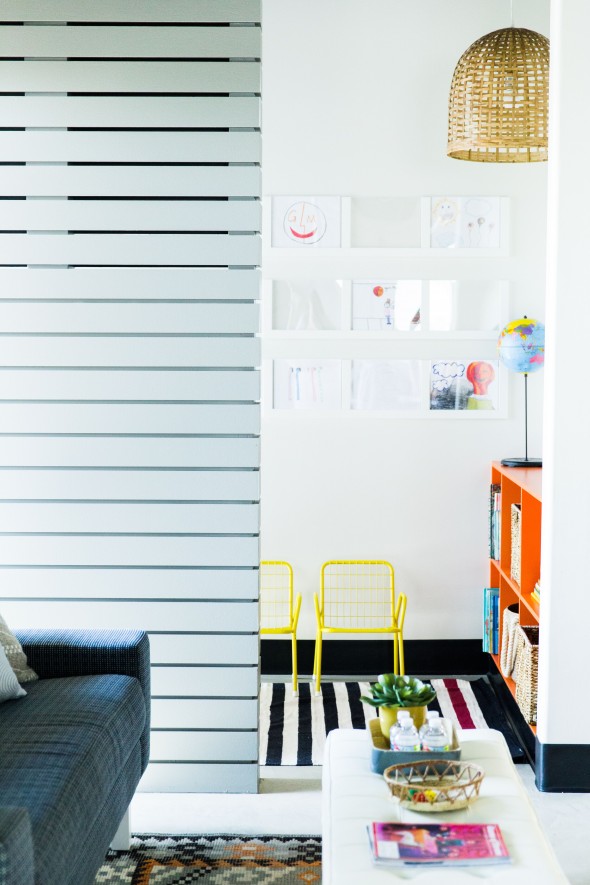
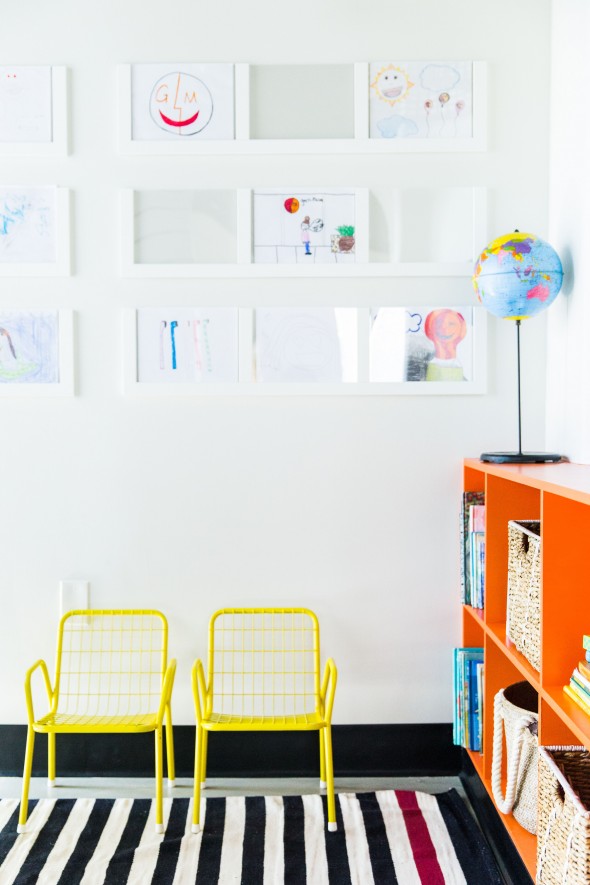
rug (similar) // picture ledges
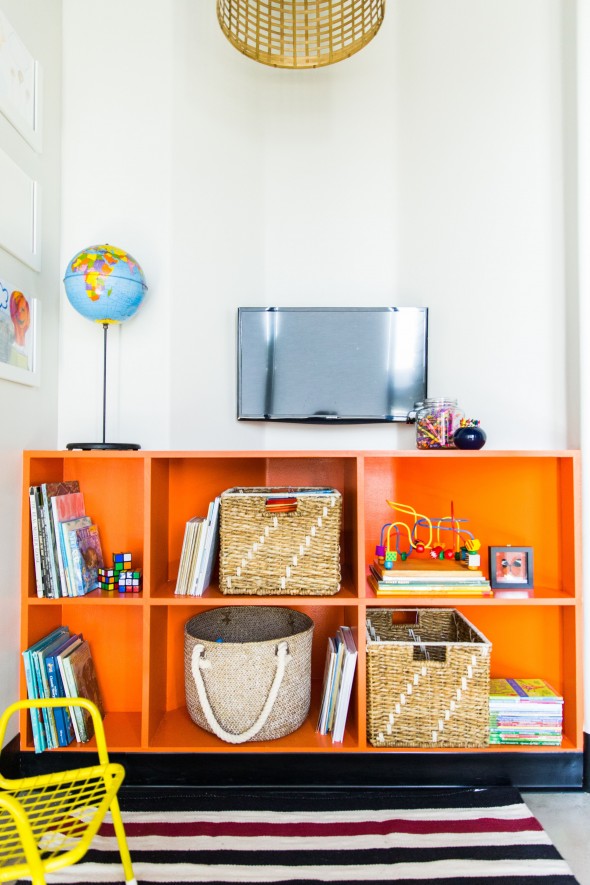
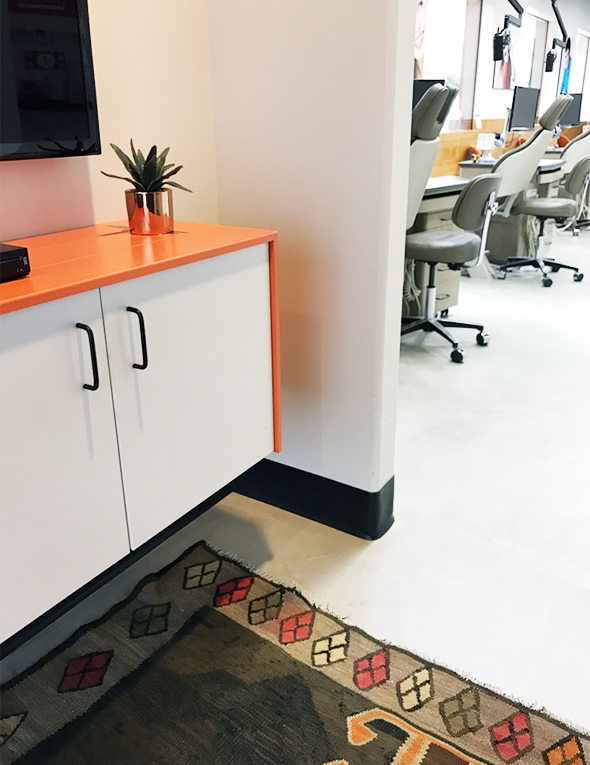
And here are some more photos of the rest of the office! We tried to incorporate their orange and red colors as much as possible in a way that felt fun and fresh and appropriate for an orthodontist office.

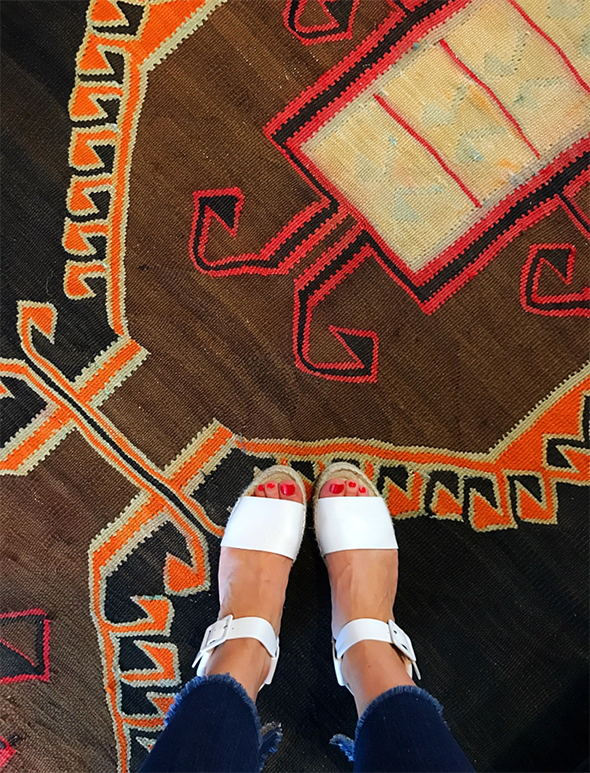
Vintage Turkish rug // sandals
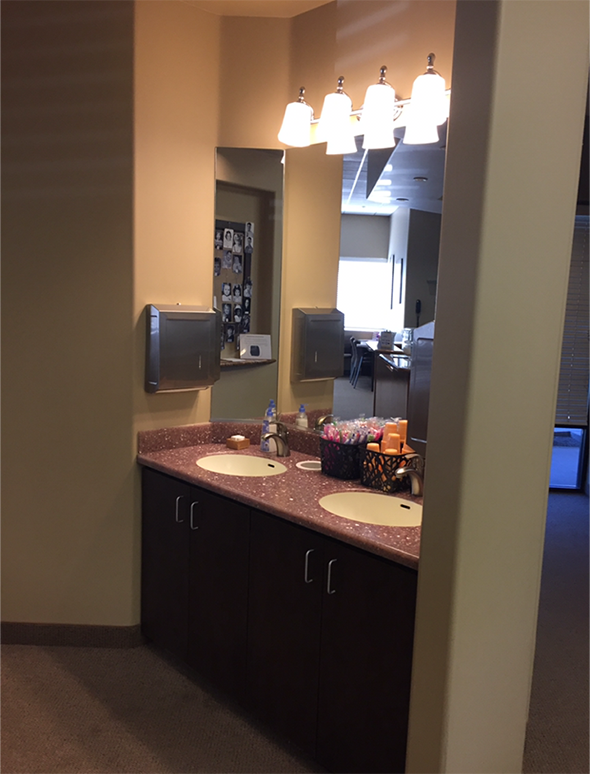
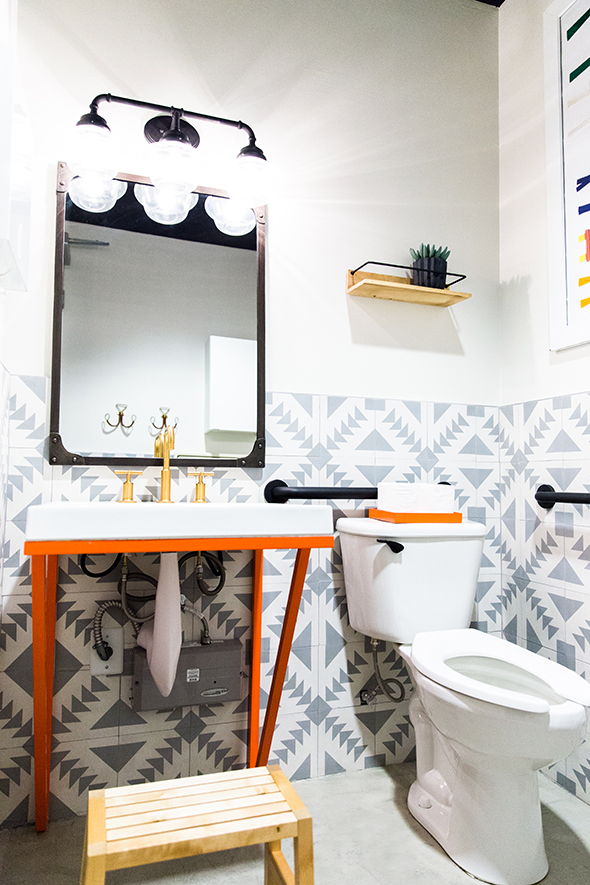
The patient bathroom is one of my favorite spaces! Here are the befores:
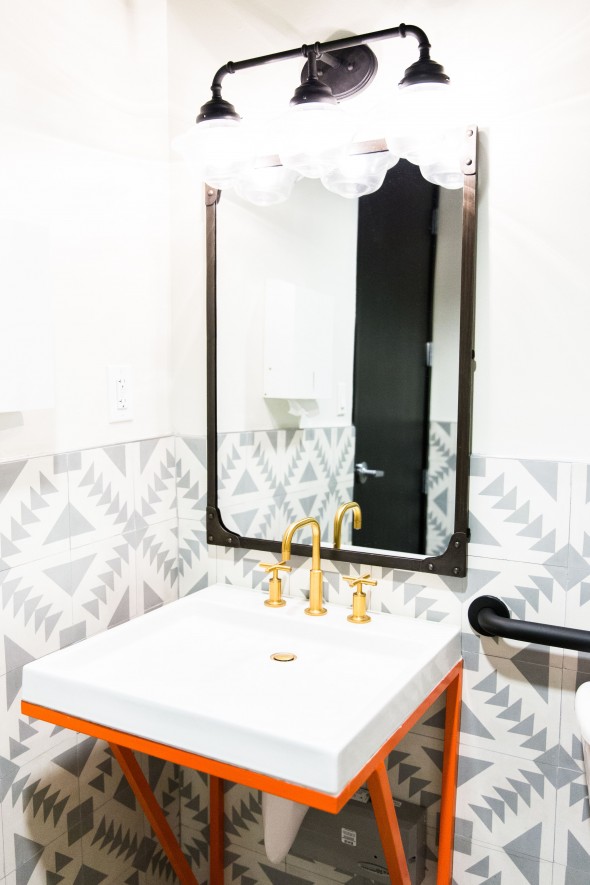
And the bright, happy afters!! I designed this metal sink base that we had powder coated in their signature orange company color. The walls are tiled in this cement tile.
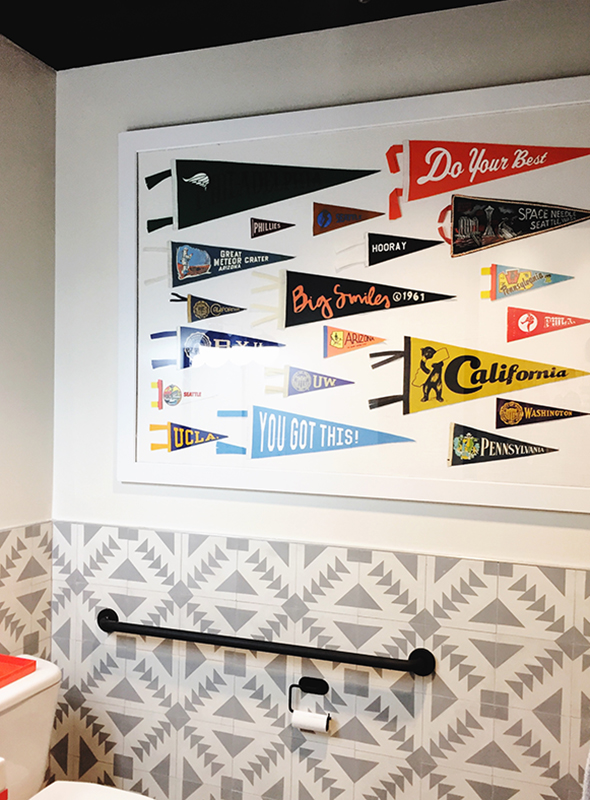
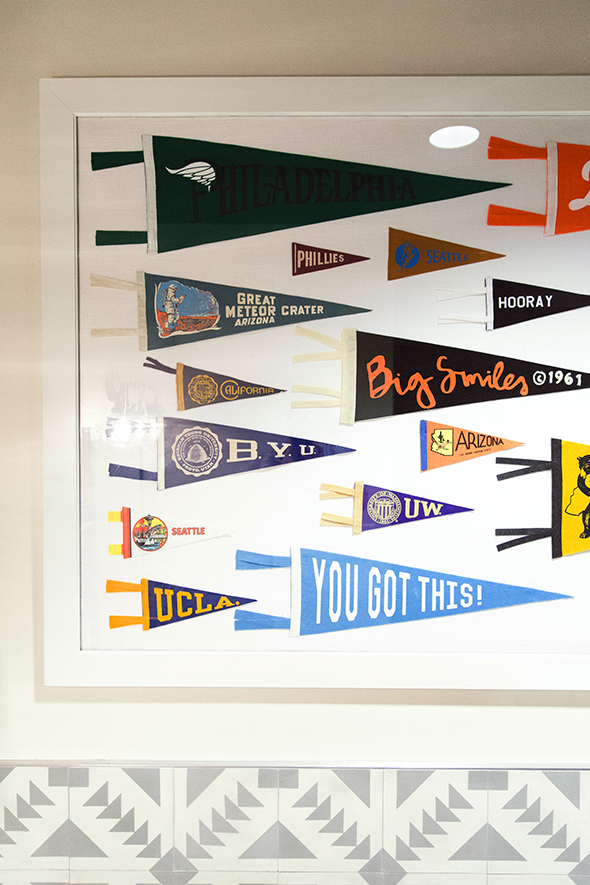
I think we’re going to do a more in-depth post about the art in here since so many of you had questions on my instagram stories tours! We sourced dozens of vintage and new pennant flags from places the doctors lived and went to school. I love all the colors and the story behind this giant framed piece! :)
And those are the highlights!!! You get a gold star if you lasted this long!! :) :) Thanks for sticking around – this was a big project that took a long time to wrap up! It was SO fun to finally get to share all these photos with you! Here are links to the same or similar items that we used here, but as always if you have a question about an item, leave us a comment and we’ll get back to you!


Just Wow!
Ditto! Simply amazing.
Love this!! I often go into spaces like that before and think of what they could be. So cool to see it come to fruition!
Triple love it!! Great job, i had such fun looking at all you did! Love to see more pics of it if you have them. :) Also, the light fixture in that bathroom, can you tell me where you got that? it’s pretty much exactly what i have been looking and looking and looking for. whew! Thanks for the inspiration :)
I had thd EXACT same commet as Angela above. Just wow! I thoroughly enjoyed looking at all the befores and afters. Man, you guys went in! Absolutely beautiful spaace.
This is amazing! And YES! This is where I would want to send my kiddos to the ortho! Seriously, so much goodness! Would you mind sharing where the black faucet is from near the pipe shelving? I’ve been looking for something just like that! Thank you!
Charming, cheerful, genius!!!
Wow!!! Is it weird that I want to move west and get braces??? Beautiful work!!
Simply gorgeous, each little touch had your signature style all over it. This practice must be thrilled to walk into such a fresh workplace each day! Well done.
The updates are amazing! Love the use of colors and mixed prints.
https://www.bluelabelsboutique.com
Wow! I love it that somewhere as boring as the orthodontist office could make me want to jump for joy! Those places are so unnecessarily ugly sometimes! And I am so thrilled to learn about Monarch Sofas! Definitely going to look into using them. Thanks for sharing!
Wow. I want to get braces again. :)
I love this. To say it is a stunning transformation full of stellar spaces is an understatement. LOVE LOVE LOVE!
What a beautiful space. I agree with you; I could live there! You did a wonderful job of combining fun with cozy and sophisticated. I would love to know what the striped fabric is you used on the sofa in the main reception area.
Hi Morgan! The fabric is by Pindler! I can look up the specific numbers if you need me to! Feel free to email me if that is the case :)
It says that you had the old carpeting removed and the concrete was resurfaced. do you have any more insights or details into that process? who handled that for you? was it a complicated process or costly? I am thinking about doing this in my home until I can afford to get hardwoods put in. Really would appreciate any information on that process! thanks!
It is a complicated and messy process, depending on what your foundation looks like! Best left to a concrete/flooring professional! There will be a lot of patching or there will be visible seams. It is a very industrial look and is probably not a great idea for a home unless the architecture of your space is super modern!
Beautiful spaces with clever solutions! I love the black ceiling. I’d like to know more about the situation under the bathroom sink. I put an ADA sink in recently, and I’m unhappy with the way the pipes look under it. My plumber put in white PVC pipes. The orange powder coating on the frame is great…and the tile….and everything
Hi! I was just looking at this amazing transformation all over again after it was posted in IG stories. I’m still in love with that sink & pipe situation. I’m still unhappy with my sink situation here at home. It looks like there is a white plastic or ceramic cover on the drain pipes. Do you remember what it is? Thanks.
SUCH a beautiful and fun space! Love it!
This is so great! Where did you get the brick veneer? Do you think that would work in a kitchen instead of tile?
Hi Meghan!
We got the brick tiles from here and painted them white after install:
https://www.flooranddecor.com/stone-decoratives/boston-mill-thin-brick-panel-100105659.html
:)
Absolutely exquisite!! I want that couch. When I’m ready to turn the “lego command center” aka basement into a proper den/play area, I’m going to call up Monarch sofa and tell them I want the Komenda LGN leather couch. Its EXACTLY what I’m looking for. Rock on with your bad self!
Jenny, I am a longtime reader but I don’t comment that often. I just wanted to say BRAVO. This is a truly remarkable transformation and you should be so proud. You truly left no detail to chance, and I’m having a blast looking at all of the pics for a second and third time to see them all. YOU GO GIRL.
Thank you for the heartfelt comment, Jordan!!! I so appreciate it! This was a really fun project to work on! xo
It looks amazing!! I’m just curious how stuff will withstand a lot of use.
We bought everything with commercial use in mind! :)
Holy cow, Jenny! (italics? my daughter was just pushing buttons on the computer..)
I love the combination of everything! Every space you do looks different from the last, but you have such a clear style that is just you! I’m so happy that you’re back to blogging more. I look forward to your posts so much!
What a compliment! Thank you, Colleen! xo
Excellent renovation. Great job! I really like all the design ideas. I loved that shelving units from gas pipes. Waiting for its DIY post. Thanks for sharing!
This is really so beautiful. Such a transformation and is so light and airy now. Love! Great job!
Hi Jenny,
What a beautifully done space!’ Could you tell me pretty please where that adorable yellow plaid pillow is from? It had my heart.
Amazing! Love every part. I want to move in too! The light fixture over the sink in the bathroom…also the Lucent Lightshop??
WOW!! Everything looks FANTASTIC!
Wondering where you found the frames with the kids artwork in them? Those are so cool!
Thanks! Those frames are from IKEA! They are perfect for displaying kids art because you can easily change them out! :)
kudos to that ortho for caring about the space. huge win for customer experience. congratulations on an incredible transformation!
Holy. Moly. This is absolutely stunning!!! Wow. Great job!!
Hello again. I’m stalking in hopes to find out where I can get that cute yellow check/plaid pillow that is paired with the west elm throw pillow (which I have already purchased lol). I also spotted it on your insta stories a few days ago in the new shelving!
Hi Katie!
I got it from this etsy seller! :) http://bit.ly/2v2mSm9
Thank you so much! ❤️
Ahhh the link didn’t work. :( I must have this pillow in my life. Could you provide the name of the etsy shop/seller. Thank you again!
Hey Jenny! Amazing job. Truly stunning. Would you be interested in posting a brick veneer tutorial sometime soon? I imagine it’s easier to apply than it looks.
Our contractor installed the brick, but it is definitely just like tiling a backsplash and grouting with mortar. Once everything dries you can prime and paint! I want to do this in my kitchen SO bad!! :)
It’s really not my place, but I am compelled to add my two cents here. The first house my husband and I bought was a cute little ranch that had been decorated terribly (really, you can’t imagine–one of the bedrooms had metallic gold walls with orange shag carpet). In the kitchen, Z-brick had been applied to the walls and backsplash with black mortar. First, I painted it all white; it took many, many coats. When we finally remodeled, our contractor said he would never agree to remove “that stuff” again. It looks great in a commercial setting, but I would be super thoughtful about putting it in a residence.
Major upgrade! Any chance a diy/lessons learned is still coming on the pipe/wood shelving system? I’m pumped to try building one, but I’m a bit too nervous to build from a photograph :)
Gorgeous!! Where can I get the tile in the bathroom?? Love the gray and white geometric pattern!
Not sure if you’ll see this. Someone told Me you redid a dental office and we are in the process of building one so naturally I had to come check it out! It is amazing and definitely the look we are going for. Quick question, where did you get the black bars for handicap patients in the restroom? Did you just spray paint them? Thanks!
I was wondering how you attached the welded vanity to wall? Thanks!
Beautiful space!! Where can I find the black wire leg side table?
That was an old CB2 table! I think it’s not available any more though, sadly!
Beautiful!! Sophisticated but still perfect for kids. Would you happen to have a link for those picture ledges that hold the kids artwork? The link doesn’t seem to be working! Thank you!
Those are from IKEA, Katie!
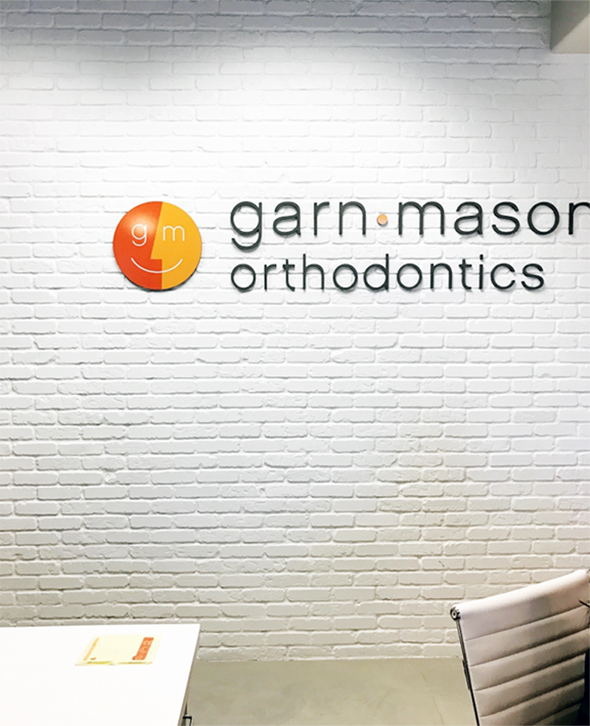
The office is so welcoming! Do you know where the sign was made?
We use Sierra Signs in Mesa! :)
Hi there, have been following you for so long and somehow missed this post but saw on your stories. I’m obsessed with the pennant art and am wondering how you did it. Would you share the frame you used and how you mounted the pennants? Thank you!!!
Hi Jenn! It’s a pretty easy project. I thought I had a DIY post up for it somewhere but I’m not seeing it either. I found a really big frame at a thrift store, had a linen backer board cut in the framing department at Michaels or Hobby Lobby (its the same board they use for making mats), and then just used fabric glue to mount the pennants to the linen board before putting the frame together again. Super easy!