This week is a little crazy. Our church does a stay-away camp for hundreds of teenage girls in our area that I was asked to help with and that finally, after months and months of meetings and work, is happening this week. Balancing the end stage planning of that really fun project with all the recent house projects going on here has been a little tricky, but also so exciting! It feels like things are really starting to happen this week! The bookshelf installers came yesterday and they are a good halfway there and the other projects are ahead of or at least right on schedule. I only hope this pace continues until our big photo shoot deadline at the beginning of July (Knock on wood!).
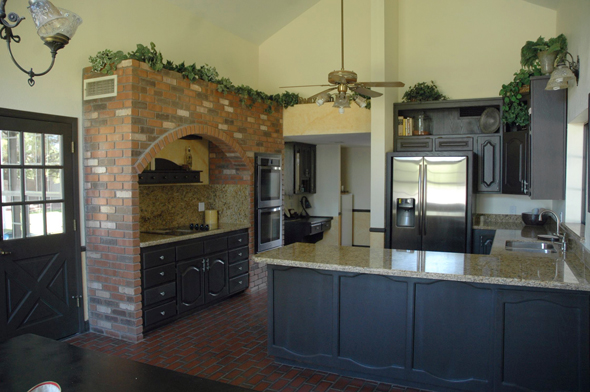
So, the kitchen. Many of you have weighed in as I’ve bounced around different thoughts and plans. I’ve swung from wanting to do a full-blown-knock-down-tear-out kitchen remodel to “let’s just leave it all as-is for another year or two and then renovate” – and every version of a remodel in between.
One of the first things I try to figure out about a new client before we start working together is their change tolerance. Some people need more time on decisions, some people move very, very quickly. Usually somewhere in between yields the best results. Unfortunately, I swing a little more on the side of “very quick” decision maker when it comes to my own house choices, which comes back to bite me sometimes. I’ve been trying to learn how to slow down and pace my decisions, but I am super comfortable with change. I’d love to move to a new house every year if I could! Or at least I’d love have a new kitchen every year if it wasn’t so expensive and wasteful! :)
Anyway, what I’m getting at is that I spent a little more time thinking about what I wanted to do in this kitchen than I might normally spend, and I still waffled right up to the very end on how much money and effort we should put in here. This room is a head-scratcher for me. It really, really bothered me how much I didn’t like the room we spent a huge amount of time in every day. But I think we’ve finally figured out a longer-term plan that makes sense for the house and for us.
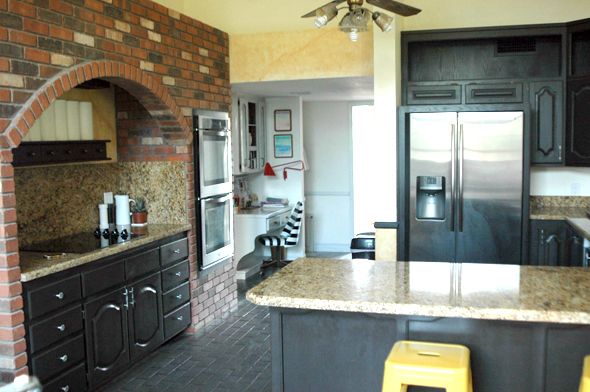
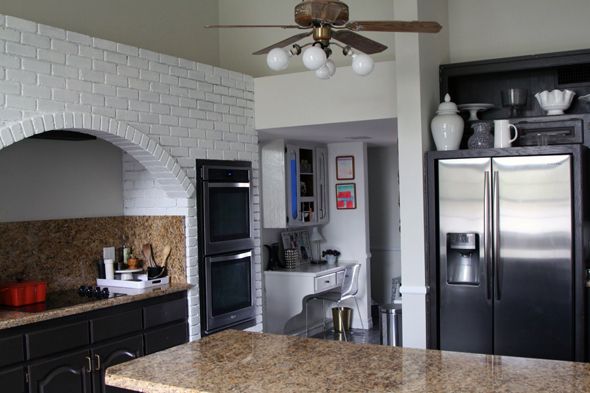
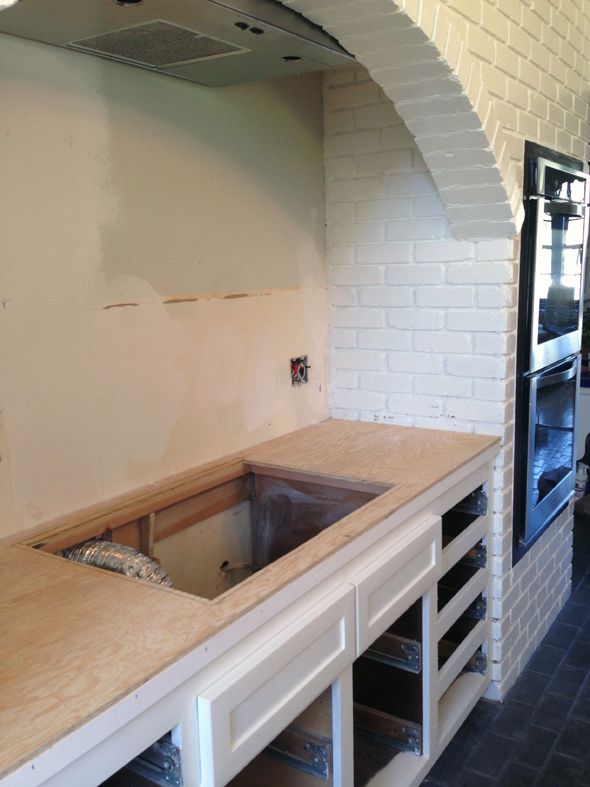
I’m sure you remember that we’re going to need a new roof here in the next year or two. The roof (which is going to cost a ton) is higher priority than a fully brand new, re-worked kitchen. So we decided to spend the next 1-3 years putting our pennies away for a new roof and a new kitchen. And in the meantime, we’d do a Jenny style make-it-work remodel in the kitchen. Because of the photo shoot, I can’t show you one or two angles, but I want to share a lot of the process with you over the course of a couple posts. We’re about 90% done now and I can’t believe how new the room feels! And it also feels bigger! A huge part of the change was removing the granite.
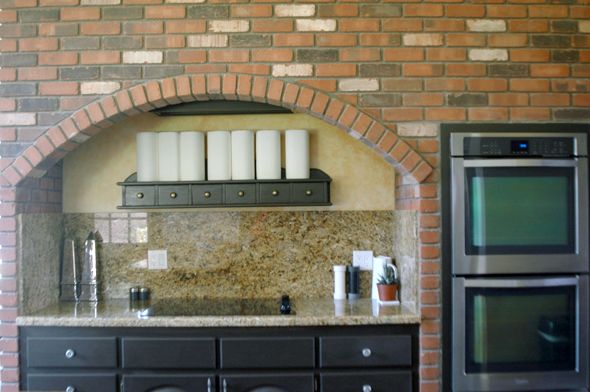
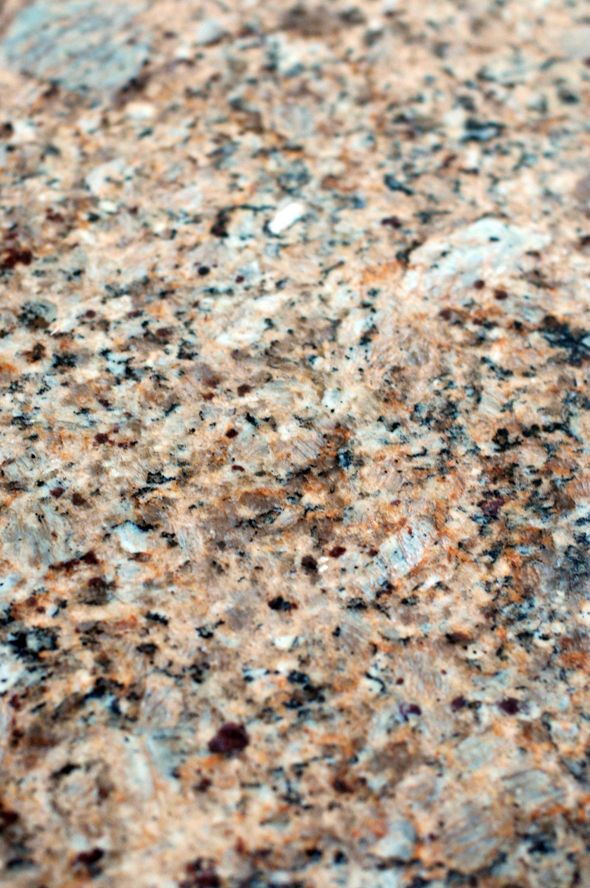
I really tried guys. I wanted to make this work, but it was a doomed relationship from the start. It’s not you, Granite! It was me all along.
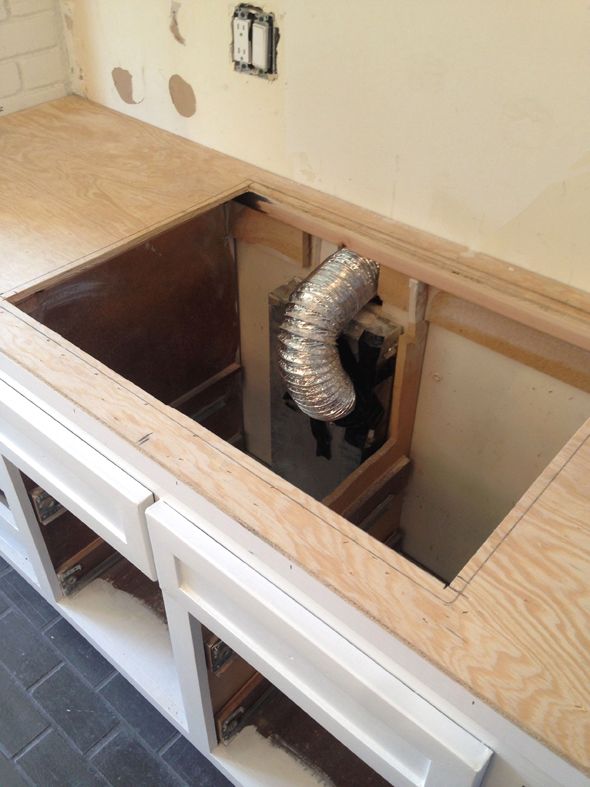
Slowly and carefully we scored and pried, and the granite was removed. The cut out parts by the sink and cooktop ended up snapping, but all the other lengths were successfully salvaged and are being reworked for another family’s bathrooms.
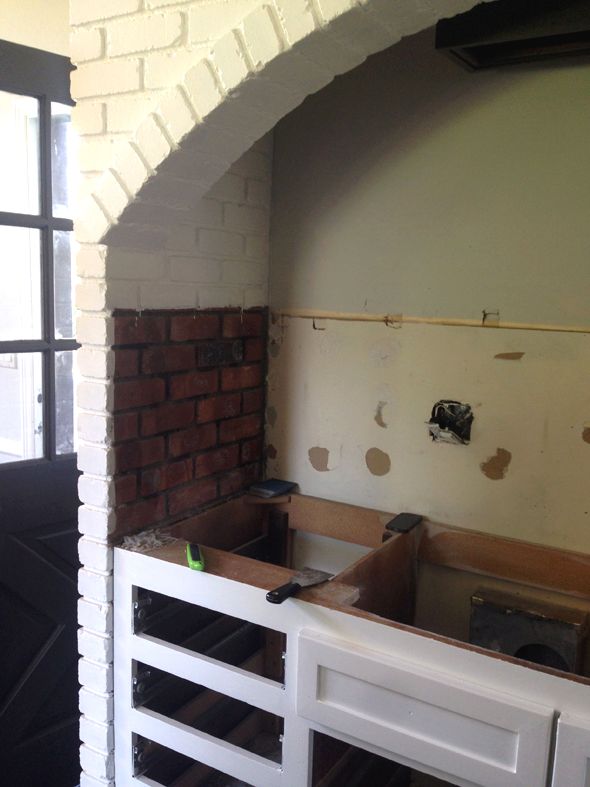
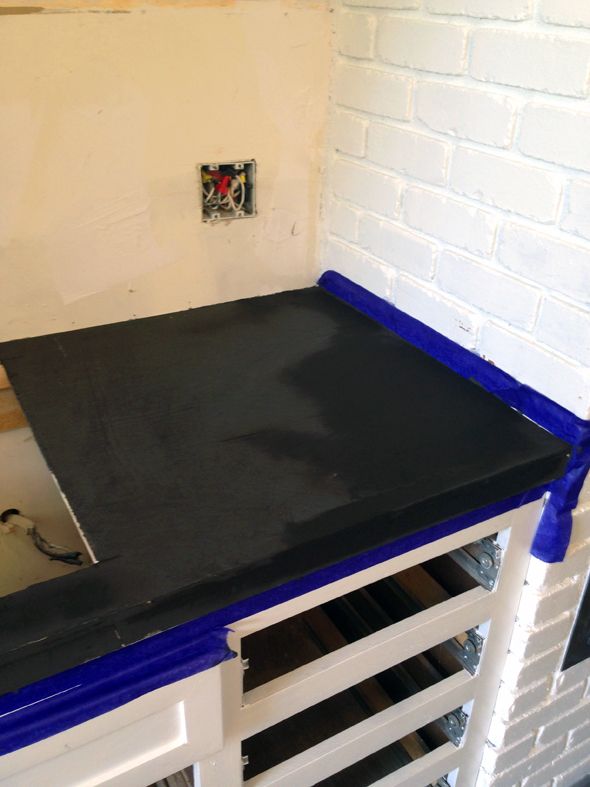
And we used plywood to build countertop bases for concrete. I was really tempted to go with stone, but it was a pretty obvious choice to go with the concrete overlay. It looks great and it’s CHEAP. Like less than $100 for all the materials required here (concrete, plywood, concrete color additive). Actually scratch that. The sealer I bought this time was about $100 alone, but it was worth the splurge. It’s really good and it’s food-safe, which is so important for a kitchen space, obviously. I’m totally getting ahead of myself though. More on concrete later.
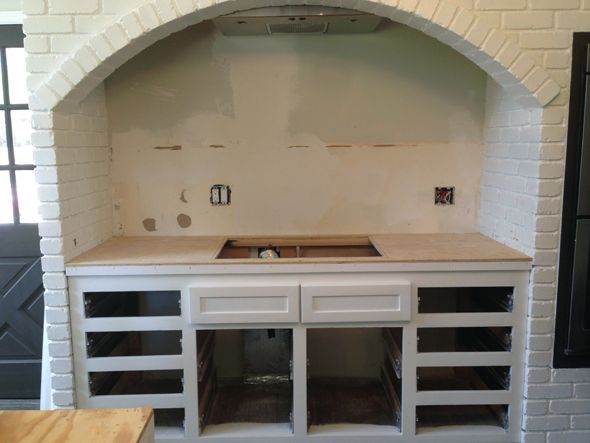
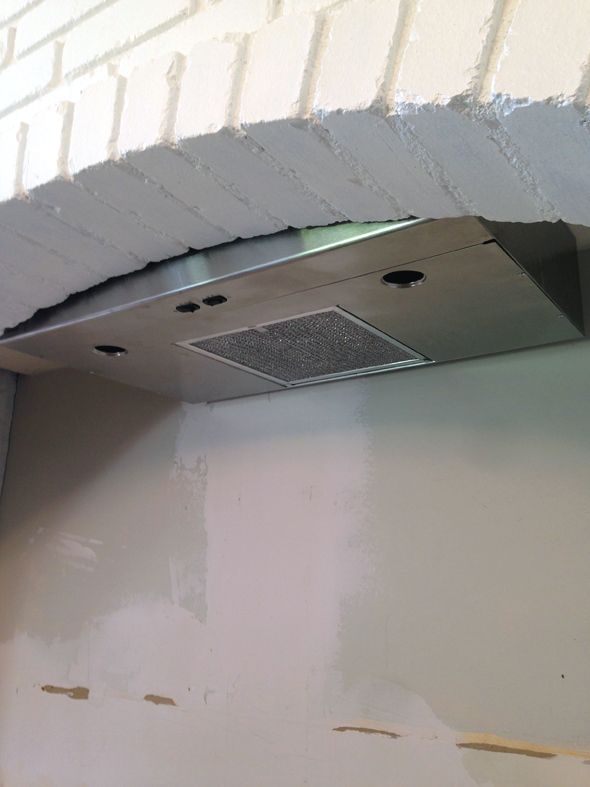
After removing the granite, it seemed like a good time to have our handyman install a vent hood. There had been a downdraft vent at one point, so we just had to open up the drywall and connect the new overhead hood with the existing vent to the outside. It was so simple and I have been SO HAPPY to cook lately. :) No ventilation is bad, bad news, guys!
I wish the hood didn’t show at all, but we only had a couple of inches to work with (the HVAC vents are right above this, so we couldn’t get any more height – grrr) and this was the thinnest vent we could find for the money. It’s worked out though – we ended up running concrete all the way up the back wall, so now it’s a lot less noticeable. I’d rather have an inch or two of hood visible than no hood at all I guess.
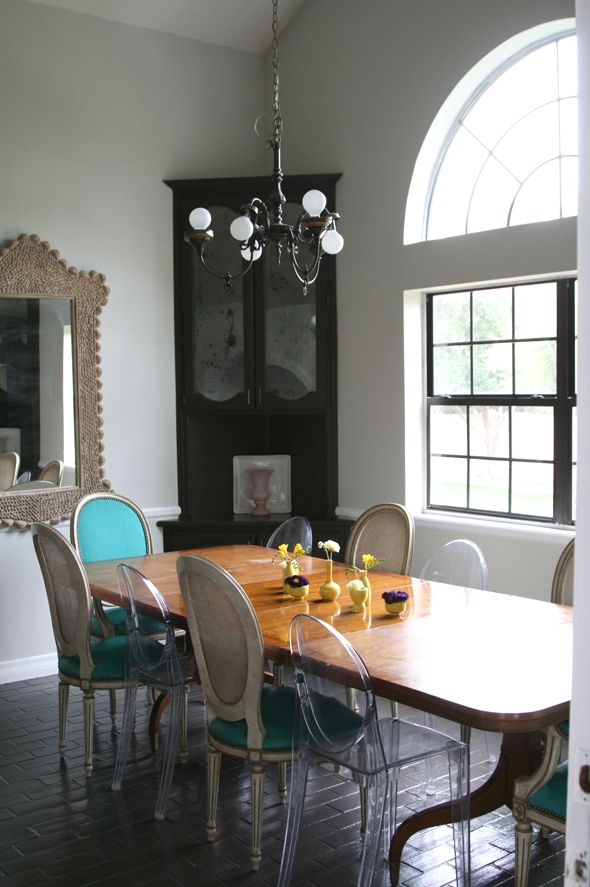
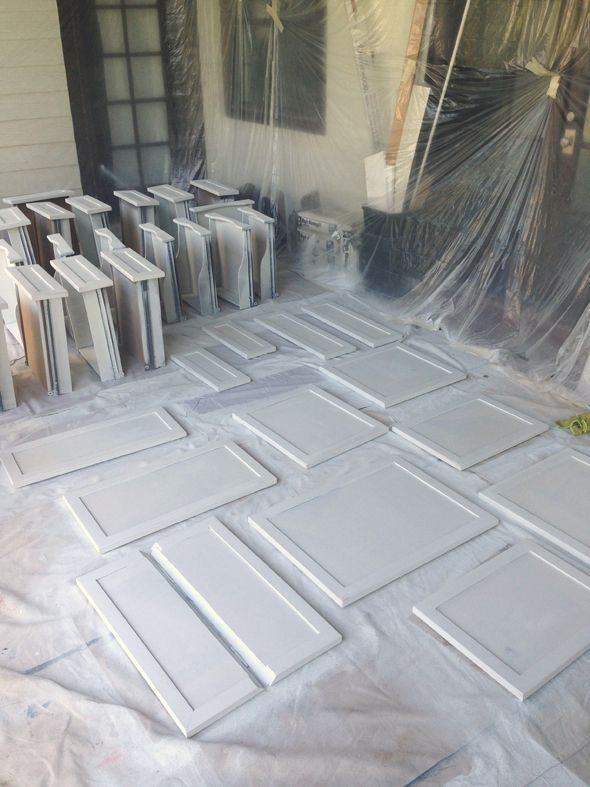
You probably noticed the color change on the cabinets here. This is the primer coat, so it’s brighter than the final color (Ben Moore’s Swiss Coffee). We wanted to go with a really warm white to balance out the cool wall color (Titanium). The floors are probably going to get a change too. We had a few drips and spills while doing the cabinet frames and the concrete so we need to do touch ups anyway. Might as well go a little lighter.
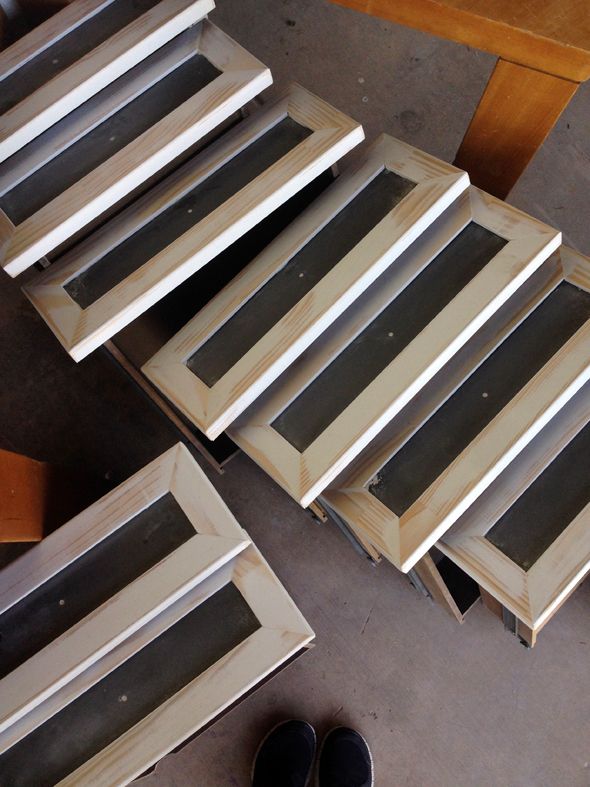
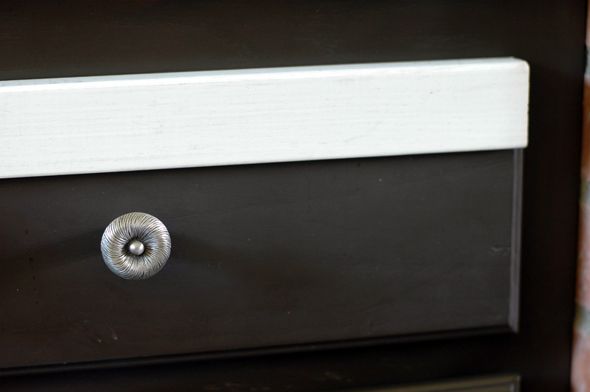
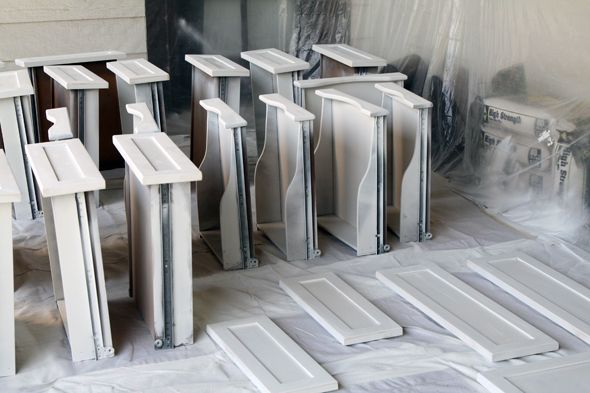
The cabinets were updated with some L-shaped corner moulding, cut with my miter saw and installed with a really cheap pinner gun I got on clearance at Lowes. It took a full day to get just the moulding on (sooooo many cuts), but I love the cleaner look of the shaker style fronts. We saved a ton of money by going this route and salvaging the cabinet doors, drawers and frames, so it ended up being worth the effort.
I bought a new spray gun with a wider spray radius than the Critter. I will defend
my undying love for the Critter til the day I die, but it does spray a little slower and finer than the bigger guns. I found
this Grace airless sprayer at Lowes on clearance (they have the BEST deals on clearance tools!) and it’s been pretty great. The airless feature means you don’t need an air compressor. You just plug it in, fill the cup with paint and start spraying. I’m really happy with how fast it sprays and how smooth the finish is. This is the primer coat below, after we had sanded and caulked the new moulding.
After taking these photos, I sprayed a second coat and covered the drawer sides and glides on that pass, so everything is white now. It is such a clean look.
The cabinet frames are not the best, but they function and now they’re much prettier. I’m waiting for the hardware still and I’ll show some afters soon and talk more about the counters. We went with black and I’m pretty much in heaven with the combo of the dark counters and the creamy white cabs. Good stuff.
I’m so happy we decided to just make the big stuff work for another year or two. To me, a few days of hard labor and a couple hundred bucks are work it to have a prettier kitchen, even if it is just a temporary fix.


Beautiful! I love everything you have been doing in this house….it's turning out amazing. Can't wait for the next installment!
brigitte
thedeserthaus.blogspot.com
Yes!! Good-bye golden granite!! I love that you would rather have plywood and concrete than bad granite. Style over status!
Oh jenny – I packed up my graco and bought a critter because of a. Your love for it b. every time I used the graco it put me in tears. No joke. Cross threading and oozing paint and it's so heavy. And the clean up!! Oh the clean up!!!!! I'm
About ready to spray plank panels in my dining room and I'm hopeful the critter works fore cuz the last thing I want to do every again is use the graco. I don't understand how it has so many great reviews.
Jenny this is beautiful! I too love the contrast of the dark vs. light. The concrete will be awesome, I'm sure. Best of luck!!!
I can't wait to hear about your concrete counter tops! We've been thinking about doing some for YEARS now. So ready to take the plunge!!
I have that same granite and I HATE it. Even my non-aesthetic husband does not like it.
When we first looked at this house the kitchen has tile countertops and I was OK with that because it would give us the perfect excuse to get rid of them. Then, while the house was still on the market, the owner got so much pressure to put in granite and he caved. I'm SO sad he did. He told me later he would have much rather given us $10K off the house than to go through it. ARG!
We will still try to change it out in the next year or so and are hoping to use the pieces in some other part of the house like the guest bath, basement bar, etc.
I am enjoying seeing what you are doing. I want white cabinets too and would love some kind of carerra type marble in the kitchen…
You are tireless! So excited to see the transformation!
I love how you updated the drawer fronts! For some reason I thought that would be such a challenge, but the picture showing the L-shape of the trim made me think "duh! of course!"
Can't wait to see the final results. Love the work with what you've got aspect. That's where many of us reside,and may never move beyond. Not that I can't appreciate a brand new kitchen. :).
You are so stinking talented!!!!! Can't wait to see more! ????
I didn't hate that granite but I could see the look you were heading towards and it was clear the brown/goldish-ness of that granite was never going to work. I would have had trouble letting it go to, but even with it gone and no top it already changes the tone of the room, in a good way! Nice work!
I was really hoping you might try solid concrete this time! It's not that much harder, and it's fantastic! We did ours in a very dark grey (almost black) and I absolutely love it. You can see them here http://www.storefrontlife.com/concrete-countertops-the-reveal/
Oh, wow, this looks like it's going to be one heck of a transformation! And you sound so happy about it, too! It's definitely coming through your photos & words.
The black concrete is going to look amazing Jenny! You'll love concrete in the kitchen too. We did a concrete overlay in our kitchen about 6 months ago and I could not be happier with the decision. You can check them out here: http://www.thenestbook.com/2014/03/25/diy-idea-concrete-kitchen-counters/
You are doing an amazing job with this house! Keep up the good work!
I love it all and can't wait to see it all finished! I am going to add molding to make my cabinets shaker style too this summer. Please post about the countertops in your follow up. I hate the rounded shape of my laminate and never thought about building a new wood base for the concrete overlay.
Your DIY ability never ceases to amaze me! Did you spray the cabinet boxes as well or brush paint them? I would love to paint my cabinets so can't wait to see your results!
Jenny — I would love love love to learn more about how you covered the cabinet doors. I see you have the exterior hinges (like my kitchen, sigh), and an ornate face. How in the world did you do it?! Please please give us a post on how you dealt with that. I'm on the edge of my seat!
This honestly looks so amazing! Jenny, you're a goddess.
x Lily
http://whilemyboyfriendsaway.blogspot.com/
I'm with Karo! How did you change the face with the exterior hinges? Do give more detail please :)
I can't wait to see the whole space, I know it will be just crazy amazing. I have the same white cabs/black counters color combo in my kitchen and I love it too. & major yes, worth the mini reno so your kitchen makes you happy!!
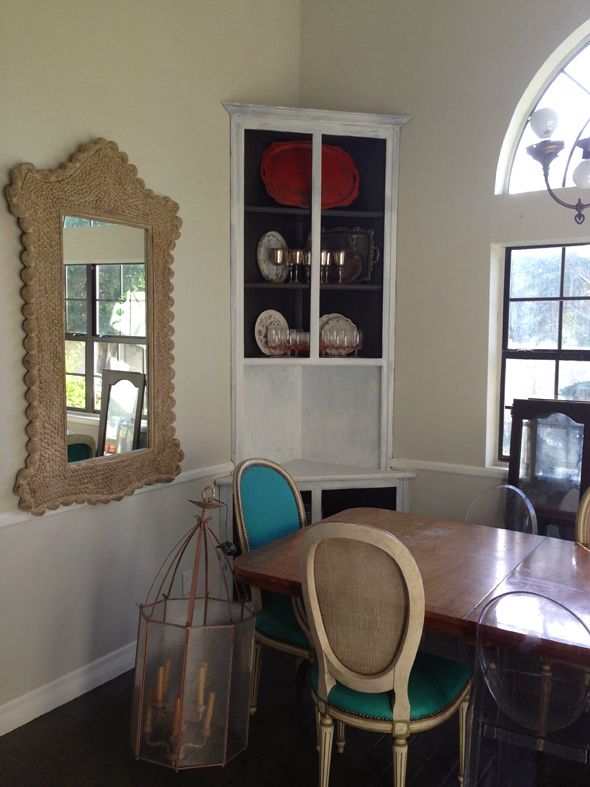
Love the look! Only thing is I liked the black corner hutch better than the distressed white.
Looking great! I think the decision to live with the kitchen for a while was a good one. Love the new molding you attached to the drawer fronts too.
SO much better without that granite.
I LOVE the update to the cabinets. I'm looking to do something like that soon here too. I was going to use small strips of wood to create the look – but I am interested in the idea of using corner molding. Do you have any more progress shots of how you did that/how it will affect the install (are the cabinets much bigger now to rework the hinges?)
Thanks!
I'm doing the same kind of update to my kitchen! I wish I would of thought corner moulding, we are using strips of underlayment which are really cheap. Your process looks like it happened a whole lot faster than ours! What kind of paint did you use in your sprayer- oil or latex?
Fabulous decision making and beautiful work….Really wanting to see the finished product but thinking we may need to wait until July?
Great job Jenny!
Love all the choices so far.
Love it – can't wait for the big reveal!
It's more fun to see you doing DIY stuff rather than just paying for it anyway! We have the same granite in our kitchen (backsplashes right up to the upper cabs too!) and I detest it. It is soooo yellow. I wish I had the guts to put concrete in but I don't dare because of the resale value. Can't wait to see your kitchen finished!
Can't wait to see the final product!
Looks fabulous!! Question about sprayer – Did you have to thin the paint at all?
Top Expensive Cars, top speedy cars, top most popular cars in the world
TopAmazingCars.BlogSpot.Com
I like things to be done right away too, but I think you're really smart to live in the space for quite some time before making decisions about a full-blown reno. And what you've got going thus far for now is going to be nothing short of beautiful! Isn't it amazing what a little extra trim can do to drawer and cabinet fronts? Cant wait to see it all come together and looking forward to the big reveal (I'm guessing on Domino.com?)!
thanks ,,,,,,,,,,,,,,,,,
It looks great! I like the whole brick look and I love the fact that you painted it. I am so happy you took that granite out…I used to design kitchens and the granite with the old wall covering was a whole lot to look at…if ya know what I mean. I like the direction you are going though.
Have you ever looked into the environmental impact of using concrete? (vs granite or tile I guess) I love the modern look, but my ecological husband always talks about how bad concrete is to use (in the context of outside), and brick, pavers, stone is a better environmental choice. Not sure about interior alternatives though????
Please, Please, PLEASE, do a tutorial on the concrete countertops. We are doing a kitchen remodel and most of the DIY tutorials out there are on existing countertops, whereas we will need to start with a new plywood base. I can't wait to see the whole kitchen done!!!
I think you made the right decision and I love the temporary look!
No ripping out happening here, either, Middle of Nowhere. The countertops were the only big item we replaced and those are getting reused by another family. Everything else has been updated with paint! I'm with you that it would have been very wasteful to put in new cabinets and that's why we've decided to wait a few years. :)
I don't understand why you would do a mini-renovation now when you are completely going to redo it in a few years? Why don't we all live with what we've got for a long time, do mini-renovations, but not add to landfills by redoing a kitchen every 8-10 years? I'm in my parents 1970 kitchen. They had to update when a flash flood hit the house in 2000, but they let the cabinet bases dry out, fixed the refrigerator and stove that were probably 15 years old (the fridge finally died a few years ago). When I moved in 4 years ago all I did was put more modern knobs on the cabinets. Do I love the bisque-color stove and dark green laminate counter tops? No. In a few years my goal is to paint the cabinets, install a dishwasher, get new countertop and new sink and faucet. I just don't see ripping it all out just to be on some unwritten time schedule that I have to completely redo it every 10 years. It's wasteful, and I'd rather be happy with what I have and save money for a trip instead. Your kitchen will be beautiful with this mini-reno. Everything works. Unless the cabinet drawers are falling off, just repaint or put in a new light fixture every few years if you tire of it. Just my 2 cents.
No ripping out happening here, either, Middle of Nowhere. The countertops were the only big item we replaced and those are getting reused by another family. Everything else has been updated with paint! I'm with you that it would have been very wasteful to put in new cabinets and that's why we've decided to wait a few years. :)
On the edge of my seat! We bought a house in August, and it has medium toned cabinets and that same awful granite. Oh, and black appliances. So, I'm in a similar boat…would love to start by painting my cabinets, but I'm worried about tackling this as a DIY. Would you please do a new cabinet painting tutorial? I know you've done these in the past, but with a new spayer and one more time under your belt, I'm sure you have more to share. I'm hoping your wisdom will help me be confident enough to take the plunge. Thanks for all of your ideas!!!
We bought a small house about ayear ago and it has the NASTIEST orange cabinets and cream counters! It's even so classy to have some cigarette burns in a few places… yikes! I wanted marble or granite but it wont add enough value to our house to make it worth it! I'm tempted to do concrete because I love the look, would you ever pour it over the counters I already have? They are 1 1/4" thick. I am SO TEMPTED but I need to do more research before I go for it!
I know this is an ancient post and a lot has changed since then but I’ve wanted to use your cabinet updating techniques ever since. We are about to own our first home and can’t wait to turn our 1960s cabinets into shaker style cuties. I just can’t find the L shaped corner molding like this anywhere! All I see are L shaped piece with equal lengths on each side. Any advice for locating the right sizes? Thank you for a wonderful place to get inspired.
Wheres the follow up to this project?
What model of Graco paint sprayer did you use? Getting ready to buy one to paint our cabinets too….
It looks great! I like the whole brick look so beautiful. thanks
beautiful And the styling is amazing! great job
I love your honesty and recommendations……this is exactly what I have been looking for. Thank you…
Curious about the scroll/cathedral style skinny cabinet next to your fridge? How did you do the shaker style reusing the door for this?