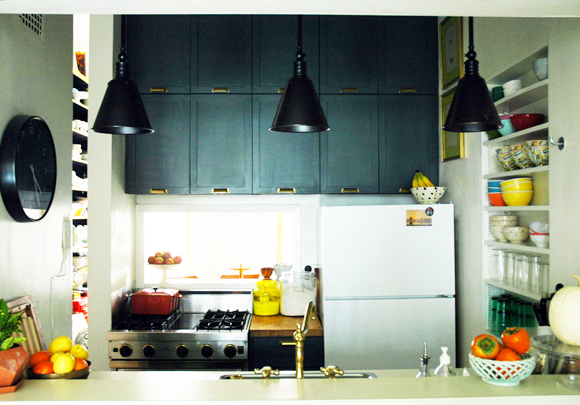
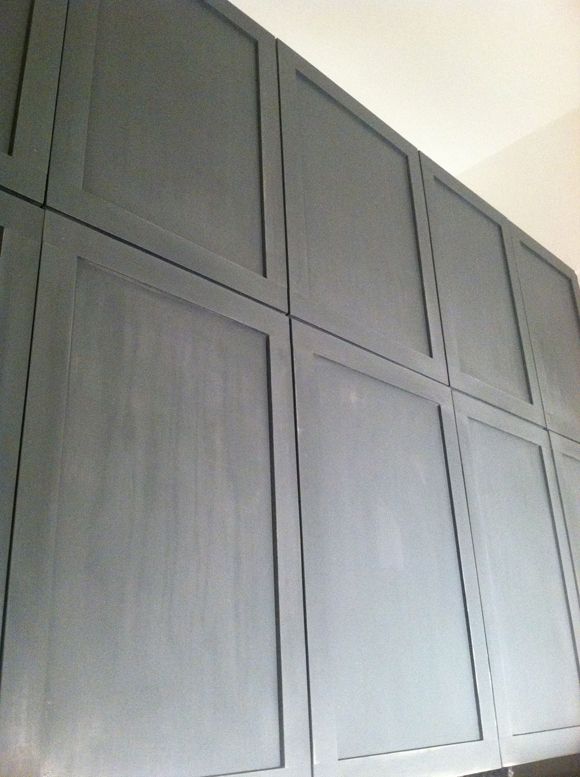
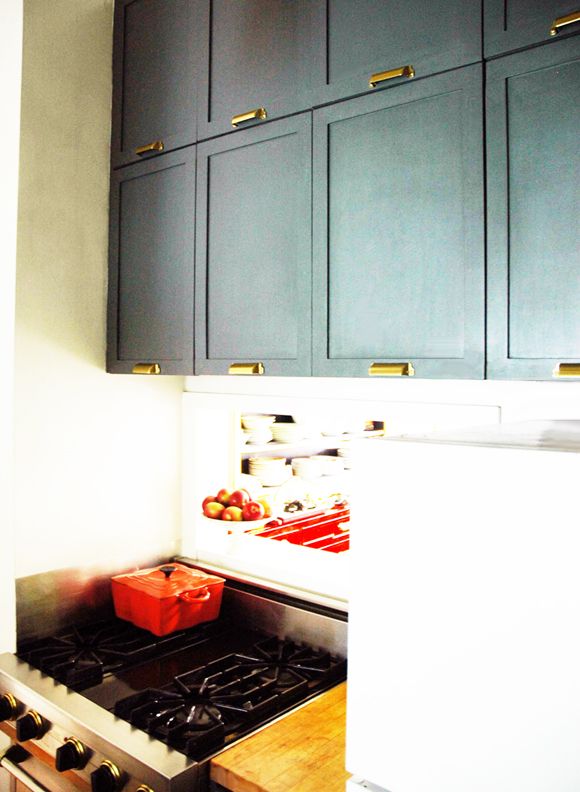
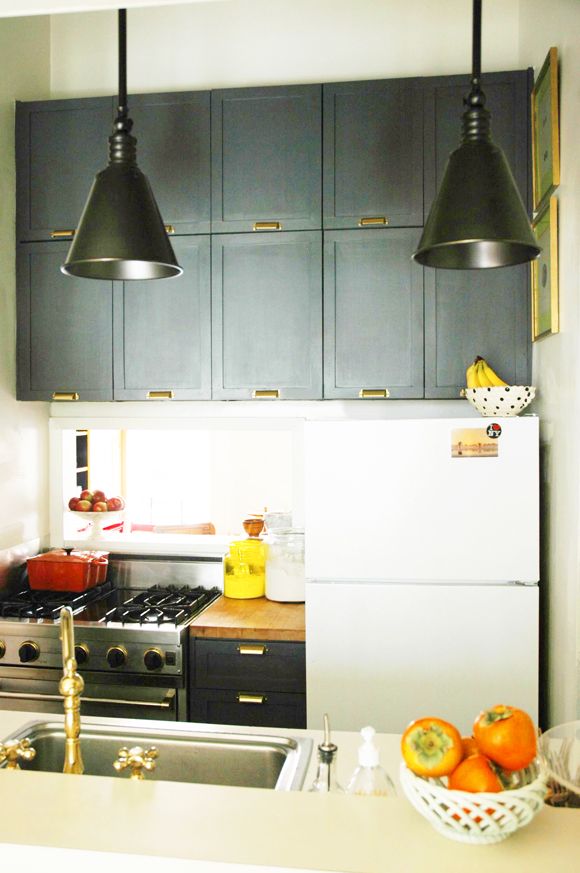
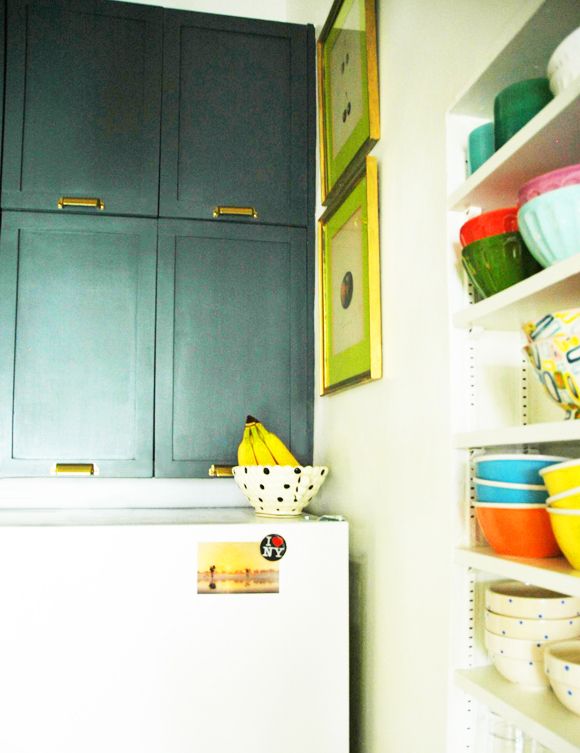
Hey-o! Look who has finished kitchen cabinets!
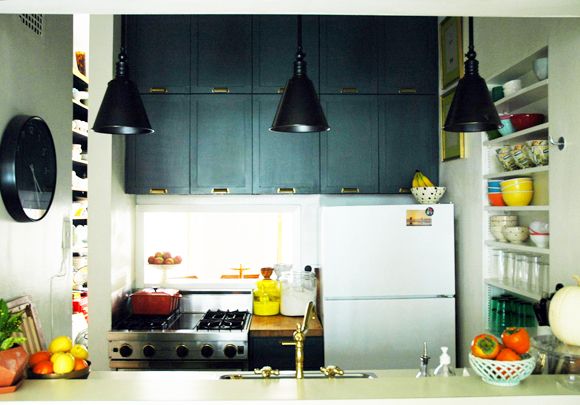
There really should be a big fat “IN PROGESS” slapped on the bottom of that photo because the space is far from done. Those white appliances are helping to brighten the space I guess, but… they’re so — white. Also, the floors need to get finished (you can see a little sneak peek here of the direction I’m going). I’m still thinking of that marble backsplash. And next spring I’m going to try making my own concrete counters for the sink side. But the good news is I won’t be incredibly embarrassed to host Thanksgiving here next week.
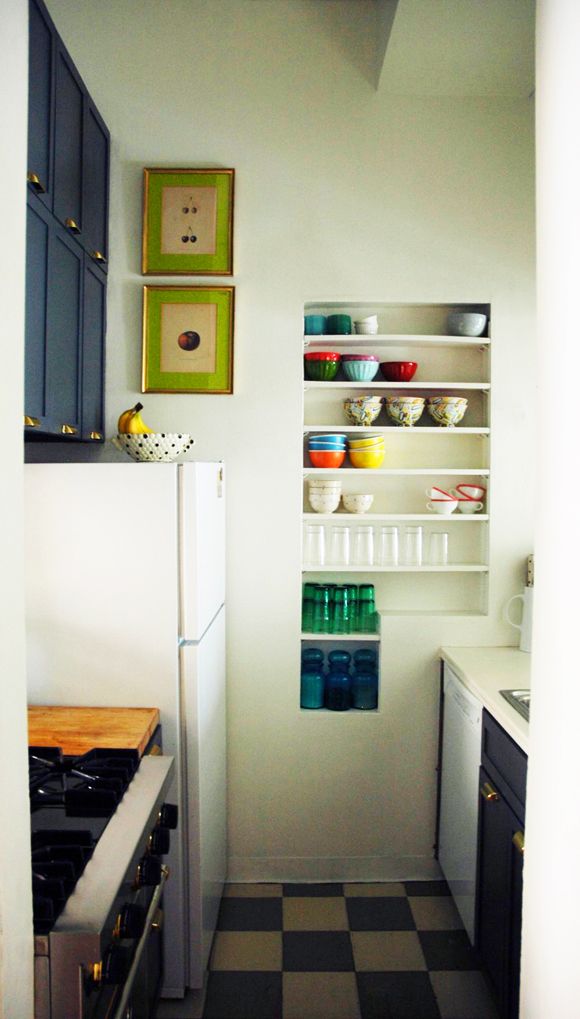
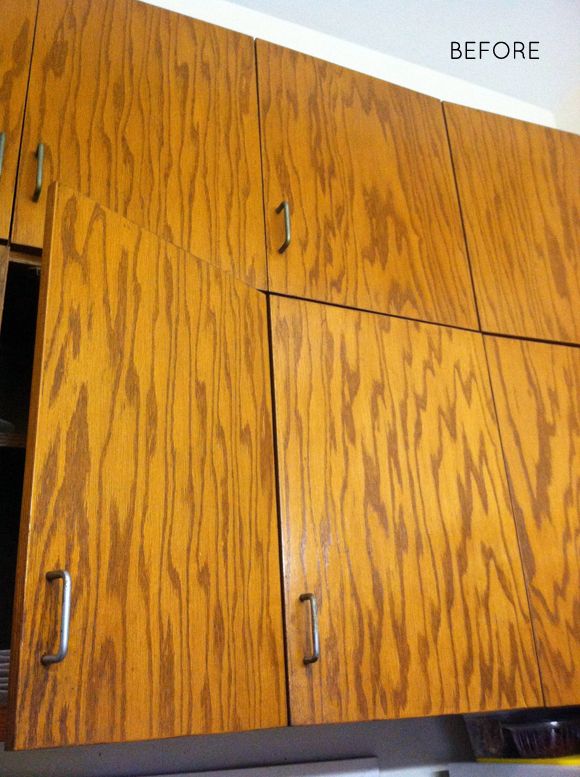
Whereas I would cry if visitors were going to be subjected to this:
So here’s the run down on how I finished these! I definitely learned some things along the way…
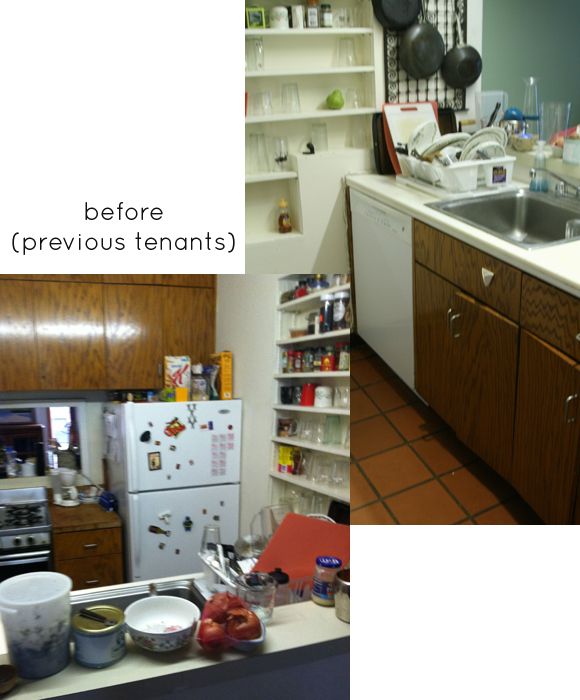
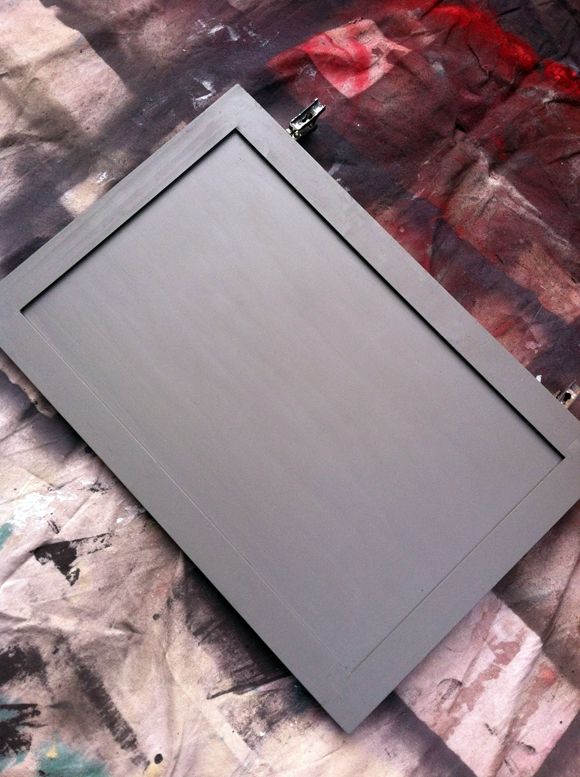
As a reminder, we started out with these heavily grained oak doors. (and here’s what I was going for)
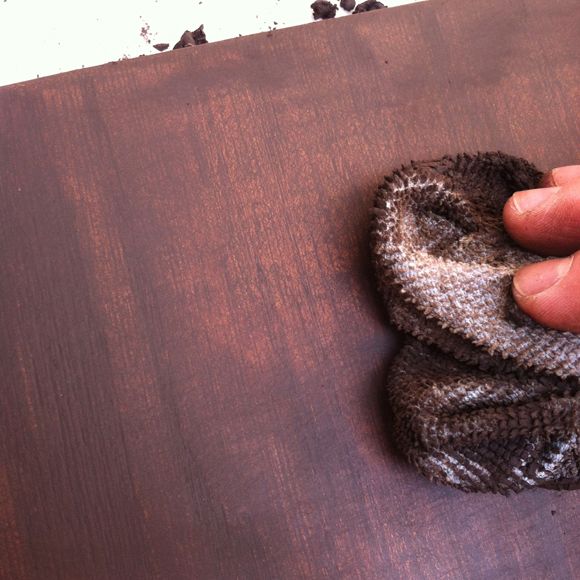
I sanded and filled them with grain filler,
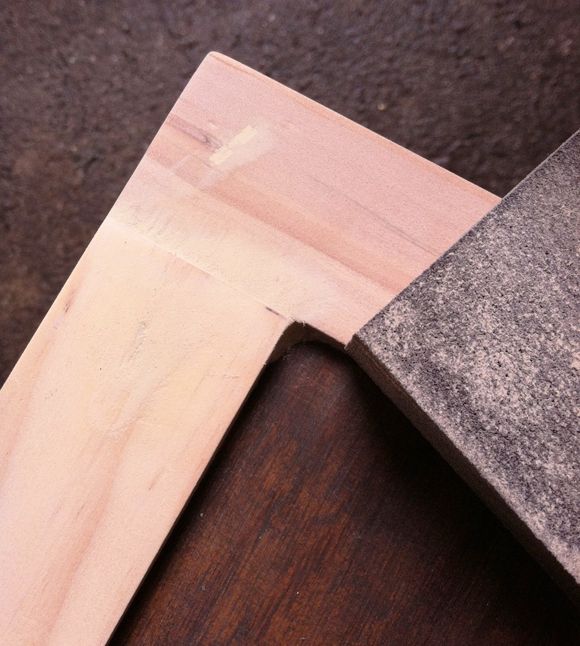
Then added flat trim moulding to the borders.
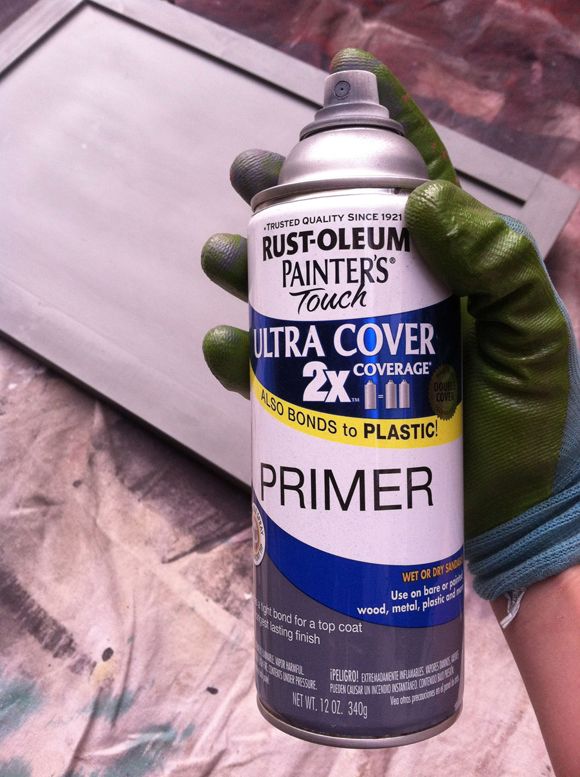
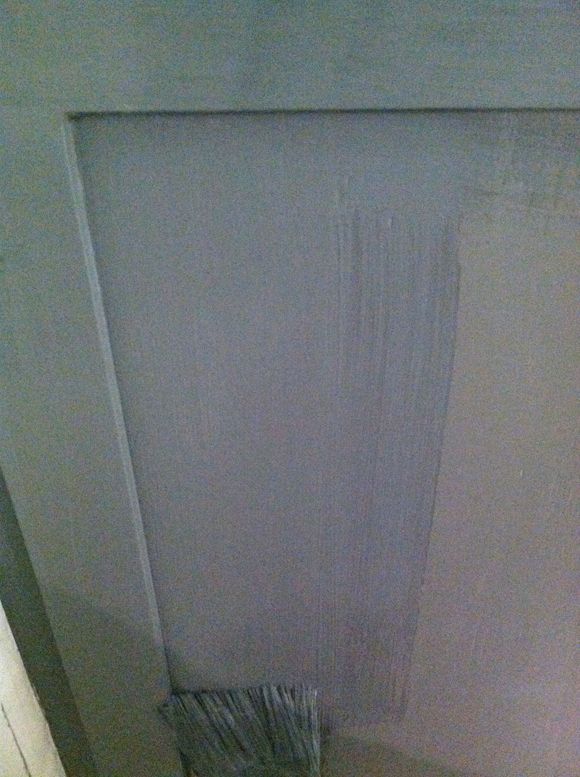
After sanding and wiping the doors down with a microfiber cloth, I sprayed them all with a dark Rustoleum primer. I sprayed the fronts and backs
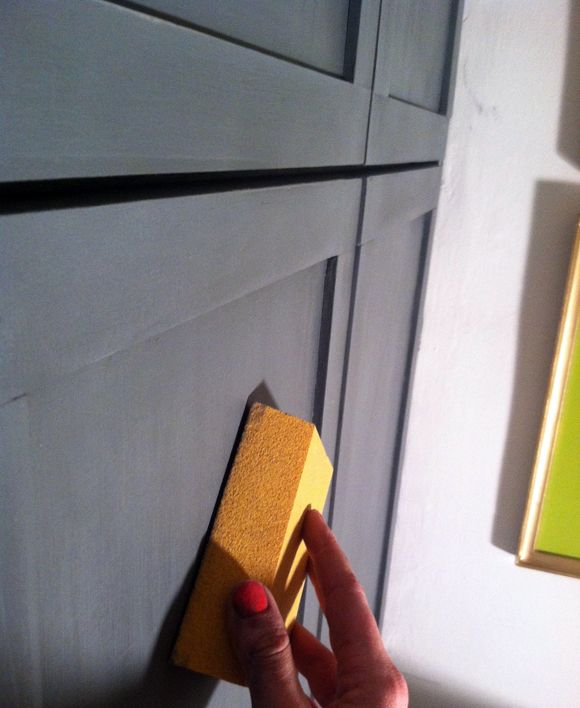
Here’s where things got a little experimental. I rolled on the first coat of paint (F&B Down Pipe) with a foam mini roller and that gave me a consistently smooth surface. Then I went back to touch up the inside corners of the moulding with my two-inch angled brush and I got a little cocky. I wanted to see how well I could do fully brushing the final coat. It turned out to be a bad idea. They looked very bad-DIY once everything had dried. I thought I had a steady hand, but I will definitely be sticking with foam rollers from here on out.


Wow! Those look awesome!!
DANG. that's all i gotsta say.
Like the rest, I think the cabinets and hardware are awesome, but even more so, I love all your little dishes, displays and accesories. Even in progress, it looks lived in and enjoyed already!
They look amazing!
http://owleyevintage.blogspot.com/
http://www.etsy.com/shop/OwlEyeVintage
I can't believe how good this looks. You are a miracle worker. Such amazing talent. Love you. Miss you.
What a great job, Jenny! As to the appliances, you could paint them or better yet use chalk paint on the fridge! (as seen on Houzz) Barbara
Holy moly Jenny!!! These look insane! You have outdone yourself. Shocker! Major facelift.
SO AWESOME! And so you.
Looks Amazing! You have me totally rethinking brass hardware now for my kitchen. LOVE the cabinet color! Kudos!!
Bravo, Jenny!! Love everything about it! You increased the value in that kitchen by waaaaaaayyy more than $100!
Bravo, Jenny!! Love everything about it! You increased the value in that kitchen by waaaaaaayyy more than $100!
oh wow it looks gorgeous! Love the grey and the pendants look great. x
That is DIY at its finest lady! making your own shaker style cabinets from scratch? amazing. The hardware was just the right bling. Love it. Now, will the landlord allow you take em when it's time to leave?!! They are way too fab to leave behind
kudos on your cabinets! they're gorgeous. what a challenging space, I love all your design ideas.
one thought, have you considered closing-up the pass through above the stove? it might make the space seem a bit less busy and a spot for a magnetic knife rail or other random bit?
best of luck in all your brownstone designs!
So totally awesome- you rock my DIT world;) LOVE those brass pulls too!
Love this! I am in the process of renovating my tiny kitchen. You can see it at http://createbakecelebrate.blogspot.com/2012/11/create-kitchen-remodel-part-4-another.html
I've been checking your blog rather compulsively to see the finished cabinets!! I'm tryint to convince the husband that we need to do our 1970 wood specials! Great job!!
LOL Jenny,I vote for you as most energetic design blogger in the design blogging stratosphere.
You do more in a day than most of us can squeeze out in a year or longer. And you do it well!
k
love it! great job.
How do you find the time to accomplish so much in such a short amount of time!? Looks AMAZING- love love love it.
outstanding job!
Question: is the entire kitchen pictured? is that all your counter space?
Your landlord is very lucky, hope you have a long lease! it looks great, well done you
Amazing. I really love this transformation. Very cool. Good job!
Oh wow it looks amazing! You should be so proud!
They came out beautifully, I'd probably want this color (on the cabinets) in my dream kitchen. I was wondering (I'm sure you've thought of it already) if you were going to add some decorative moulding to frame that niche in the wall where you have all the cups. It'll (imo) enhance this beautiful kitchen even more.
xox,
Maida
Wow, Jenny! You are incredible! They look amazing! You'd never know that was the same kitchen! You commented that it's still progress, but it really looks so polished! I love your faucet and your colorful dishes look so pretty in the wall niche and your fruit prints look great in there! Gorgeous!
If only I had cabinets half as pretty as these. Actually, if only I had cabinets! My landlord doesn't think they are necessary. It really stinks! :(
xo
Kara
http://www.thebostonista.com
PS: If you have a second I'd love it if you could come and enter my giveaway with Rent the Runway!
Your cabinet makeover is glorious! I never would have guessed the befores were that heavily grained. What an eye you have! Can't wait to see what you have planned for the rest of the house since you saved a ton of $$ refinishing the cabinets yourself.
Question; Do you wear gloves? I know you do a lot of the work by hand and I just wonder how you take care of your hands with all the work.
Kitchen looks so nice.
pve
Looks really good! It is a HUGE improvement over what you had previously. Great job!!!
Probably the BEST before/after EVER!
they look amazing! can't believe those are the same cabinets!
Hi guys! Thanks so much for your sweet comments. It's not the fanciest kitchen in the world but it is better than the before!
PVE – I do wear latex gloves sometimes when I'm painting (especially if it's oil-based paint), but only if I remember. I use some of that orange lava soap sometimes to really scrub my roughed up hands. Also, manicures in the city are super cheap (like $17 total for a mani/pedi), so I do that often too.
Posts on the pendant lights, floors, faucet, plans for the fridge and dishwasher, etc are coming up!
Someone asked about our renting situation again. As a recap, we are getting a good deal on rent here in exchange for fixing it up, and he chips in for a lot of our related purchases. BUT! We have done a lot of home improvement stuff like this on our own dime in other homes we've rented too (when they landlord doesn't care). I love doing these types of projects and get a huge sense of well-being when my home is pretty to me, so if I can upgrade a room I'm living in for a least a year for only $100 and some elbow grease, I'm all over it.
Have a good weekend friends!
xoxo
This looks incredible! You did an amazing job :)
I LOVE this! Not only does it look amazing, but I'd never even thought of DIY-ing shaker cabinets – so inspired!
Bone a great job!!
Hats off..i was get irritating if its like ohh!!
after it look cool
I just read your blip in Lonny (congrats!!) and am dying over the idea of that Mint fridge in your kitchen. Please do that! It would be the most cheerful kitchen ever. Love your eye!
Soooooooo good!
Beautiful! Love the brass hardware and faucet! What's the source on the faucet?
Wow, Jenny! What an improvement! You have the Midas touch … everything you do turns something drab into something fabulous! Even when you spend hardly anything, you have such a knack for making things look expensive.
What a fantastic transformation!!! Looks great!
with your talent you could never be embarrassed to host anything in your home!
Perfect!!!
I love this…
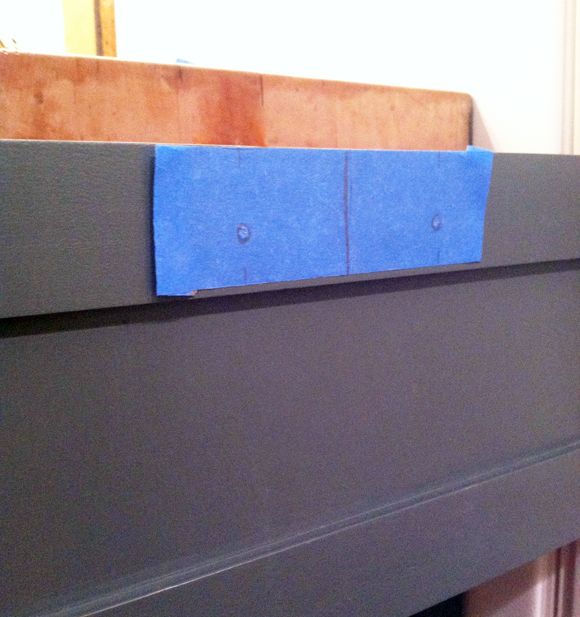
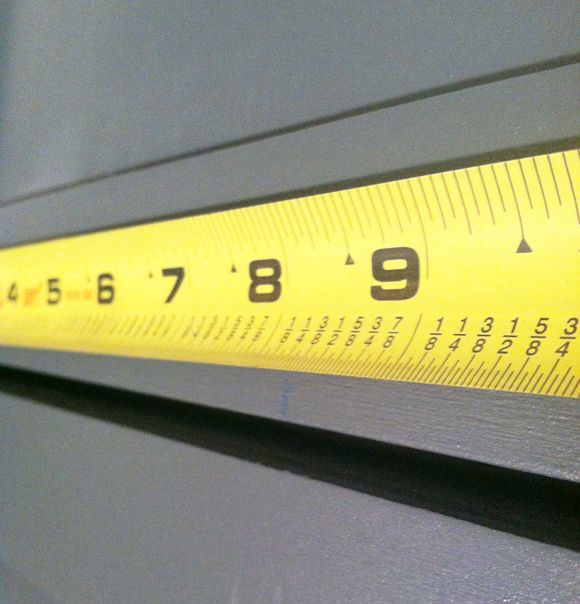
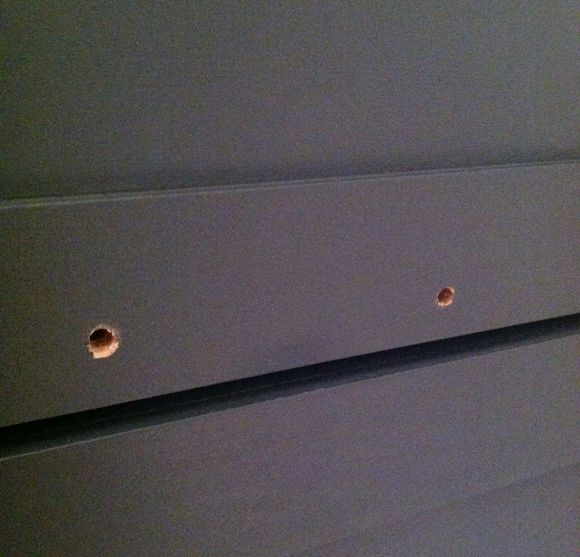
Jenny, where did you find your cup pulls? I love the more squared-off style that you found; it perfectly complements the shape of your "Shaker" cabinets!
I am so impressed! Your cabinets look amazing!! Esp knowing what they looked like before. You are very talented :)
Beautiful transformation of ho-hum cabinets. Very inspiring!
Wow, the contrast between your before and after looks are pretty amazing! I love what you did with the grained oak doors, it gives them a much more updated, modern look. The gold pulls were also a nice touch- the gray and gold go together much better than I’d have imagined. I might be tempted to try this out on my ancient looking cupboards, your method seems simple and affordable enough for me to pull off.
On a side-note I love the little wall storage space you have in the first picture. Everything’s simple, organized and easily accessible though it does seem a little precarious with no doors. Thanks for sharing!
I’m no stranger to plumbing, but I’ve had a nightmare renovating my kitchen, so inspiring to see such a beautiful kitchen, I’m determined not to give up!
I am so impressed! Your cabinets look amazing!!