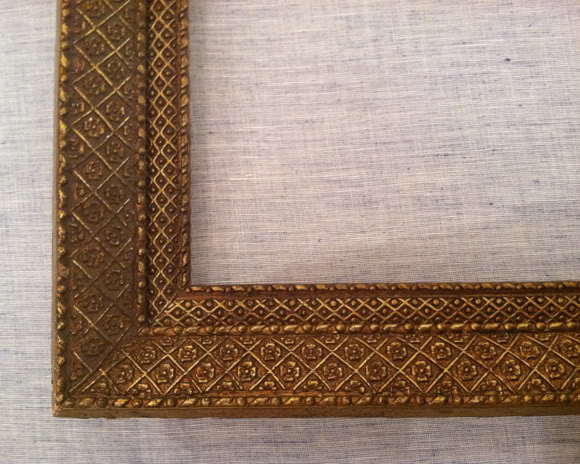
I’m always looking for inexpensive alternatives to custom framing. I’d rather spend the money elsewhere in a room. I’ve mentioned before that I like to pick up cheap art in good frames from thrift stores and flea markets, and later I switch out the art.

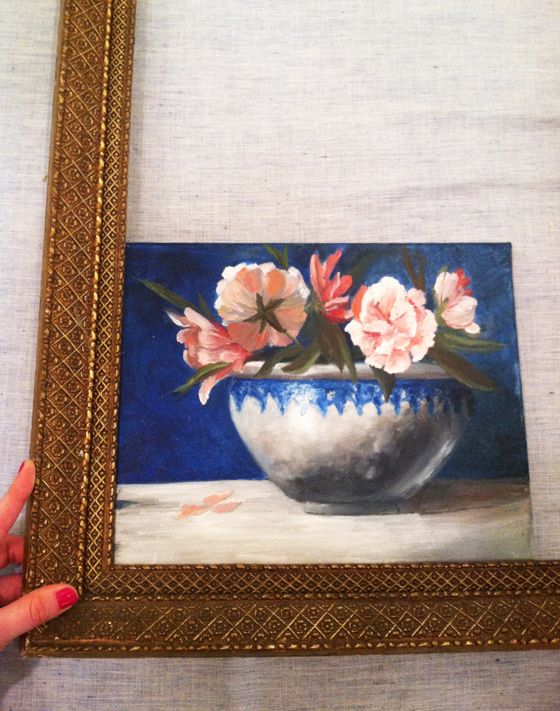
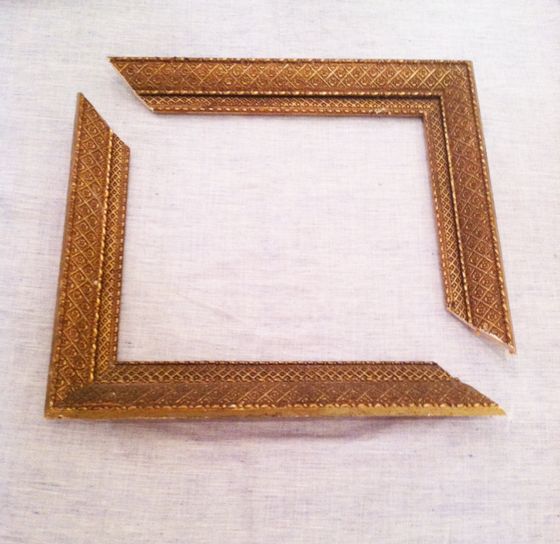
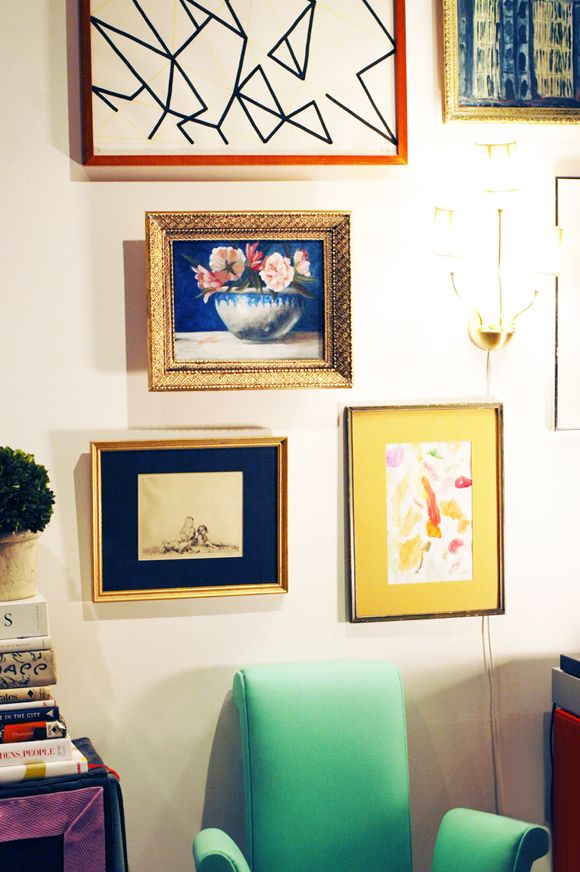
When I finished the chinese wallpaper panels a couple weeks back I moved over the gallery wall to the tv area in our living room. I wanted to included this peony painting because I like the dark shot of blue color. I’ve been meaning to frame it for a while now but it was painted on a European canvas which won’t fit in standard US frames. It’s not easy to make a frame from stock moulding you buy at the lumber yard, so I had an idea to repurpose one of the old frames from my collection.
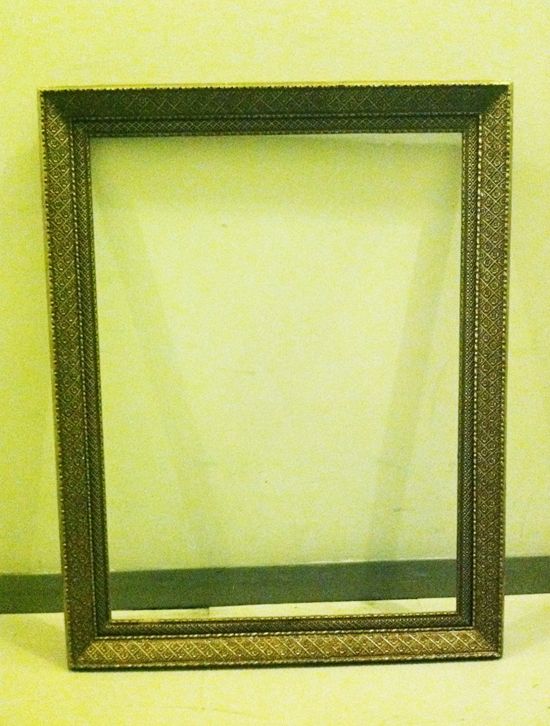
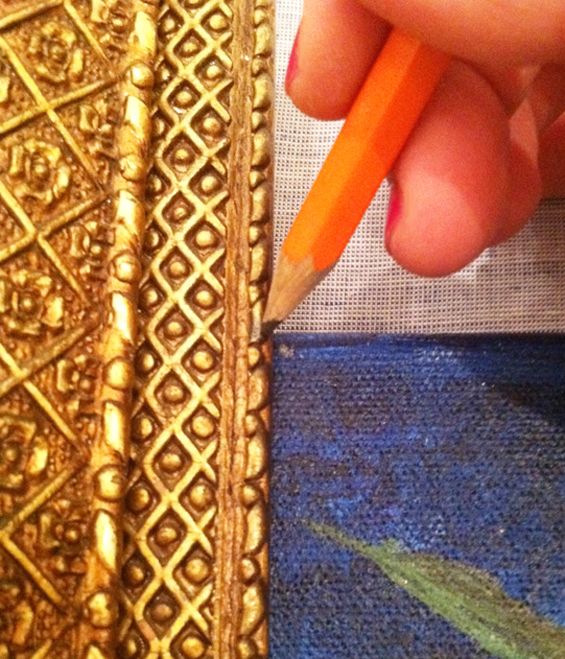
I tucked the painting into the corner of the old frame and marked the edges on the frame. I did this twice – using the two best corners with the least amount of damage to the plasterwork.
Then I used a miter box and a hand saw to make four 45-degree cuts. If you have a miter saw, this step would be super fast, but even cutting the angles by hand wasn’t bad. The trick to fast, straight cuts is keeping the frame moulding flush with the miter box edge. It’s helpful to have a second set of hands here.

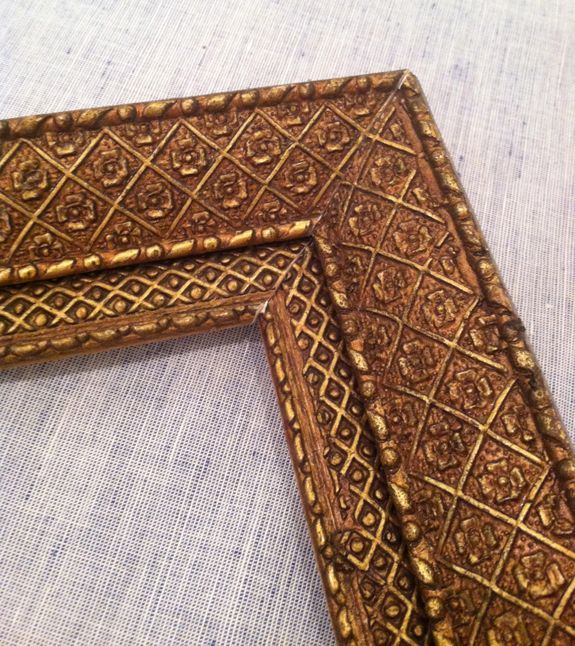
Four simple cuts later and we have the beginnings of a new frame!
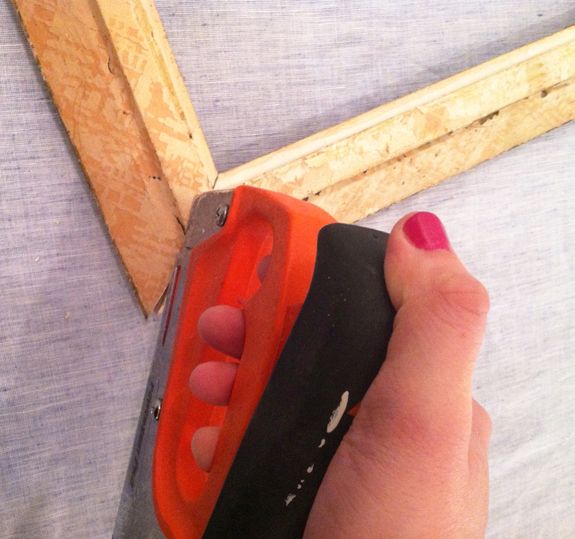
I smoothed the cut edges with a sanding block until the two cut edges fit perfectly together.

Then I ran a bead of wood glue along the edges and stapled the two pieces together, right down the corner line four or five times.
Not bad, right? Pretty seamless.
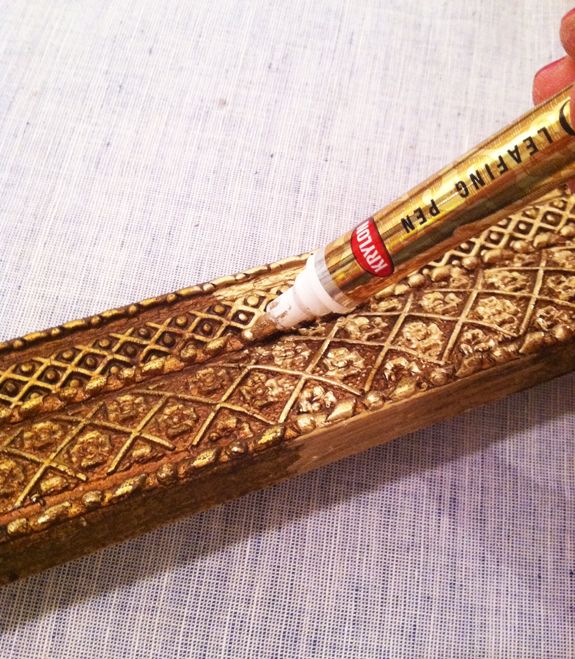
While the glue was drying, I touched up the highlights on the frame with my trusty gold leaf pen so that the gilding would be a brighter yellow.
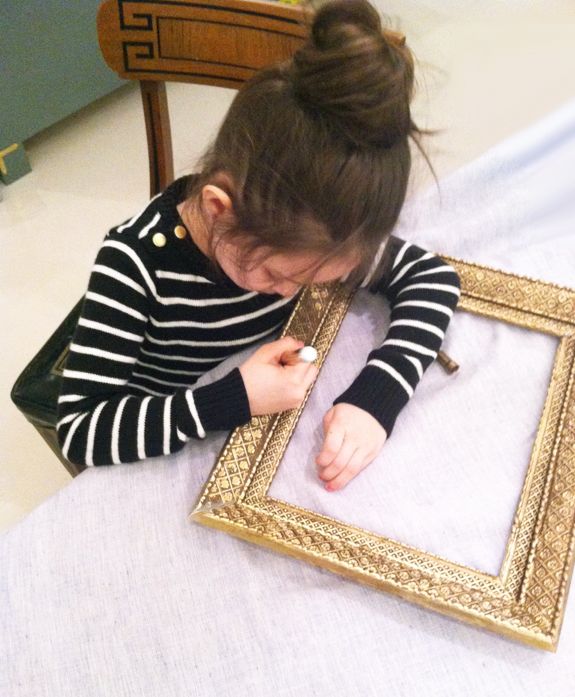
Gracie got in on the action too. She’s my little budding artist.
I forgot to take a photo, but I simply stapled a few times on the back around the perimeter of the painting at an angle to keep the canvas secured in place. Then it was done and ready to hang.
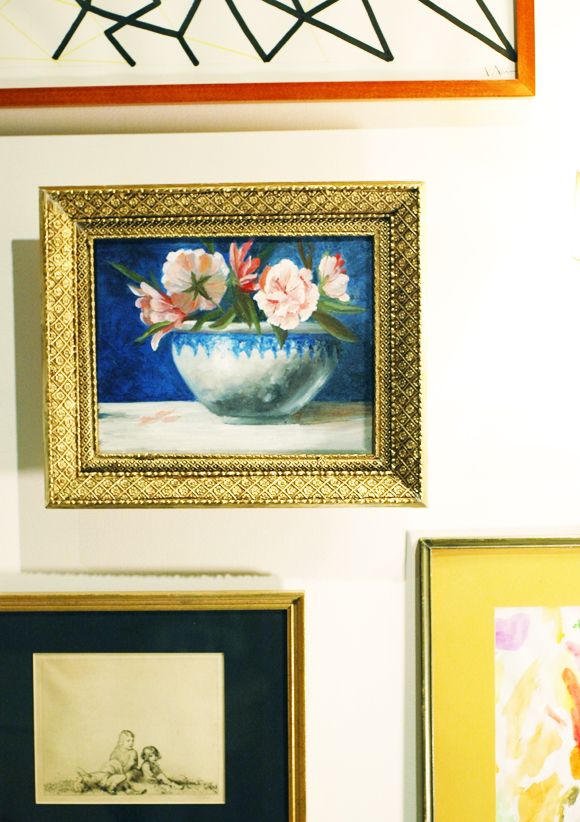
I’m so thrilled with the results here. Even if I had dropped $300 on custom framing, it wouldn’t have the age or patina this old frame has. I’m dying to cut down more unwanted frames for the other canvases I have in storage!


This turned out great! I wouldn't have guessed it was a hacked up frame!
http://houseonrene.blogspot.com/
this kid should receive reward from his mom, and mom receive reward too for raising great kid. Congrats to both of you..
Thanks for sharing another great project. I need to purchase a staple gun. Can you tell me the maker of yours or recommend one? Thank you
wow! it is great idea! i like it!
Well done. I used to own a framing shop and when people brought in old golden frames to change to something more modern I would keep them and paint them and frame some of my own art. I have a few mirrors that I put in old frames that I painted creme and put some dark patine over to make them look older.
Omg! never would have thought of that. FABULOUS idea.
Great idea. I've been looking for second hand picture frames myself but it never occurred to me that I should cut one to size!
Thanks for the idea.
Superb
Lately, I have found it so hard to find frames I like, but I really like the idea of grabbing "cheap art in good frames from thrift stores and flea markets" and swapping the art. http://adventuresofdutchandme.blogspot.com/
I love this idea! I just might have to try it!
This is great, now I won't shy away from all the frames I see at estate sales, etc. due to their size.
Unrelated comment…I love your nail polish color in the post. Do you know maker/name?
nice post related to frames. Now you can use this free business listings in india to promote moulded furnitures import & export business.
This is such a great idea, I've never thought to do anything like that!
What a great idea! I will definitely be keeping my eye out for vintage frames now, knowing that trimming them down to size is always an option!
Wow that is great a super idea thanks for sharing I am inspired to have a go myself now thanks heaps!! :)
You are so creative. I have the hardest time finding wall art.
This is seriously an ingenious idea! I will never pass up a big unique thrift store frame again.
Thanks for sharing. I love the painting by the way.
What a fabulous idea! Also- love the chair sneak peak! I tried stapling a broken frame back together in the corner with no luck after it got dropped and broken. The little metal slice thingies that held the corners together were cracked. I didn't try glueing it first though- maybe I should give that another try…
Thank You for sharing this idea. I will to do it practical for my Bedroom wall.
Also See-
Kitchen Appliance Repair in 54 Sector Gurgaon
Your ideas are really awesome!!!!!!!!!!
Thanks for giving these brilliant ides……
Thank you so much…….
Your painting is good..
I will always tried your ideas in bedroom…….
Your ideas are really awesome!!!!!!!!!!
Thanks for giving these brilliant ides……
Thank you so much…….
nyc
best nice looking frame and ideas to incredible and those picture frame i never thought anything like that.
We are best manufactures of Battery Enhancer, Dead Battery Revival, Battery Life Enhancer in India at very affordable rates.
Battery Enhancer
nice designs..thank u for sharing. https://airfresh24.com/
very informative
Best quality Calcium Carbonate(CaCO3) based filler compounds used in plastic industries
What is Filler Masterbatch?